")
As I flipped through the pages of my favorite cookbook, the mere sight of a Cheesy Tuna Melt brought back floods of warm memories. This quick and easy comfort food has a way of transforming an ordinary lunch into something memorable, especially with gooey cheese melting into a savory tuna mixture, all cozily tucked between crispy, toasted bread. What I love most about this delightful dish is how customizable it is; whether using canned salmon instead of tuna or opting for gluten-free bread, you’ll find a version that suits your taste and dietary needs. Plus, it packs a protein punch, making it a satisfying choice for busy days or cozy evenings at home. Curious about how to whip up this classic sandwich? Let’s dive into the world of Cheesy Tuna Melts!

What Makes Cheesy Tuna Melts Irresistible?
Comforting Classic: Cheesy Tuna Melts are the ultimate go-to for a heartwarming meal that’s guaranteed to please the whole family.
Customizable Delight: Whether you prefer tuna, salmon, or shredded chicken, this recipe allows for endless variations to match your cravings.
Quick Prep: Ready in just about 15 minutes, it’s perfect for those busy lunch breaks or unexpected guests.
Protein-Packed: With high-protein ingredients like tuna or salmon, you’ll feel satisfied and energized throughout the day.
Mouthwatering Textures: Enjoy the crispy exterior paired with a melty, savory filling that’s simply addictive. For more creative ideas, check out my recipes for Cheesy Gordita Crunch or Broccoli Parmesan Cheesy for a delightful twist!
Cheesy Tuna Melt Ingredients
• If you’re ready to create your own Cheesy Tuna Melts, here’s what you need:
For the Tuna Filling
- Canned Tuna – Ensure it’s well-drained for the perfect texture in your melt.
- Mayonnaise – A good-quality mayonnaise adds that creamy goodness essential for binding the filling.
- Fresh Herbs (e.g., parsley or dill) – Optional but these herbs enliven the flavor of your tuna mixture.
For the Sandwich
- Shredded Cheese (e.g., cheddar) – This ingredient is key for that irresistible gooeyness; feel free to use your favorite melting cheese instead.
- Bread (e.g., sourdough or whole wheat) – Acts as the sandwich base; gluten-free bread is a great option if needed.
- Butter – Use unsalted butter for grilling, ensuring a heavenly golden exterior.
Step‑by‑Step Instructions for Cheesy Tuna Melts
Step 1: Prep Tuna Mixture
In a medium mixing bowl, combine the well-drained canned tuna and mayonnaise. Stir in finely chopped fresh herbs, like parsley or dill, along with a pinch of salt. Mix everything until it’s smooth and well blended, creating a creamy and flavorful filling. This tuna mixture should have a luscious consistency, ready to generously spread on your bread.
Step 2: Assemble Sandwich
Take two slices of your favorite bread, such as sourdough or whole wheat. Spread a generous amount of the creamy tuna mixture onto one slice, ensuring even coverage up to the edges. Next, sprinkle a generous layer of shredded cheese over the tuna, then top with the second slice of bread to create a delicious Cheesy Tuna Melt sandwich that’s both hearty and satisfying.
Step 3: Grill
Heat a skillet over medium heat and add a tablespoon of unsalted butter, letting it melt and coat the pan. Once the butter is sizzling, gently place your assembled sandwich in the skillet. Cook for about 3-4 minutes, until the bottom slice is golden brown. Carefully flip the sandwich and press down lightly with a spatula to achieve that crispy crust while the cheese begins to melt.
Step 4: Serve Hot
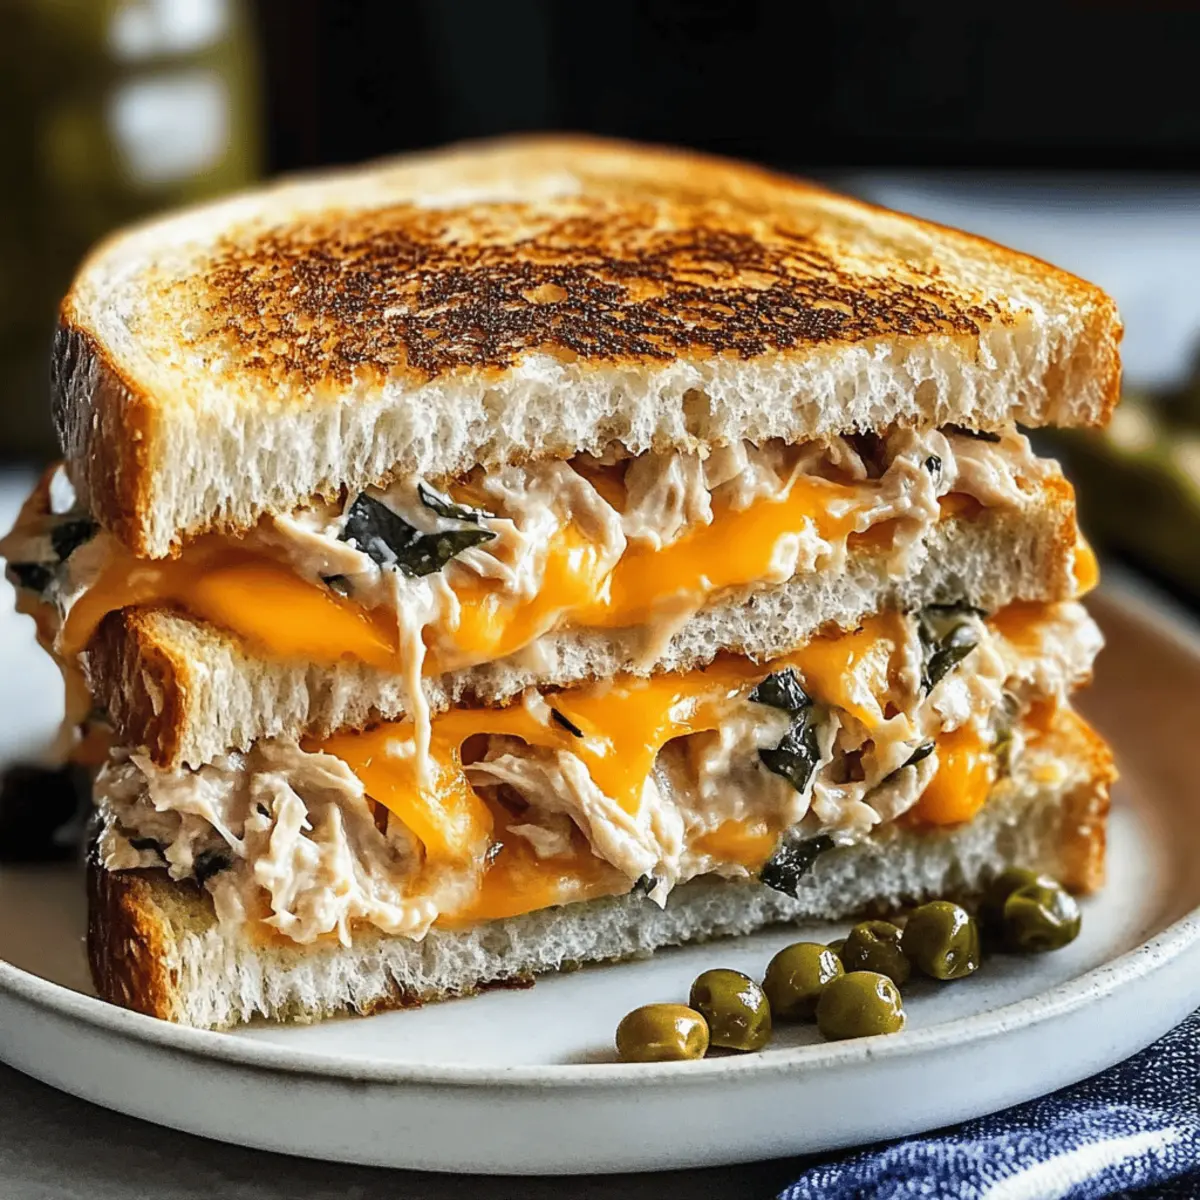
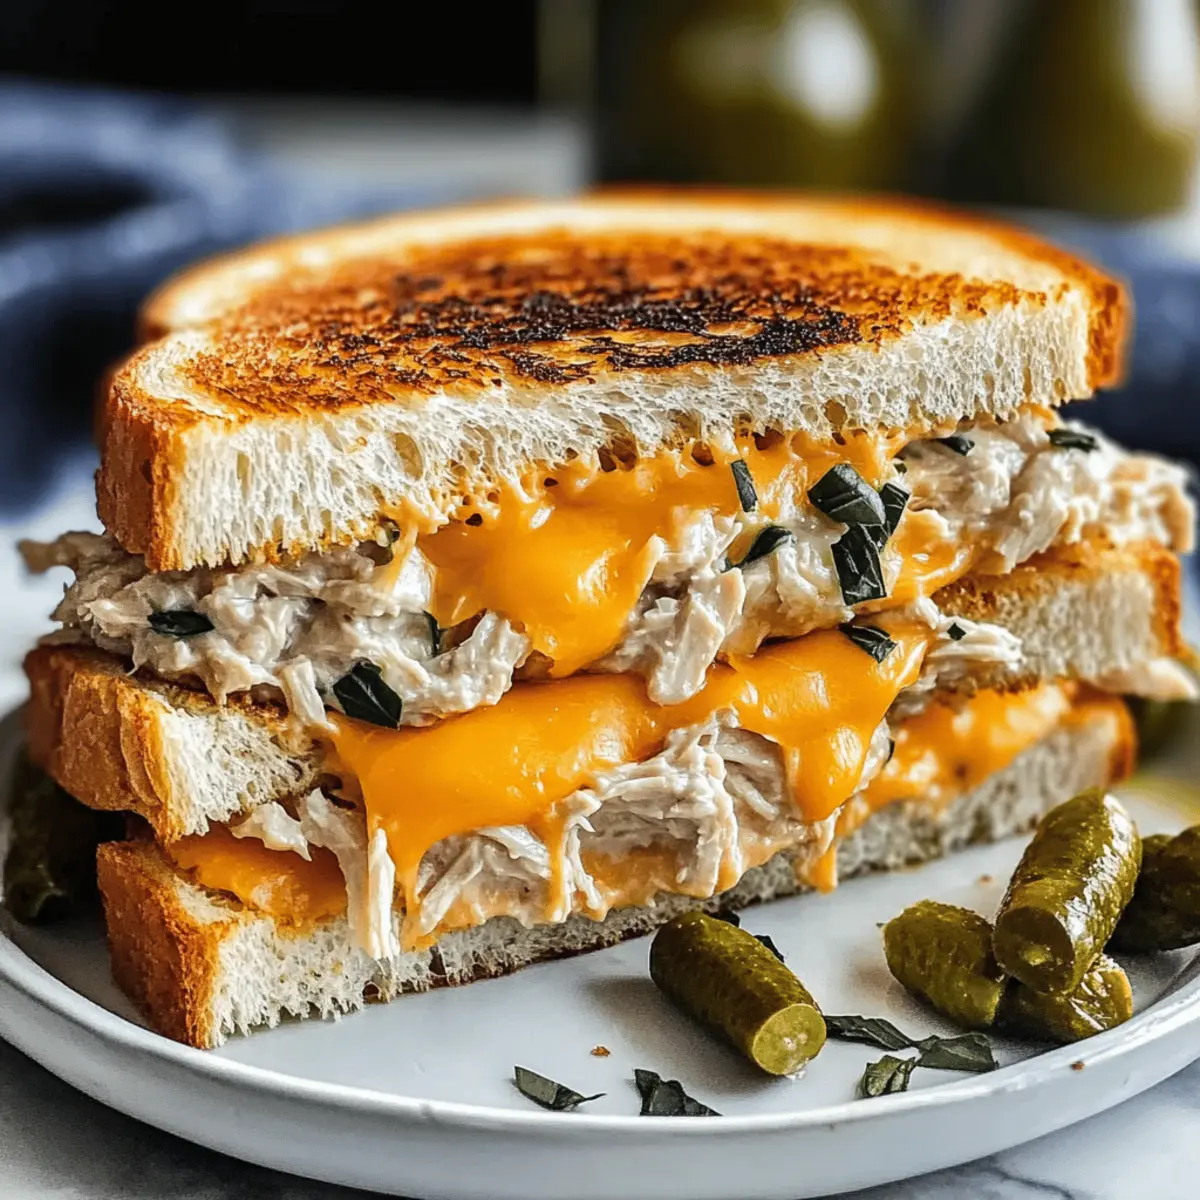
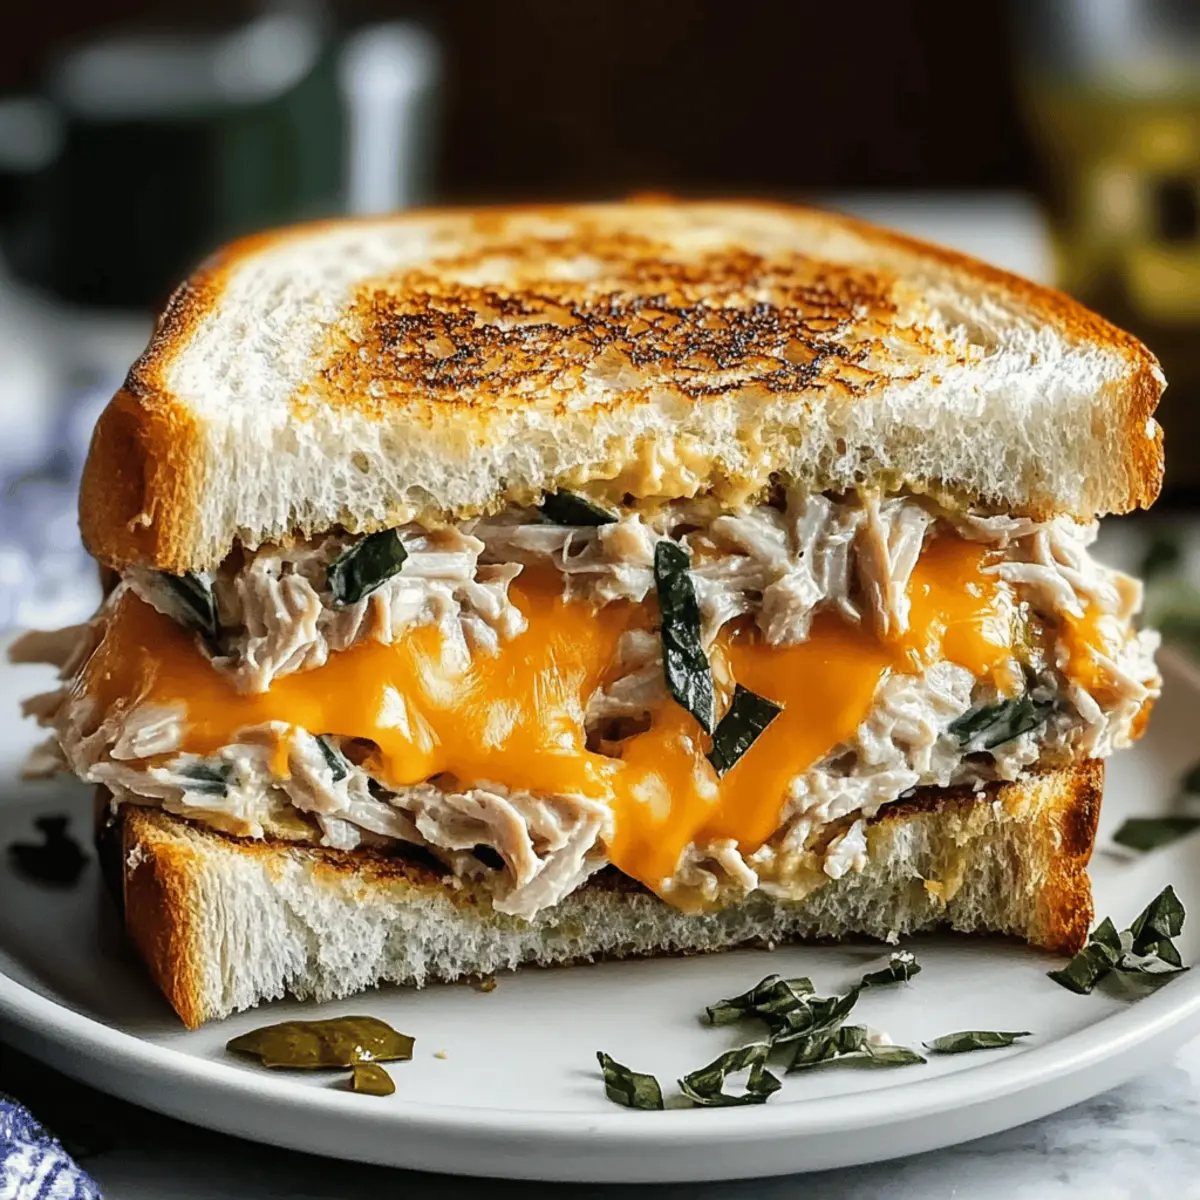
After about 3-4 more minutes, remove the sandwich from the skillet once both sides are beautifully golden and the cheese is gooey and melted. Use a sharp knife to slice the sandwich in half diagonally, revealing that deliciously melted cheese inside. Serve your Cheesy Tuna Melts hot alongside a salad or a comforting bowl of tomato soup for a delightful meal experience.
How to Store and Freeze Cheesy Tuna Melts
Fridge: Store leftover Cheesy Tuna Melts in an airtight container in the refrigerator for up to 2 days to maintain freshness.
Freezer: For longer storage, wrap grilled sandwiches tightly in plastic wrap, then foil, and freeze for up to 3 months.
Reheating: When ready to enjoy, thaw in the fridge overnight, then reheat on a skillet over low heat, adding a touch of butter to restore crispness.
Room Temperature: Avoid leaving Cheesy Tuna Melts at room temperature for more than 2 hours to ensure food safety and flavor preservation.
Cheesy Tuna Melts Variations & Substitutions
Feel free to make this Cheesy Tuna Melt your own with delightful twists that enhance the flavor and cater to your dietary needs!
-
Canned Salmon: Swap tuna for canned salmon to create a rich, flavorful alternative that’s equally satisfying. The tender texture of salmon pairs beautifully with the gooey cheese, making a truly delicious combo.
-
Shredded Chicken: If you’re in the mood for something different, shredded chicken works wonders in place of tuna. Toss the chicken with the same creamy filling for a new twist that’s just as comforting!
-
Gluten-Free Bread: Opt for gluten-free bread to make this recipe suitable for gluten-sensitive eaters. You’ll still get that satisfying crunch and gooey goodness without any compromise.
-
Non-Dairy Cheese: For a vegan alternative, use non-dairy cheese. It’s a scrumptious option that provides a similar melted texture and flavor while keeping it plant-based.
-
Fresh Veggies: Add sliced tomatoes or avocado for added creaminess and freshness. The juicy tomatoes will brighten every bite, while avocado lends a rich, buttery flavor that’s simply irresistible.
-
Spice It Up: Incorporate spices like paprika or black pepper to amp up the flavor. A pinch of cayenne can also add a delightful kick, giving your melt a fun burst of heat that will wake up your taste buds!
-
Herb Infusion: Experiment with different fresh herbs, like basil or chives, for a unique twist. These herbs add freshness and elevate the overall flavor of your Cheesy Tuna Melt, making it even more enjoyable.
Looking for more inventive meals to try? Don’t miss my delicious recipes for Cheesy Gordita Crunch or Broccoli Parmesan Cheesy for a delightful culinary adventure!
What to Serve with Cheesy Tuna Melts
Add a delightful complement to your sandwich with fresh, vibrant sides that enhance the comforting flavors.
- Crispy Potato Chips: The crunchiness of chips contrasts beautifully with the creamy melt, adding a satisfying texture to each bite.
- Garden Salad: A light blend of greens and colorful veggies brings freshness, balancing the richness of the tuna melts.
- Tomato Soup: The classic pairing provides warmth and acidity, perfectly cutting through the richness, creating a cozy meal experience.
- Pickle Spears: Their tangy crunch offers a refreshing bite that brightens the palate and enhances the savory flavors of the melts.
- Sweet Potato Fries: These slightly sweet, crispy fries provide a fun twist and a hearty side that pairs well with the melt’s comfort.
- Coleslaw: A creamy or tangy slaw adds a crunchy and flavorful contrast, making it a delightful accompaniment.
- Herbed Quinoa: The nutty flavor and fluffy texture of quinoa bring a nutritious option that elevates the meal’s overall appeal.
- Fresh Lemonade: A refreshing drink that balances the meal with its tartness while making for a lovely summer pairing.
- Chocolate Chip Cookies: For dessert, these warm, melty treats will satisfy your sweet tooth and make the meal memorable.
- Fruit Salad: A colorful mix of seasonal fruits adds a naturally sweet finish that pairs harmoniously after the savory bites.
Tips for the Best Cheesy Tuna Melts
-
Drain Tuna Well: Make sure to fully drain your canned tuna to avoid a soggy filling that could ruin your Cheesy Tuna Melts’ texture.
-
Choose Quality Mayonnaise: Opt for a high-quality mayonnaise to enhance the creaminess of the filling, ensuring every bite tastes delicious.
-
Toast Bread First: Lightly toasting the bread before adding the filling helps to maintain a nice crispy texture when grilled.
-
Adjust Cooking Heat: Keep an eye on your skillet’s heat; cooking too high can burn the bread before the cheese melts, while too low can lead to soggy sandwiches.
-
Experiment with Cheese: Don’t hesitate to try different cheeses for better flavor profiles, from classic cheddar to creamy Gouda or spicy pepper jack.
Make Ahead Options
These Cheesy Tuna Melts are perfect for meal prep enthusiasts looking to save time during busy weekdays! You can prepare the creamy tuna filling up to 3 days in advance by combining well-drained tuna, mayonnaise, and herbs in an airtight container; just be sure to refrigerate it to keep it fresh. Additionally, you can assemble the entire sandwich (excluding the grilling) and wrap each one tightly in plastic wrap for up to 24 hours in the refrigerator. This ensures that your bread stays moist and the filling doesn’t dry out. When you’re ready to serve, simply heat your skillet, grill the sandwiches for about 3-4 minutes on each side until golden brown, and enjoy that gooey, melty goodness without any hassle!
Cheesy Tuna Melts Recipe FAQs
How do I choose the best canned tuna for my Cheesy Tuna Melts?
Absolutely! Select quality canned tuna that’s packed in water or olive oil for better flavor. Look for brands that state “wild-caught” for a more sustainable option. Ensure it’s well-drained before mixing it with the rest of your ingredients to avoid a soggy sandwich.
What’s the best way to store leftover Cheesy Tuna Melts?
To keep your Cheesy Tuna Melts fresh, store them in an airtight container in the refrigerator for up to 2 days. This simple method helps to maintain their deliciousness and prevents them from drying out. When you’re ready to enjoy them again, just reheat them in a skillet over low heat, adding a touch of butter to revive that crispy texture!
Can I freeze Cheesy Tuna Melts, and if so, how?
Very! To freeze your Cheesy Tuna Melts, wrap each grilled sandwich tightly in plastic wrap and then in aluminum foil. This prevents freezer burn and keeps them fresh for up to 3 months. When you’re ready to indulge, thaw them overnight in the fridge, then reheat on a skillet over low heat, adding a touch of butter to crisp them back up.
What should I do if my Cheesy Tuna Melts are soggy?
No worries! If your Cheesy Tuna Melts turned out soggy, it might be due to not draining the tuna well or using bread that absorbs too much moisture. To troubleshoot next time, make sure to fully drain the canned tuna and consider lightly toasting your bread before spreading the tuna filling. This technique adds crispness and helps prevent sogginess, ensuring you get that delightful texture.
Are there any dietary considerations I should keep in mind?
Absolutely! If you or your guests have allergies, it’s crucial to opt for gluten-free bread if gluten intolerance is a concern. For those avoiding dairy, try non-dairy cheese alternatives. Be sure to check ingredient labels for any hidden allergens, and use tuna or chicken alternatives that suit your dietary restrictions. You can make a delectable Cheesy Tuna Melt while catering to everyone’s needs!
Cheesy Tuna Melts: Your New Favorite Comfort Food Delight
Ingredients
Equipment
Method
- In a medium mixing bowl, combine the well-drained canned tuna and mayonnaise. Stir in finely chopped fresh herbs, like parsley or dill, along with a pinch of salt. Mix until smooth and well blended.
- Take two slices of bread. Spread a generous amount of the creamy tuna mixture onto one slice. Sprinkle a generous layer of shredded cheese over the tuna and top with the second slice.
- Heat a skillet over medium heat and add a tablespoon of unsalted butter. Once sizzling, place your sandwich in the skillet and cook for 3-4 minutes until the bottom is golden brown. Carefully flip and cook for another 3-4 minutes.
- Remove the sandwich once both sides are golden and the cheese is melted. Slice in half and serve hot with a salad or tomato soup.
")