")
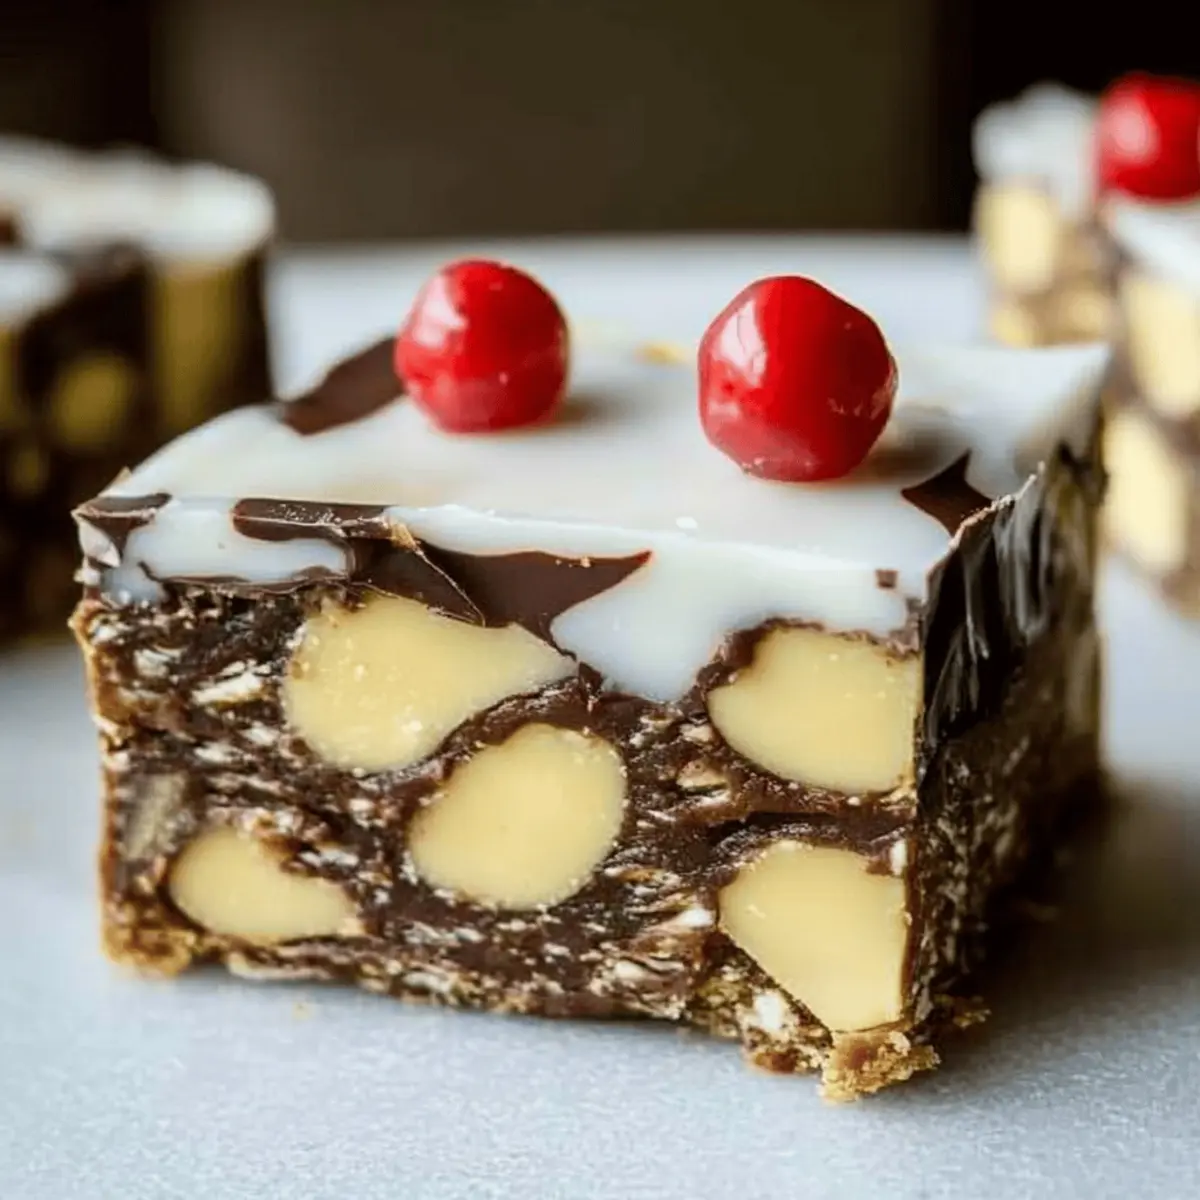
As I stood in my cozy kitchen, the delightful scent of melted chocolate wafted through the air, instantly transporting me to a world of holiday cheer. That’s when it hit me—there’s something truly magical about making Christmas Rocky Road, among the 45 easy no-bake Christmas treats I’ve gathered. These decadent bites are not only quick to whip up but also a total crowd-pleaser, ensuring that your festive gatherings will be filled with smiles and sweet surprises. With options for various dietary needs, you can share the joy without stress. So, whether you’re gifting them in decorative boxes or just indulging yourself, these treats will undoubtedly bring a touch of sweetness to your holiday season. Curious about how to create these scrumptious delights? Let’s dive in!
Why Choose Christmas Rocky Road?
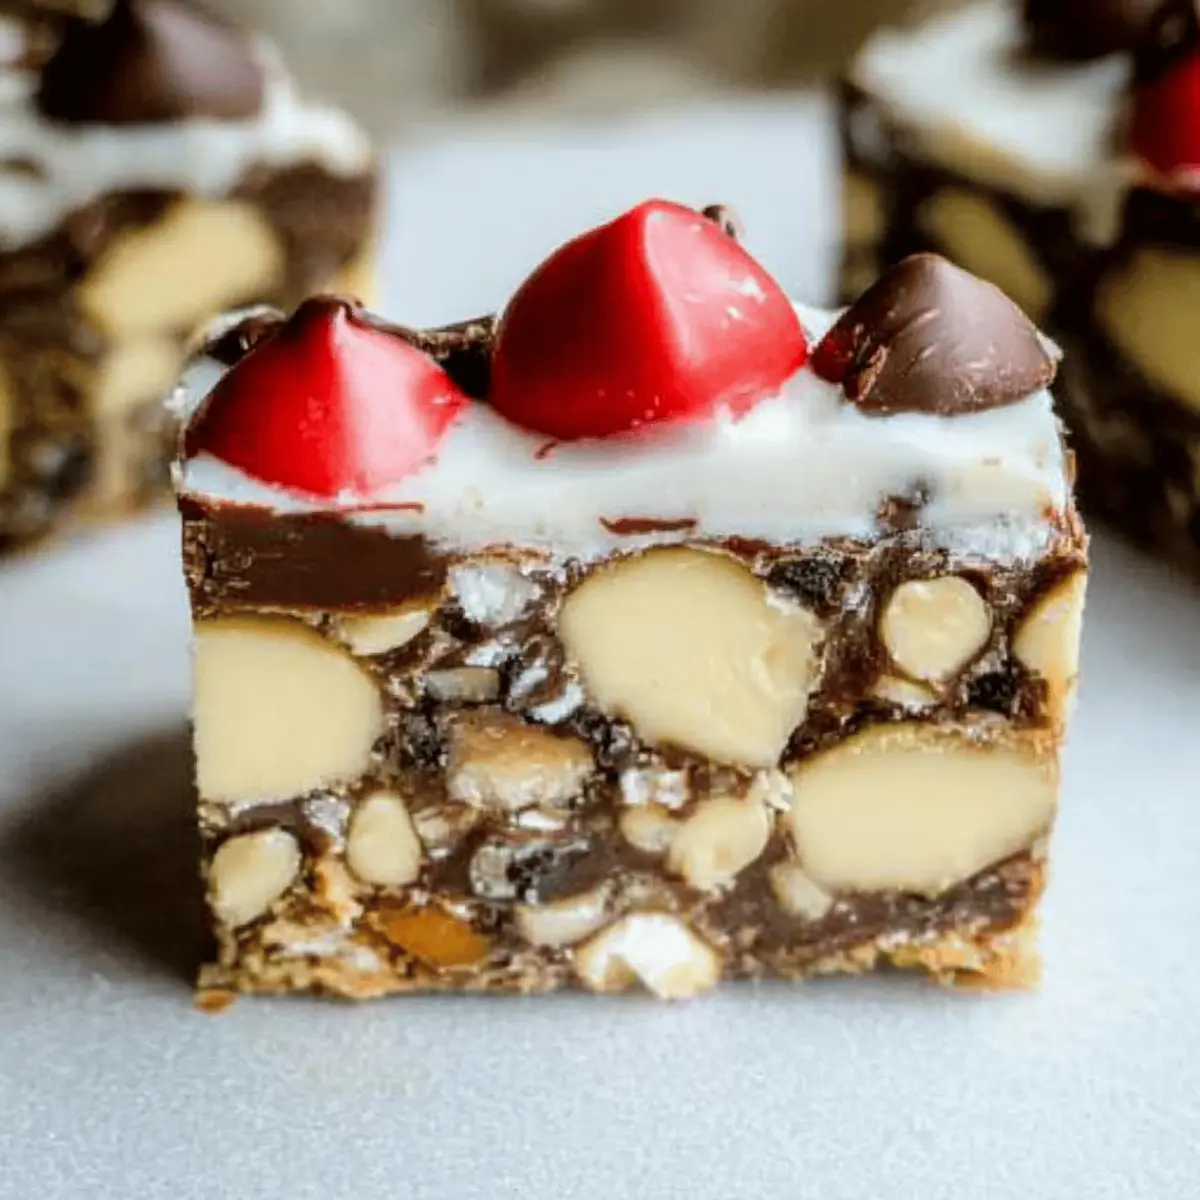
Irresistible Flavor: Christmas Rocky Road offers a delightful blend of rich chocolate, chewy marshmallows, and crunchy nuts that create a symphony of tastes and textures.
Quick and Easy: You can whip up this festive treat in no time, perfect for those busy holiday moments.
Customizable Options: Tailor your recipe by adding dried fruits or switching out ingredients to cater to various dietary preferences, making it a versatile choice for everyone.
Joyful Gifting: Beautifully packaged, these no-bake delights make for thoughtful homemade gifts that will surely impress your friends and family.
Budget-Friendly: Enjoy the magic of the season without breaking the bank—this treat is not only delicious but also economical!
Dive into the festive spirit with this collection of no-bake Christmas treats and bring extra joy to your gatherings!
Christmas Rocky Road Ingredients
For the Base
- Dark Chocolate – A rich layer that serves as a foundation; opt for dairy-free varieties for vegan options.
- Butter – Adds creaminess; can substitute with coconut oil for a vegan twist.
For the Mix-ins
- Mini Marshmallows – Introduce chewy sweetness; try using vegan marshmallows for a plant-based treat.
- Chopped Nuts – Crunchy addition—walnuts or almonds work beautifully; feel free to use seeds for a nut-free version.
- Dried Fruit – Adds a fruity burst of flavor; cranberries or cherries complement the chocolate wonderfully.
- Rice Krispies – Provides a delightful crunch; classic or gluten-free versions can be used.
For Topping (Optional)
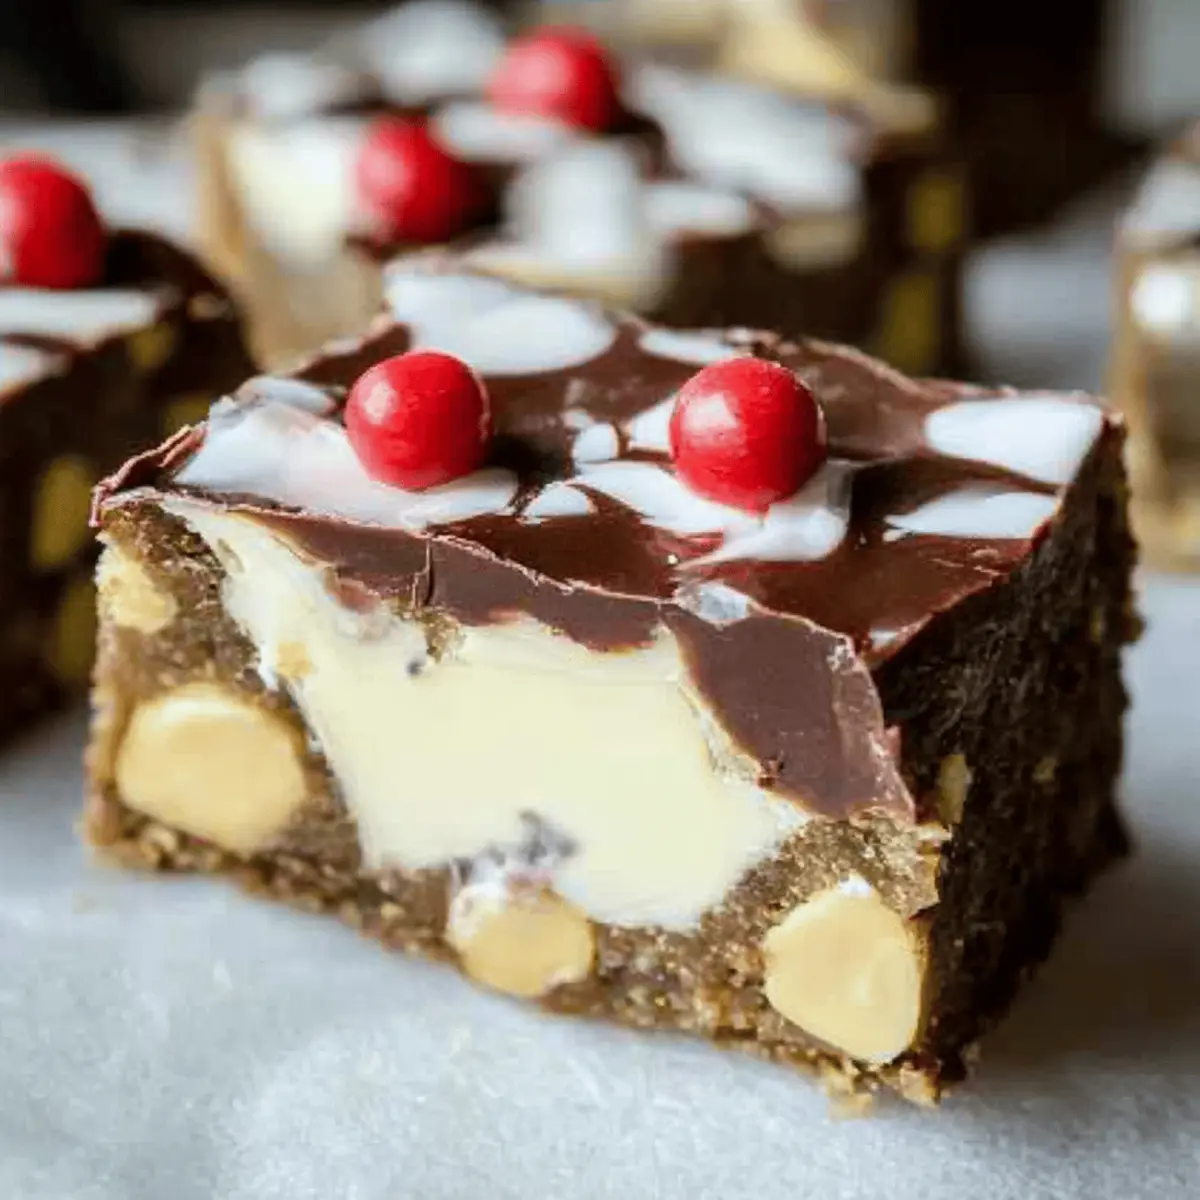
- Drizzled Chocolate – Elevates the look and flavor—white chocolate drizzle adds a festive touch.
- Sprinkles – Fun and colorful, perfect for a holiday feel; consider using edible glitter for extra sparkle.
Dive into creating this magical Christmas Rocky Road, and let the sweet indulgence fill your festive season with joy!
Step‑by‑Step Instructions for Christmas Rocky Road
Step 1: Prepare Your Workspace
Begin by gathering all your ingredients for Christmas Rocky Road. You’ll need a mixing bowl, a medium saucepan, and a spatula. Ensure your workspace is clean and organized to make the process smoother. This will help you efficiently whip up this delightful treat while preventing any last-minute scrambles for items.
Step 2: Melt the Chocolate and Butter
In a medium saucepan over low heat, combine the dark chocolate and butter, stirring constantly until melted and smooth—about 5 to 7 minutes. Take care not to let the mixture burn; you want a glossy blend without lumps. Once melted, remove it from the heat and set aside to cool slightly while preparing your mix-ins.
Step 3: Combine the Mix-ins
In a large mixing bowl, add mini marshmallows, chopped nuts, dried fruit, and Rice Krispies to create a delightful mix. Gently fold these ingredients together using a spatula, ensuring they are well distributed. The crunchy and chewy components will beautifully contrast the rich chocolate base of your Christmas Rocky Road.
Step 4: Fold in the Chocolate Mixture
Once your chocolate mixture is slightly cooled, pour it over the mix-ins in your bowl. Immediately fold all the ingredients together until everything is evenly coated with the melted chocolate. The aroma of chocolate will fill the air, and the colors from the fruit and marshmallows should start to pop!
Step 5: Press into the Pan
Line a square or rectangular baking pan with parchment paper for easy removal. Pour the mixture into the pan, using your spatula to press it down firmly into an even layer. This step is essential for ensuring that your Christmas Rocky Road holds together well after chilling—aim for a compact form that looks appealing.
Step 6: Chill to Set
Cover the pan with plastic wrap and place it in the refrigerator for about 2 to 3 hours, or until the mixture is firm to the touch. You can also speed this up by placing it in the freezer for about 1 hour. The cooling time allows the chocolate to solidify, transforming your mixture into a delightful treat.
Step 7: Cut and Decorate
Once set, remove your Christmas Rocky Road from the refrigerator and lift it out using the parchment paper. Place it on a cutting board and cut it into squares or rectangles using a sharp knife. If you’d like, drizzle melted chocolate or sprinkle festive decorations on top for an extra touch of holiday cheer before serving or gifting.
Christmas Rocky Road: Delightful Variations
Feel free to get creative with these scrumptious treats, adding your personal touch to make them uniquely yours!
- Nut-Free Delight: Substitute chopped nuts with sunflower seeds or pumpkin seeds for a safe and crunchy alternative that everyone can enjoy.
- Vegan-Friendly: Use dairy-free chocolate and swap butter for coconut oil to make this rocky road entirely plant-based without losing richness or flavor.
- Flavor Boost: Add a splash of vanilla extract into the melted chocolate for an enhanced flavor profile that complements the rich chocolate beautifully.
- Fruity Twist: Incorporate your favorite dried fruits such as apricots or figs to add a chewy texture and a hint of natural sweetness that contrasts wonderfully with the chocolate.
- Crispy Alternatives: For an exciting crunch, replace Rice Krispies with crushed pretzels or popcorn. The salty-sweet combination adds a fun dimension to this classic treat.
- Spicy Kick: Sprinkle in some chili powder or cayenne pepper to the melted chocolate for a surprising and festive heat that’ll delight adventurous eaters. It’s a wonderful way to elevate the flavors while keeping the holiday spirit alive.
- Chocolate Variations: Experiment with white chocolate or milk chocolate for a change in sweetness and creaminess, making it a perfect treat for different taste preferences.
- Dazzling Decor: Get festive with toppings like edible glitter or holiday-themed sprinkles to transform these treats into eye-catching delights that are perfect for gifting or sharing at gatherings.
Enjoy these exciting variations while diving into the festive vibe! If you’re looking for more ideas, be sure to check out this wonderful collection of no-bake Christmas treats for endless inspiration!
What to Serve with Christmas Rocky Road?
As you indulge in these sweet, chocolatey delights, consider adding a few complementary dishes that enhance the festive spirit of your table.
- Holiday Fruit Salad: A refreshing mix of seasonal fruits adds a burst of color and balances the sweetness of the Rocky Road.
- Nutty Cheese Platter: Incorporate a variety of cheeses with nuts and dried fruits to provide a savory contrast, inviting everyone to savor diverse flavors.
- Spiced Hot Chocolate: Warm up with a cozy cup of spiced hot chocolate, perfect for sipping alongside these rich treats, creating a comforting, indulgent experience.
- Gingerbread Cookies: Classic and aromatic, gingerbread cookies offer a spicy, sweet balance that pairs delightfully with the soft, chocolatey bites.
- Creamy Vanilla Ice Cream: Serve a scoop of vanilla ice cream topped with a drizzle of warm chocolate sauce, enhancing the decadence of the Rocky Road.
- Peppermint Bark: This festive confection complements the chocolate flavors while introducing a refreshing minty touch—perfect for the holiday season.
- Festive Punch: A fruity punch, perhaps with hints of cranberry or pomegranate, can add a colorful, festive element to your gatherings and refresh your palate.
- Christmas Cookies: Opt for an assortment of cookies like sugar cookies or snickerdoodles to encourage a cookie exchange feel that everyone will love.
- Coffee or Espresso: Rich coffee or a shot of espresso pairs beautifully with the sweetness, creating a sophisticated end to your holiday meal.
Expert Tips for Christmas Rocky Road
• Ingredient Temperature Matters: Ensure your chocolate and butter are at room temperature before melting. This helps achieve a smoother mixture and prevents clumping.
• Mix-in Balance: Avoid overloading with too many mix-ins, which can make it hard for the chocolate to bind. Stick to the suggested amounts for best results.
• Chilling Time: Make sure to chill the mixture long enough; under-chilling can cause it to crumble when cut. Aim for at least 2 hours in the refrigerator.
• Customize Wisely: When swapping ingredients, consider flavor compatibility. For instance, almond butter pairs well with chocolate, while coconut adds a tropical touch.
• Gift-Ready Presentation: For impressive gifting, cut your Christmas Rocky Road into uniform squares and wrap them in festive paper or containers—presentation matters!
• Allergy Awareness: If serving to a crowd, clearly label any nut products used in the recipe to avoid cross-contamination and ensure everyone can enjoy this festive treat.
Storage Tips for Christmas Rocky Road
-
Room Temperature: Keep your Christmas Rocky Road in an airtight container at room temperature for up to 2 weeks to maintain its flavor and texture.
-
Fridge: If you’d like to extend freshness, store it in the refrigerator for up to 3 weeks. Be sure to wrap it tightly to prevent any moisture from affecting the treats.
-
Freezer: For longer storage, you can freeze individual pieces of Christmas Rocky Road in a freezer-safe container for up to 3 months. Make sure to separate layers with parchment paper.
-
Reheating: If your treats become too hard in the fridge or freezer, let them sit at room temperature for a few minutes before enjoying, allowing them to soften slightly for an ideal bite!
Make Ahead Options
These Christmas Rocky Road treats are a fantastic option for meal prep, saving you precious time during the bustling holiday season! You can prepare the mix of mini marshmallows, chopped nuts, dried fruit, and Rice Krispies up to 24 hours in advance, storing it in an airtight container to maintain freshness. The chocolate and butter mixture can also be melted and cooled ahead of time, allowing you to simply fold it in just before assembling. When you’re ready to enjoy these festive delights, just follow the final steps of mixing, pressing into the pan, and chilling for 2 to 3 hours in the fridge, or popping it in the freezer for about 1 hour. This way, your Christmas Rocky Road will be just as delicious and ready to impress without the last-minute rush!
Christmas Rocky Road Recipe FAQs
How do I choose the best chocolate for Christmas Rocky Road?
Absolutely! When selecting chocolate, look for high-quality dark chocolate with at least 60% cocoa for a rich flavor. If you’re aiming for a vegan option, be sure to choose dairy-free chocolate. Check the label to avoid any hidden milk ingredients, especially if allergies are a concern.
What is the best way to store leftover Christmas Rocky Road?
For sure! Store your Christmas Rocky Road in an airtight container at room temperature for up to 2 weeks. If you want to extend its freshness, refrigerate it for up to 3 weeks. Just make sure to wrap it tightly to avoid moisture affecting your delicious treats!
Can I freeze Christmas Rocky Road?
Absolutely! To freeze your Christmas Rocky Road, cut it into individual pieces and wrap each piece in plastic wrap. Then, place them in a freezer-safe container or bag, ensuring they are separated with parchment paper. They can be frozen for up to 3 months without losing flavor. When you’re ready to enjoy, just let them sit out at room temperature for a few minutes to soften.
What if my melted chocolate and butter mixture turns grainy?
Very good question! If your mixture becomes grainy, it may be due to overheating or moisture. To salvage it, you can add a splash of cream or milk and reheat it gently over low heat while stirring continuously until smooth. Remember, patience is key here—keep that heat low to avoid burning!
Are there any dietary considerations I should keep in mind?
Definitely! When making your Christmas Rocky Road, consider those with nut allergies. Use seeds instead of nuts for a safe alternative, and opt for vegan marshmallows and dairy-free chocolate for a fully plant-based treat. Always label your ingredients for those with food sensitivities.
How do I make my Christmas Rocky Road visually appealing for gifting?
Oh, what a delightful idea! To enhance its presentation, cut the Rocky Road into uniform squares and drizzle with melted white chocolate for contrast. You can also sprinkle edible glitter or colorful holiday-themed sprinkles on top. Packaging them in festive boxes or wrapping them with decorative paper will surely impress your loved ones!
Christmas Rocky Road: A Festive Treat to Sweeten Your Holidays
Ingredients
Equipment
Method
- Prepare Your Workspace by gathering all your ingredients and ensuring your work area is clean and organized.
- Melt the Chocolate and Butter in a saucepan over low heat, stirring constantly until smooth—about 5 to 7 minutes.
- Combine the Mix-ins in a large bowl: mini marshmallows, chopped nuts, dried fruit, and Rice Krispies.
- Fold in the Chocolate Mixture once it’s slightly cooled, mixing until everything is evenly coated.
- Press into the Pan: line a baking pan with parchment paper and press the mixture down firmly.
- Chill to Set by covering the pan and refrigerating for about 2 to 3 hours.
- Cut and Decorate once set, slicing into squares and adding any melted chocolate drizzle or sprinkles.
")