")
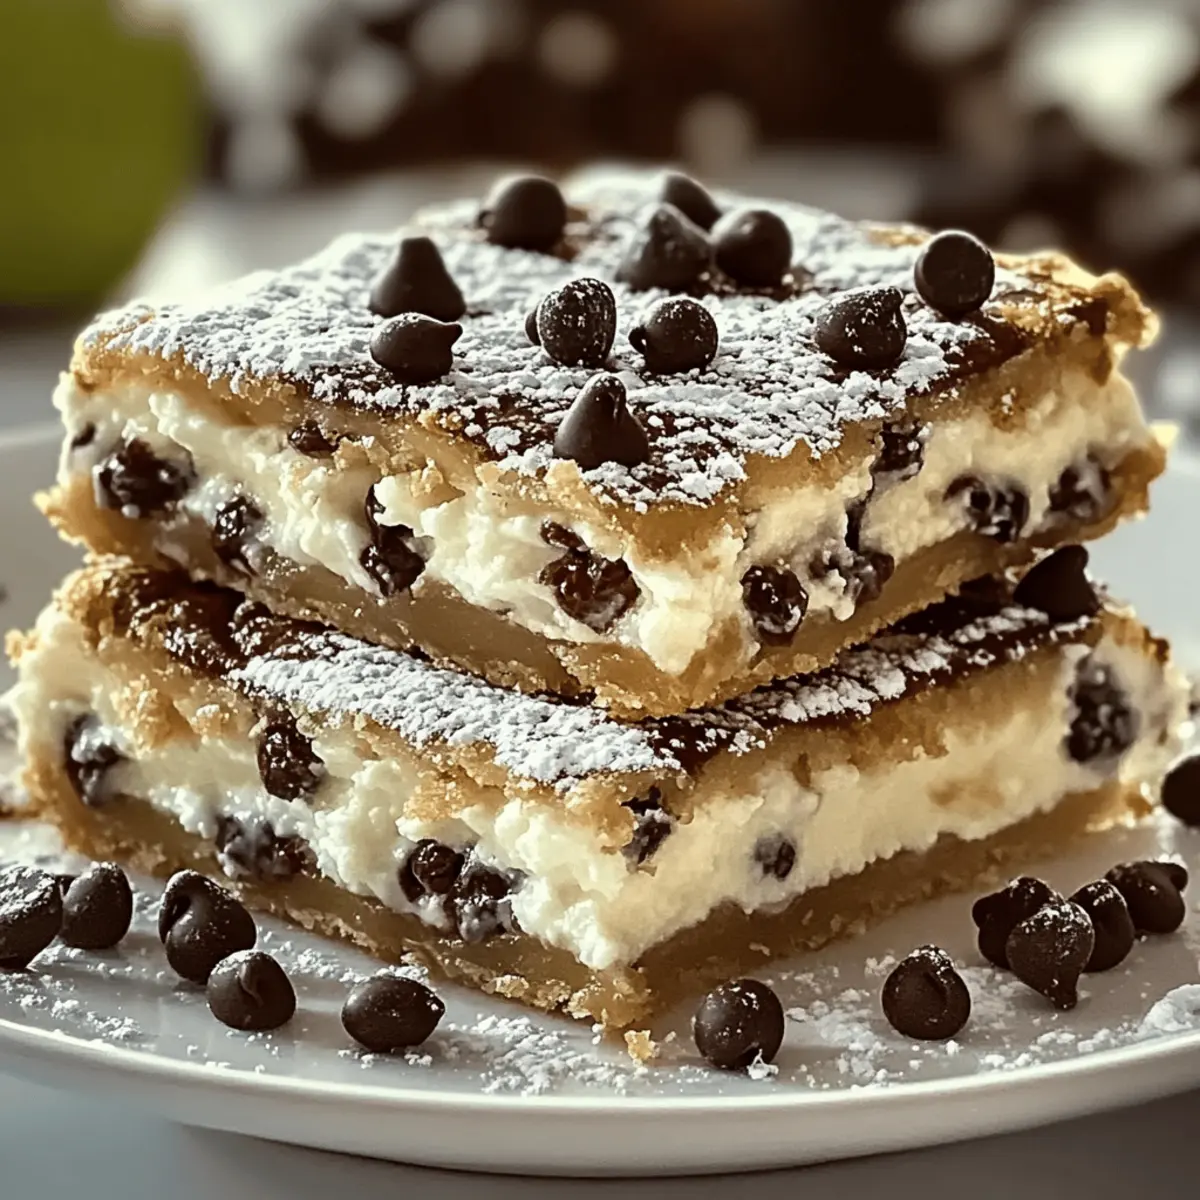
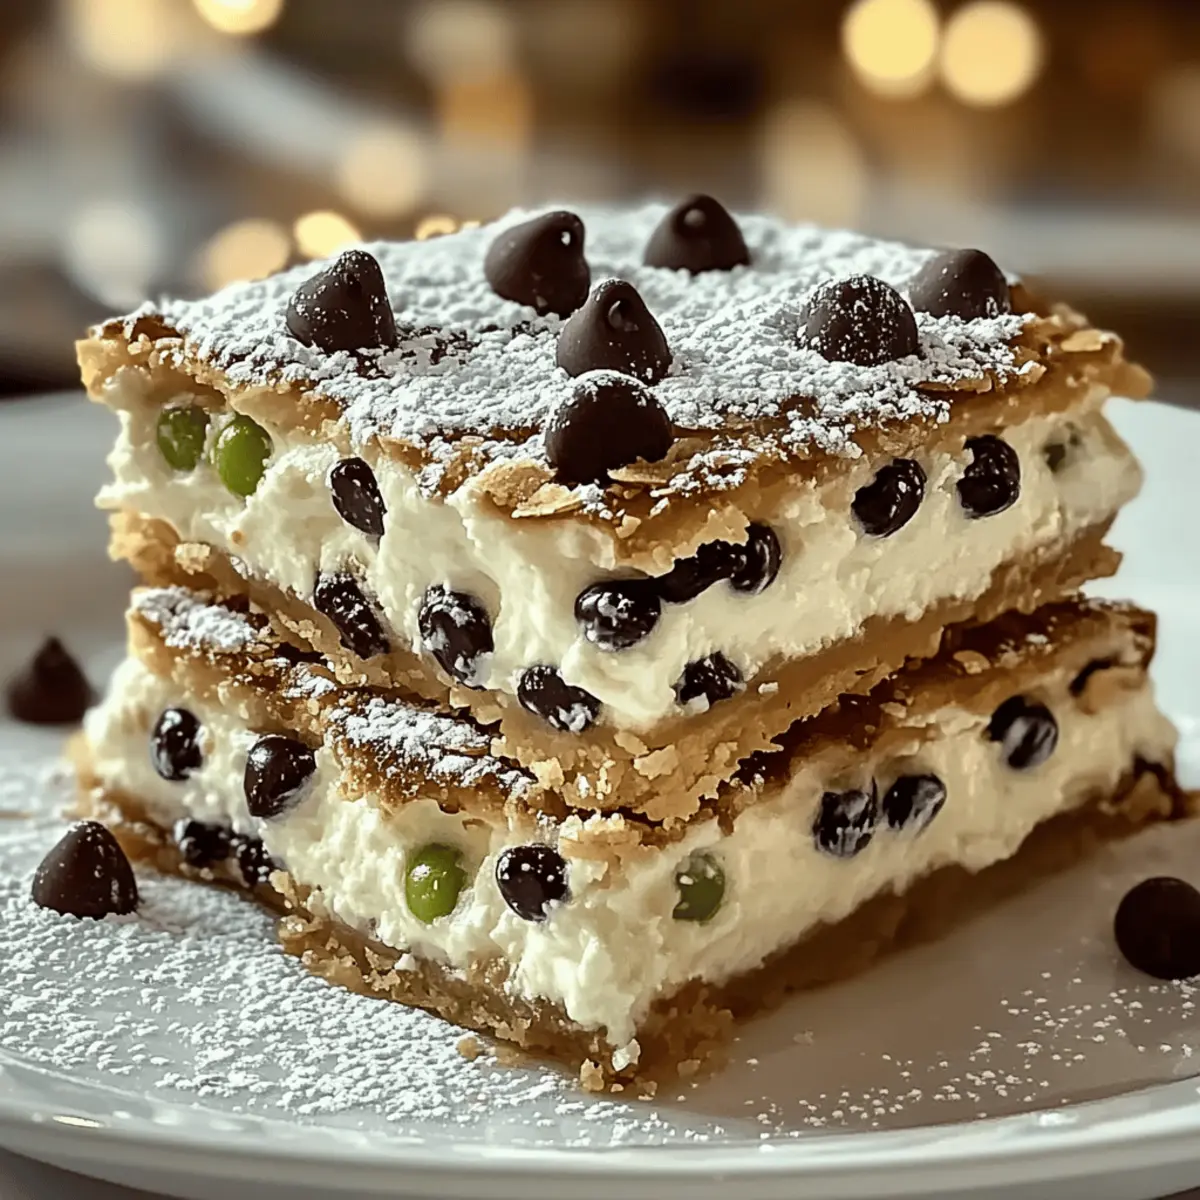
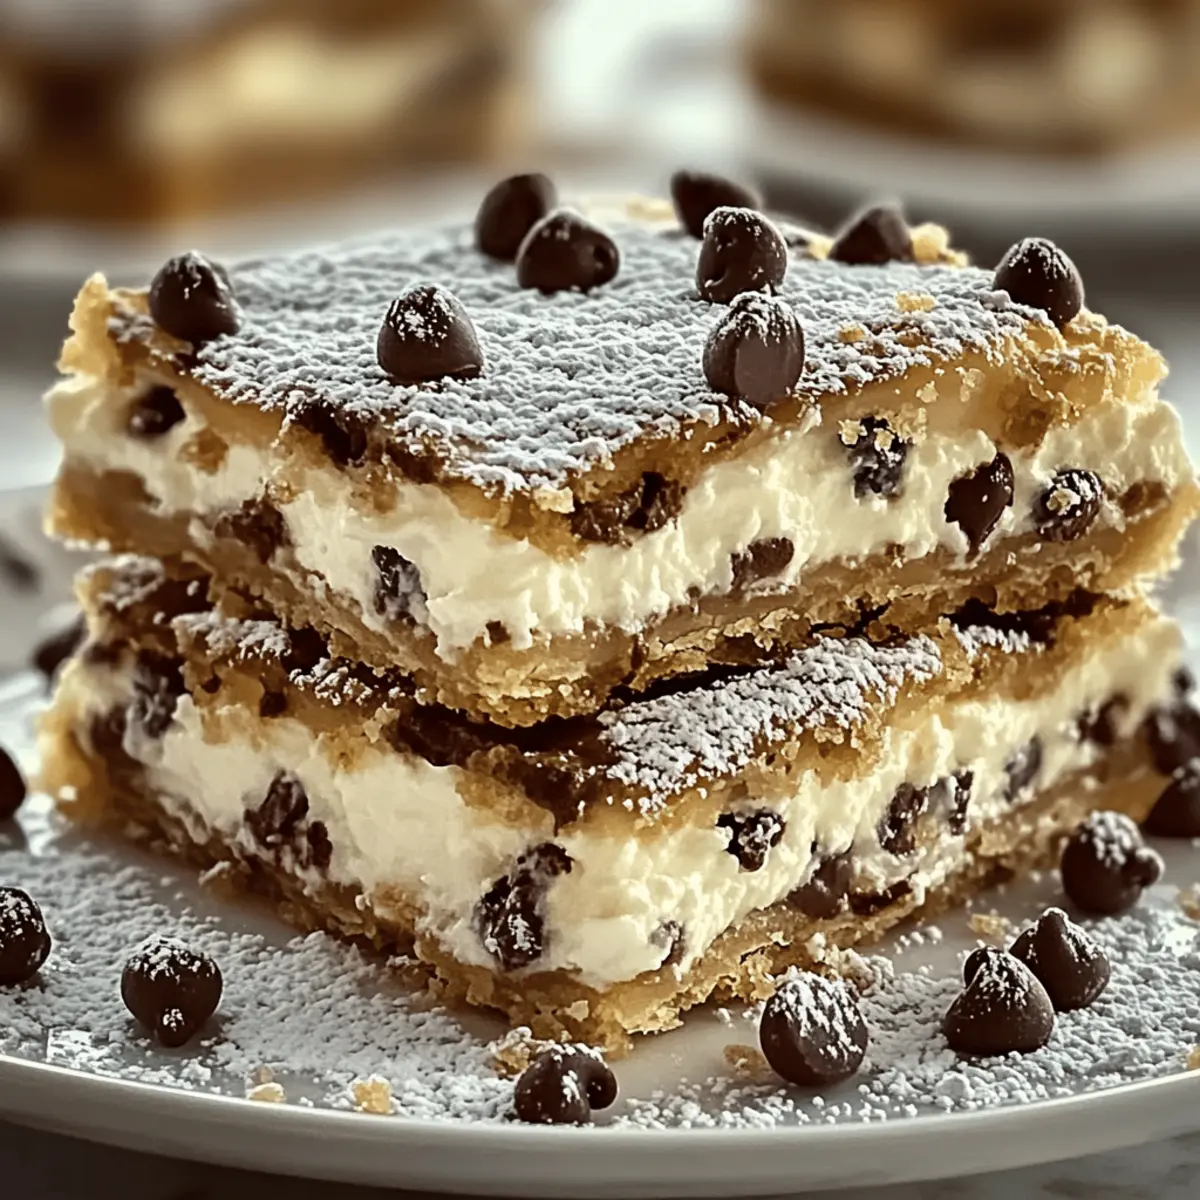
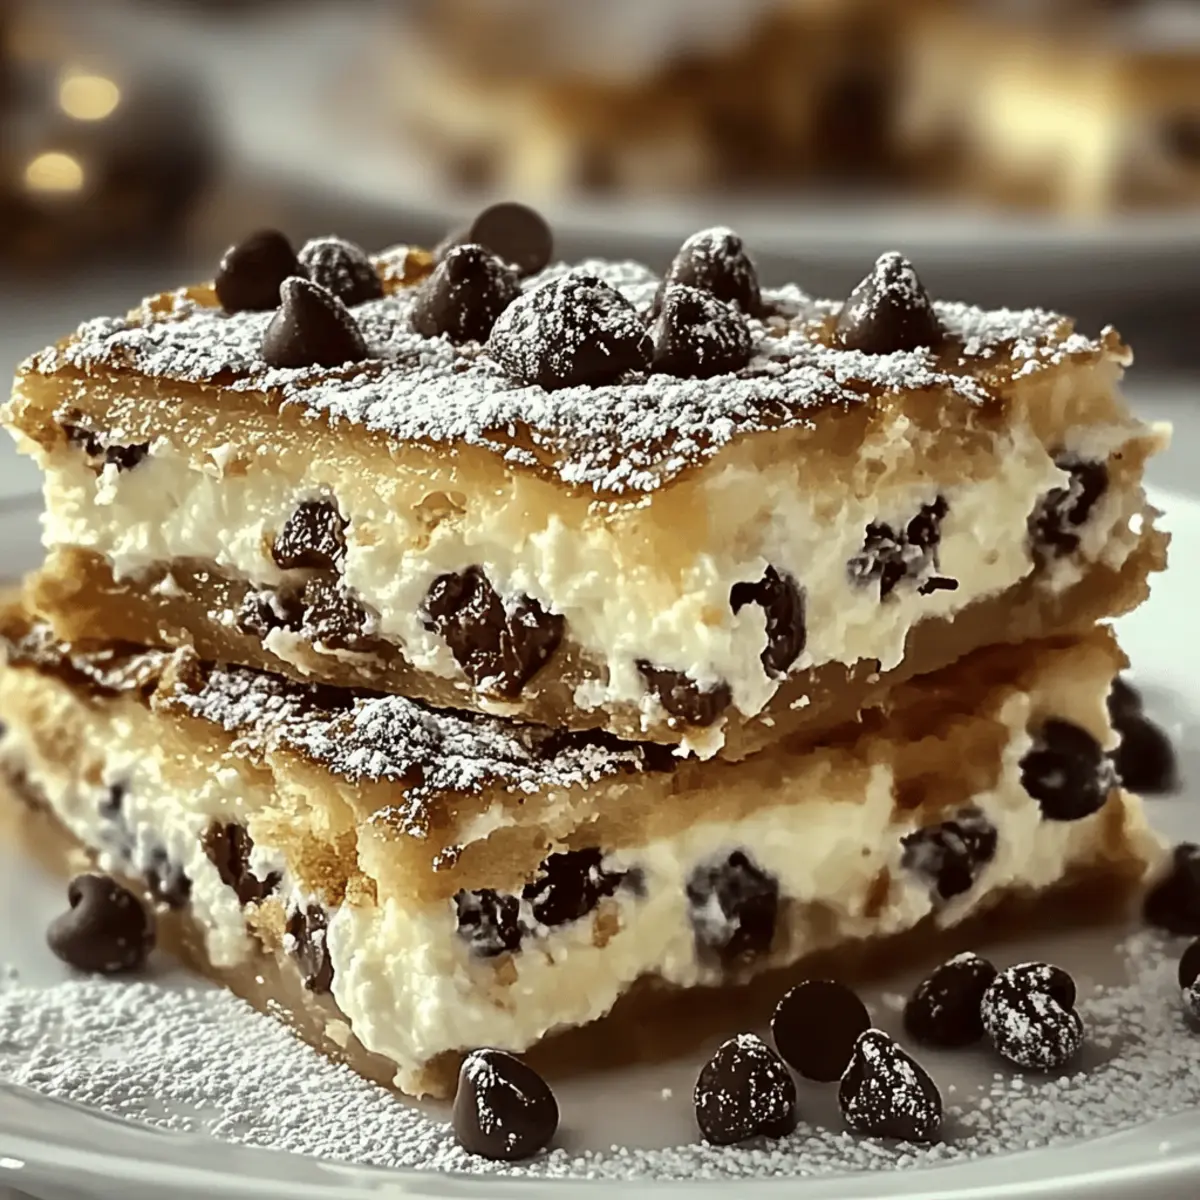
As I was sifting through my cherished collection of family recipes, the memory of sun-soaked afternoons in my grandmother’s kitchen rushed back. That’s when I stumbled upon a gem—Classic Cannoli Squares. This uncomplicated dessert is a delightful take on traditional cannoli, showcasing a rich, creamy filling nestled between a golden crust. Perfect for those who crave a bit of nostalgia without spending hours in the kitchen! These squares are not only a great make-ahead option, but they’re also a fantastic crowd-pleaser, ideal for everything from potlucks to cozy family gatherings. Curious about how to whip up these delicious bites with ease? Let’s dive in!
Why Will You Love Classic Cannoli Squares?
Ease of Preparation: This recipe simplifies the cannoli experience, allowing you to create a classic Italian treat with minimal effort.
Indulgent Flavor: The rich combination of ricotta and chocolate chips delivers a creamy and decadent experience that everyone will adore.
Versatility: Whether you opt for gluten-free or dairy-free adaptations, this dessert remains accommodating for various dietary preferences.
Make-Ahead Convenience: Perfect for busy schedules, the filling can be prepared a day in advance, making it an ideal option for entertaining.
Crowd-Pleaser: From family gatherings to potlucks, these squares are sure to impress your guests, just like a traditional cannoli!
Add a zesty twist with lemon or mix in some chopped nuts for a crunchy surprise, just like the delightful variations you can explore with my other recipes, like Velveeta Mac and Cheese or Taro Ice Cream.
Classic Cannoli Squares Ingredients
For the Filling
- Ricotta Cheese – Creamy base for the filling; use whole milk for an extra rich flavor.
- Powdered Sugar – Sweetens the filling for a balanced taste; substitute with coconut sugar for a healthier option.
- Vanilla Extract – Enhances flavor; opt for pure vanilla extract for the best results.
- Cinnamon – Adds delightful spice depth; omit for a more traditional cannoli taste.
- Mini Chocolate Chips – Offers bursts of chocolate sweetness; dark chocolate enhances the richness.
For the Crust
- Pre-Made Pie Crusts – Forms the base and top crust; homemade crust adds a personal touch but pre-made saves time.
- Large Egg – Used for brushing the top crust; helps achieve a beautiful, glossy finish.
- Sugar – Sprinkled on top for a sweet crunch when baked.
For Garnish (Optional)
- Chopped Pistachios – Adds crunch and beautiful color; sprinkle on top for an elegant look.
- Maraschino Cherries – Provides a sweet pop of color; excellent for a decorative touch.
- Extra Chocolate Chips – For those who crave even more richness in their Classic Cannoli Squares.
These Classic Cannoli Squares are sure to be a hit, offering maximum flavor with minimal fuss! Enjoy the simple process while indulging in the delightful bites that remind us all of cherished moments at the dinner table.
Step‑by‑Step Instructions for Classic Cannoli Squares
Step 1: Prepare the Filling
In a mixing bowl, combine 15 ounces of ricotta cheese, 1 cup of powdered sugar, 1 teaspoon of vanilla extract, ½ teaspoon of cinnamon, and ½ cup of mini chocolate chips. Whisk until the mixture is smooth and creamy, with no lumps remaining. This rich filling embodies the delightful essence of classic cannoli squares, ready to be spread atop the crust.
Step 2: Preheat Oven
Set your oven to 375°F (190°C) and allow it to preheat while you prepare the crust and filling. This ensures that your classic cannoli squares will bake evenly and develop a beautiful golden-brown color, creating the perfect dessert to impress your family and friends.
Step 3: Roll Out Pie Crust
Unlike traditional cannoli, these squares use a convenient pre-made pie crust. Gently unroll one pie crust and carefully fit it into a 9×9-inch baking dish, pressing it into the corners and up the sides. This will serve as the base for your creamy filling, setting the stage for a delicious dessert.
Step 4: Add Filling
Spoon the prepared filling evenly over the crust, using a spatula to spread it gently to the edges. The filling should create a thick layer, enticingly creamy and adorned with mini chocolate chips. This step is crucial, as it ensures that each bite of your classic cannoli squares is filled with delightful flavor.
Step 5: Top and Seal
Take the second pie crust and carefully place it over the filling, sealing the edges by crimping with your fingers. Beat one large egg and brush it over the top crust for a glossy finish. Finish by sprinkling a tablespoon of sugar over the crust, which will create a sweet, crispy crunch when baked.
Step 6: Bake
Place your prepared classic cannoli squares in the preheated oven and bake for 30-35 minutes or until the top is golden brown and flaky. Keep an eye on them during the last few minutes to prevent over-browning, ensuring your dessert looks as delicious as it tastes.
Step 7: Cool
Once baked, remove the classic cannoli squares from the oven and let them cool at room temperature for at least 30 minutes. This cooling period allows the filling to set, making it easier to slice into delightful squares without losing their structure.
What to Serve with Classic Cannoli Squares
Dreaming of the perfect meal to pair with the sweet indulgence of Classic Cannoli Squares?
-
Espresso Coffee: Serve alongside a rich espresso for a delightful finish. The bold coffee flavor contrasts beautifully with the creamy dessert.
-
Whipped Cream: A dollop of airy whipped cream adds a light, fresh touch that enhances the decadent taste of the cannoli squares.
-
Gelato: Opt for a scoop of authentic Italian gelato, like pistachio or hazelnut, for a delightful combination of flavors and textures.
-
Berries Medley: Fresh strawberries and blueberries bring a burst of tartness that beautifully balances the sweetness of the squares.
-
Chocolate Drizzle: Drizzle with warm chocolate sauce for an extra layer of indulgence, echoing the flavors of the mini chocolate chips in the filling.
-
Mint Leaves: For a refreshing touch, garnish your cannoli squares with mint leaves. This adds color and a cool flavor contrast.
Elevate your dessert experience by pairing these squares with light, vibrant elements, or go all out with rich, indulgent options!
Expert Tips for Classic Cannoli Squares
• Quality Ingredients: Use high-quality ricotta cheese for a rich filling. Avoid low-fat options, as they can lead to a watery consistency that drips instead of staying creamy.
• Drain Ricotta: Make sure to drain excess moisture from the ricotta beforehand. This prevents a runny filling and helps maintain the traditional texture of your Classic Cannoli Squares.
• Don’t Overbake: Keep a close eye on your squares during the last few minutes of baking. Overbaking can lead to a tough crust and a less enjoyable dessert, so aim for a golden brown finish.
• Cooling Time: Allow the squares to cool fully before slicing. This helps them set and ensures each piece holds its shape beautifully, so everyone gets a perfect slice.
• Make-Ahead Advantage: Take advantage of the make-ahead friendly nature of this recipe. You can prepare the filling up to 24 hours in advance and store it in the fridge, making your baking day much easier!
Classic Cannoli Squares Variations
Feel free to make these delightful Classic Cannoli Squares your own by exploring these tempting twists!
-
Dairy-Free: Replace ricotta with blended silken tofu; add nutritional yeast for a cheesy flavor that still satisfies. This option is perfect for those who are lactose intolerant or simply looking to cut down on dairy.
-
Gluten-Free: Use gluten-free pie crusts for a scrumptious variation that everyone can enjoy. Guests won’t even notice the difference when they bite into the creamy filling!
-
Zesty Twist: Incorporate lemon zest into the filling for a refreshing citrus kick. This brightens up the flavors and adds a delightful contrast to the richness of the ricotta.
-
Nutty Addition: Mix in finely chopped nuts like pistachios or walnuts for a lovely crunch. This texture twist adds an exciting element, making each bite even more interesting.
-
Fruity Layer: Consider layering fresh fruit like strawberries, raspberries, or even peaches along with the filling before sealing. It brings a delicious burst of flavor to each square, perfect for summer gatherings.
-
Chocolate Lovers Dream: For an extra chocolatey experience, use chocolate pudding instead of ricotta for the filling, and top with chocolate shavings. It’s a decadent way to indulge your chocolate cravings!
-
Spiced Up: Add a pinch of nutmeg or allspice to the filling for a warm, comforting flavor that elevates the dish. This twist is especially cozy during fall or winter festivities.
-
Make-It-Ahead: Prep the filling and crust, then roll into logs and freeze. When you’re ready, bake from frozen for an easy last-minute dessert! Just like my other make-ahead favorites, such as Pastina Comforting All.
Let your creativity shine as you adapt these Classic Cannoli Squares, ensuring they’re perfect for any occasion!
Make Ahead Options
These Classic Cannoli Squares are a fantastic choice for meal prep, seamlessly fitting into your busy schedule! You can prepare the creamy filling up to 24 hours in advance; simply store it in an airtight container in the refrigerator to maintain its rich flavor and texture. The pie crusts can also be arranged in the baking dish a day ahead—just cover them to prevent drying out. When you’re ready to bake, spread the filling over the crust, top with the second crust, and brush with egg wash before sprinkling sugar on top. This way, you’ll enjoy delightful, homemade squares with minimal effort, perfect for last-minute gatherings or busy weeknights!
How to Store and Freeze Classic Cannoli Squares
Fridge: Store leftovers in an airtight container in the refrigerator for up to 3 days. This keeps your Classic Cannoli Squares fresh and ready to enjoy at a moment’s notice.
Freezer: For longer storage, freeze the squares wrapped tightly in plastic wrap and then placed in a freezer-safe container for up to 2 months. Thaw in the fridge before serving.
Reheating: Reheat in the oven at 350°F (175°C) for about 10 minutes, or until warmed through. This preserves the crispy crust while warming the creamy filling perfectly.
Make-Ahead: The filling can be prepared up to 24 hours in advance and stored in the fridge. This makes assembly a breeze when you’re ready to bake your Classic Cannoli Squares!
Classic Cannoli Squares Recipe FAQs
How do I select the best ricotta cheese for my Classic Cannoli Squares?
Absolutely! For the creamiest filling, opt for high-quality whole milk ricotta cheese. Look for brands that use fresh milk and check for a creamy texture without excessive moisture. Avoid low-fat ricottas as they can result in a watery filling that won’t hold its shape. If you have time, you can also strain it briefly in a cheesecloth to remove any extra liquid before mixing.
What’s the best way to store leftover Classic Cannoli Squares?
You’ll want to store your Classic Cannoli Squares in an airtight container in the refrigerator where they’ll stay fresh for up to 3 days. If you want them to last longer, place them in the freezer, wrapped tightly in plastic wrap and then in a freezer-safe container, for up to 2 months. Thaw them overnight in the fridge before enjoying!
Can I freeze Classic Cannoli Squares?
Very! To freeze your Classic Cannoli Squares, first allow them to cool completely after baking. Wrap each square tightly in plastic wrap and then place them in a suitable freezer-safe container. They can be frozen for up to 2 months. When you’re ready to enjoy, simply thaw in the refrigerator overnight and reheat in the oven at 350°F (175°C) for about 10 minutes to crisp them up!
What should I do if my filling is too runny?
If your filling ends up runny, don’t worry! This can usually happen if the ricotta wasn’t drained properly or if low-fat cheese was used. To fix this, you can add an additional tablespoon of powdered sugar, which can help thicken it slightly. If there’s moisture from the ricotta, strain it through a cheesecloth for about 30 minutes to remove excess liquid before mixing again.
What are some allergy considerations for Classic Cannoli Squares?
For those with dietary restrictions, you can make delicious substitutions! If dairy is a concern, replace the ricotta with blended silken tofu, adding nutritional yeast for that cheesy flavor. For a gluten-free option, choose gluten-free pie crusts available in most grocery stores. These simple swaps ensure that your Classic Cannoli Squares can be enjoyed by everyone!
Can I make Classic Cannoli Squares ahead of time?
Certainly! The filling can be prepared and stored in the refrigerator for up to 24 hours before you’re ready to assemble and bake your Classic Cannoli Squares. This makes your baking day much easier, allowing you to enjoy some quality time with your guests without rushing in the kitchen! Just remember to seal the filling tightly to avoid any odors from other foods in the fridge.
Classic Cannoli Squares: Easy Italian Treats for Everyone
Ingredients
Equipment
Method
- Combine ricotta cheese, powdered sugar, vanilla extract, cinnamon, and mini chocolate chips in a mixing bowl. Whisk until smooth and creamy.
- Preheat oven to 375°F (190°C).
- Roll out one pie crust and fit it into a 9x9-inch baking dish.
- Spoon the filling evenly over the crust.
- Place the second pie crust over the filling and crimp edges. Brush with beaten egg and sprinkle with sugar.
- Bake for 30-35 minutes until golden brown.
- Let cool at room temperature for at least 30 minutes before slicing.
")