")
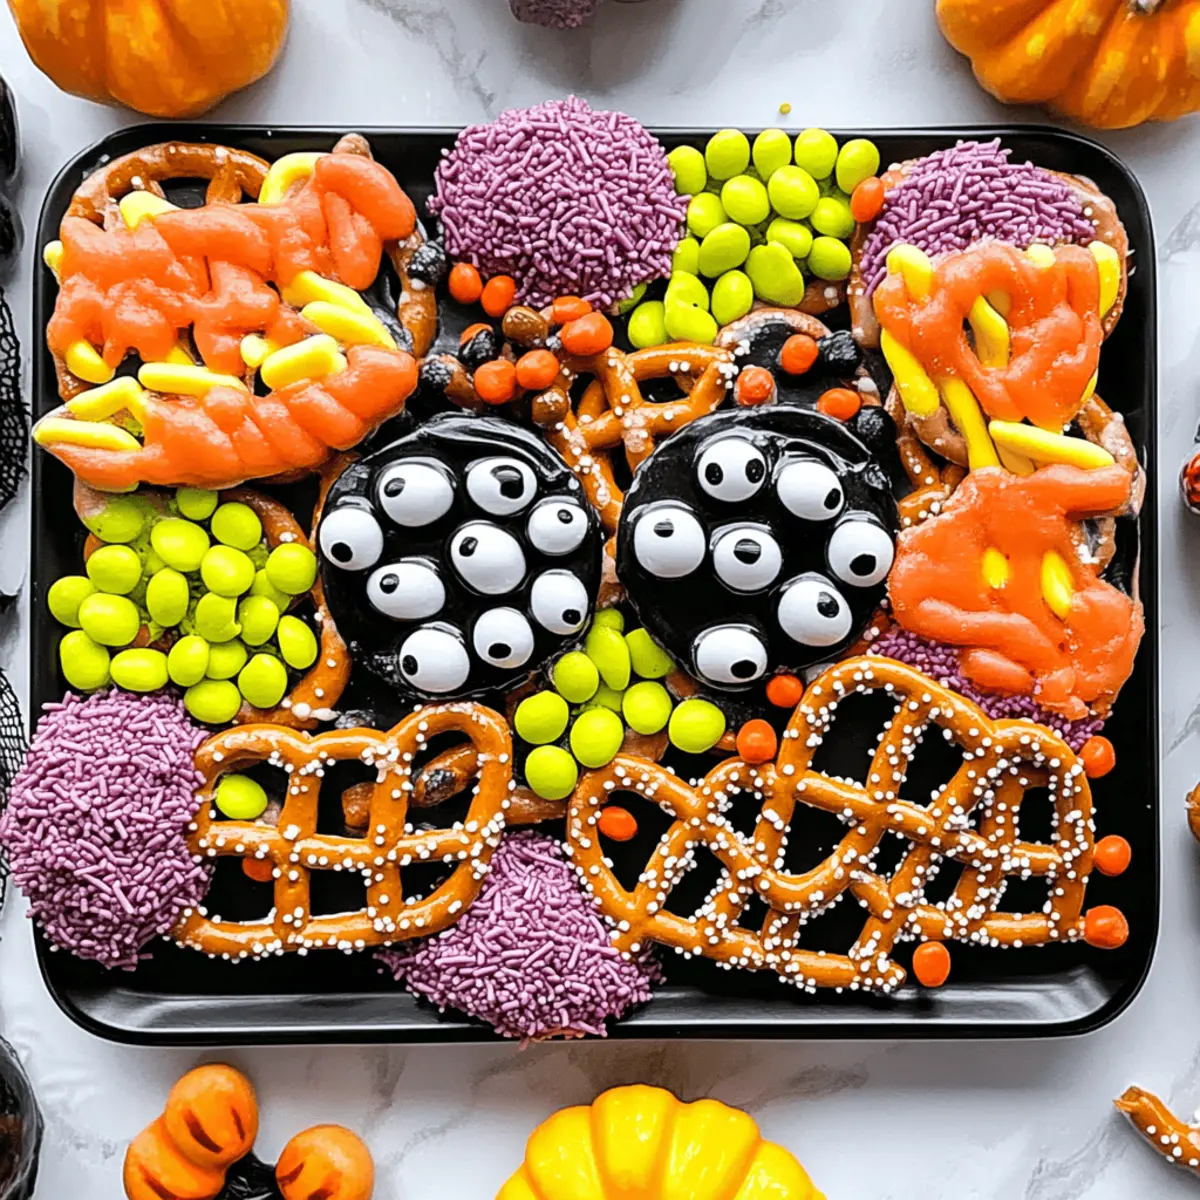
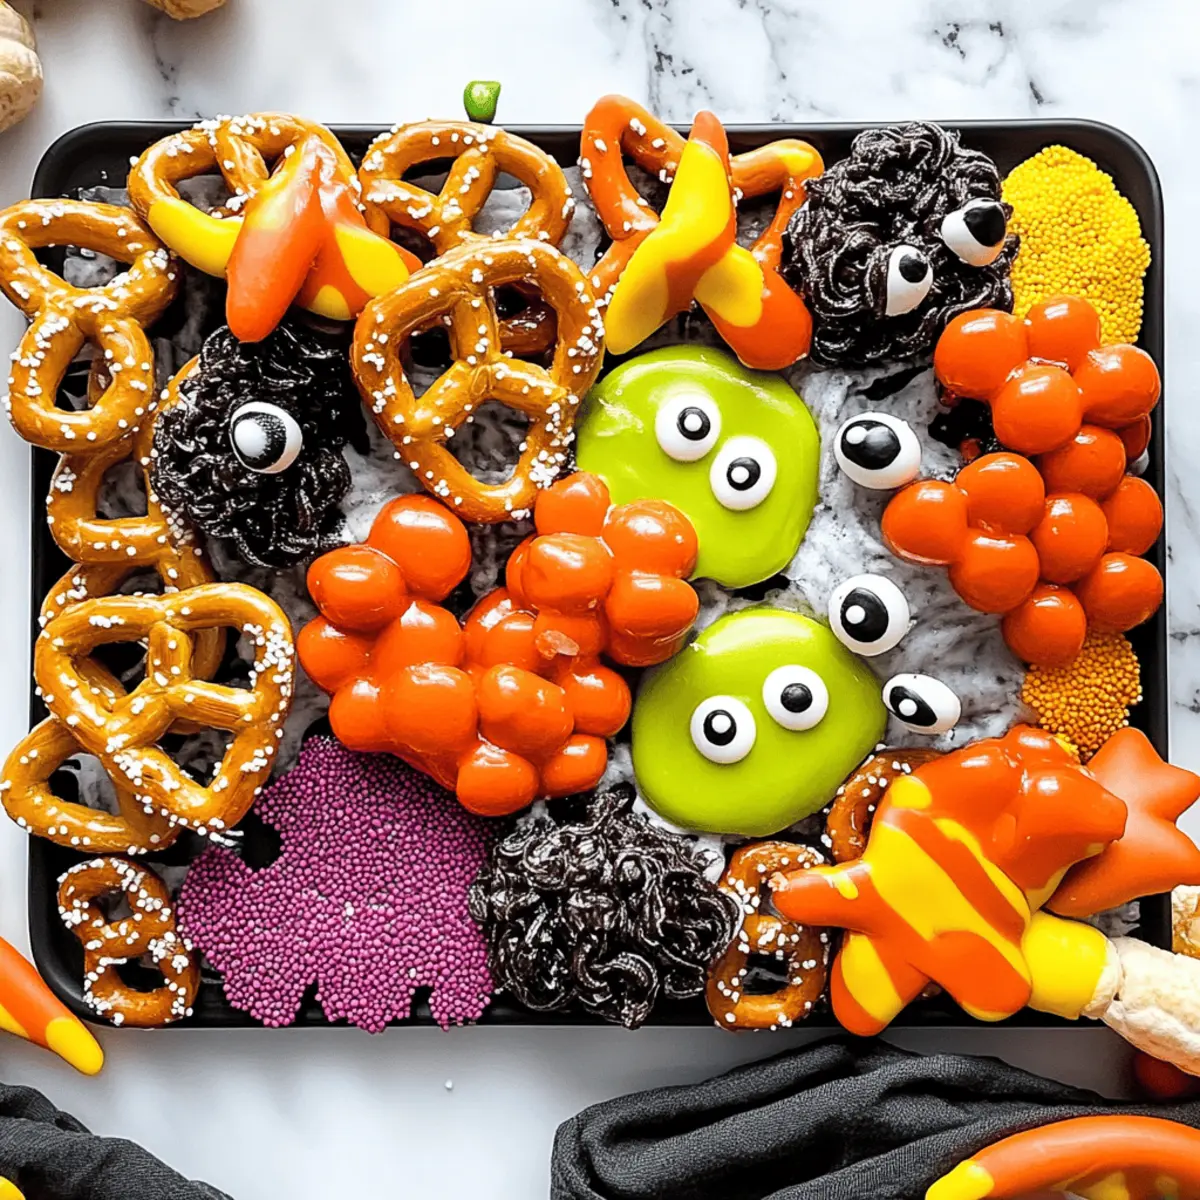
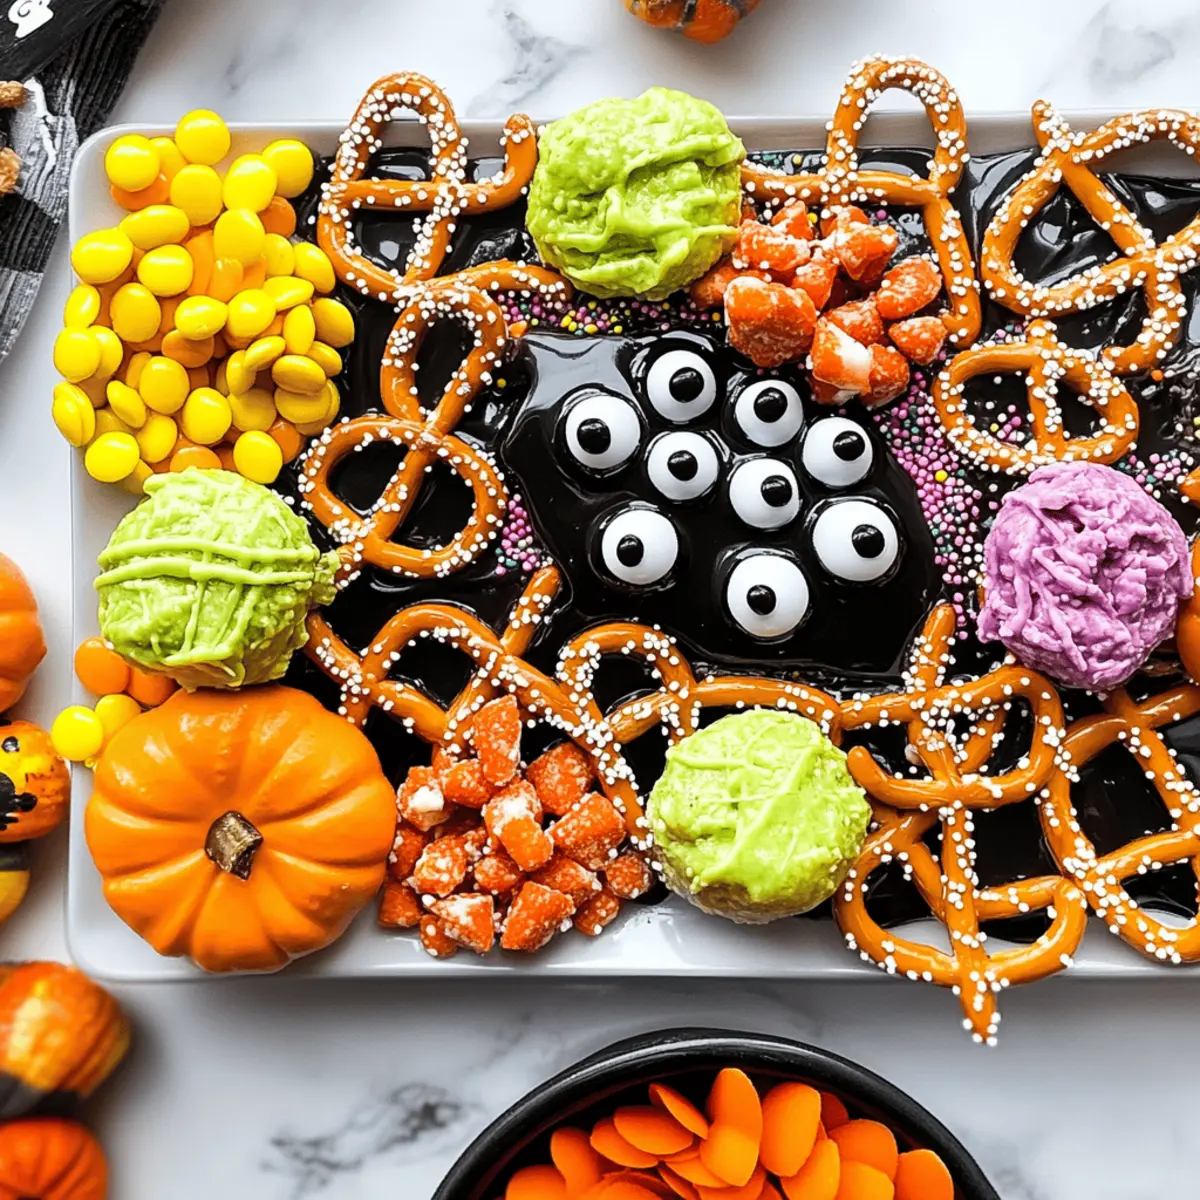
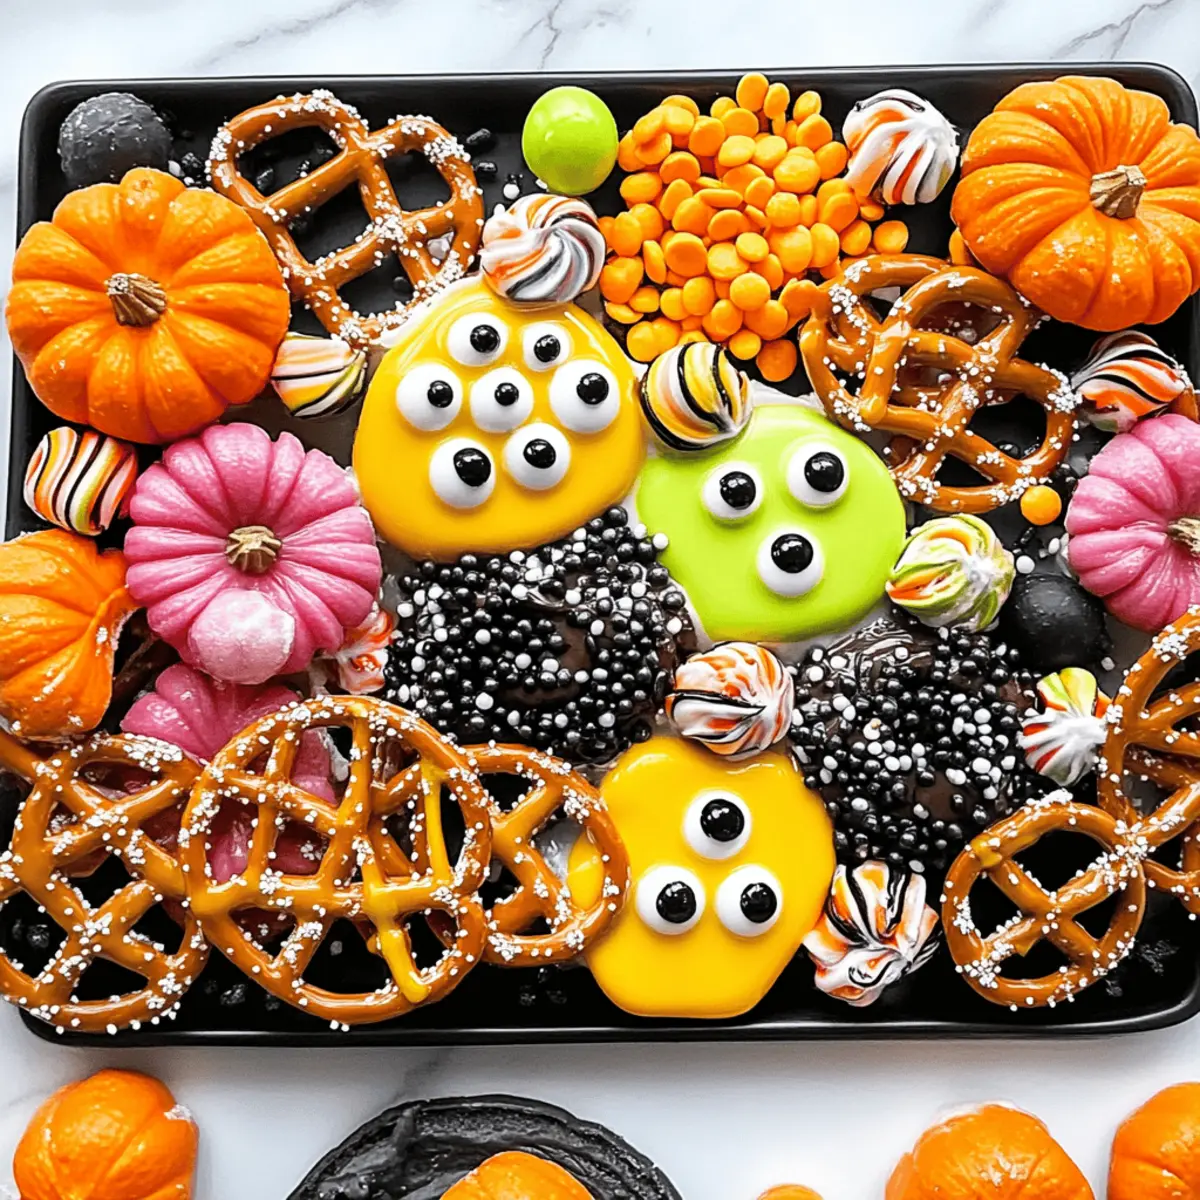
As the crisp autumn air fills my lungs, I can already hear the echoes of laughter and whispers of excitement from the kids eagerly planning their Halloween adventures. It’s during this enchantingly spooky season that I found myself in the kitchen concocting these delightful Halloween Pretzels. With a charming mix of sweet candy melts and a satisfying salty crunch, these no-bake treats become a festive centerpiece in no time at all. In just 20 minutes, you can transform simple mini pretzels into a colorful, custom creation that’s not only fun to make but also a hit with party-goers and picky eaters alike! Plus, the best part? It’s a crafty way to involve the kids in the kitchen—or satisfy the kid in all of us! Ready to bring some magic to your snack table?
Why Are Halloween Pretzels So Fun?
**Delightful **treats that bring joy: These Halloween Pretzels marry sweet and salty in the most delightful way. **No-Bake **ease makes them a perfect go-to for busy parents. Customizable fun allows little chefs to unleash their creativity with sprinkles and toppings. It’s more than just a treat; it’s a family bonding activity sure to spark laughter and teamwork. These festive snacks will become a favorite at your Halloween gatherings! Want to explore other spooky treats? Check out our easy Halloween recipes.
Halloween Pretzel Ingredients
• Get ready to create a spooky delight!
For the Pretzels
- Mini pretzels (twists or rods) – Offers a wonderfully salty crunch; gluten-free pretzels are a great alternative!
For the Coating
- Candy melts (white, orange, black) – Provides vibrant colors and sweetness; you could also use chocolate chips mixed with coconut oil for a shiny finish.
For the Toppings
- Halloween sprinkles – These add extra festive flair; opt for vibrant colors to make your treats even more appealing.
- Candy eyes – A whimsical touch that brings life to your pretzels; completely optional but oh-so-fun!
- Crushed Oreos (optional) – Adds a delightful crunchy texture; they can also serve as a unique topping to surprise your friends.
Step‑by‑Step Instructions for Halloween Pretzels
Step 1: Prepare Your Baking Surface
Start by lining a baking sheet with parchment paper to prevent the Halloween pretzels from sticking. This creates a clean, non-stick surface for your decorative treats. Ensure the parchment is smooth and flat, giving you plenty of room to arrange your pretzels once dipped in candy melts.
Step 2: Melt the Candy Melts
In a microwave-safe bowl, place the candy melts and heat them in 30-second intervals at medium power. Stir after each interval until the mixture is completely smooth and glossy, typically taking about 1 to 2 minutes. Take care not to overheat, as burnt candy melts will not coat your pretzels correctly.
Step 3: Dip the Pretzels
Once the candy melts are ready, carefully dip each mini pretzel into the melted mixture, ensuring it’s fully coated. You can use a fork or your fingers for this step. Lift out the pretzel and let any excess drip off. Place the dipped pretzels back on your lined baking sheet, ready for decoration.
Step 4: Add Fun Toppings
Before the candy coating sets, sprinkle your favorite Halloween sprinkles generously over the pretzels for that festive touch. If you’re using candy eyes or crushed Oreos, now’s the time to stick those on as well. The candy melts should be slightly tacky to ensure they hold the toppings well.
Step 5: Allow to Harden
Let the decorated Halloween pretzels sit at room temperature until fully hardened, which will take about 15 minutes. You can speed up the process by placing them in the refrigerator for a few minutes but be careful not to leave them too long, as they may lose their shine.
Step 6: Store Your Treats
Once the Halloween pretzels are completely set, carefully transfer them to an airtight container. Store them at room temperature where they’ll stay fresh for up to 7 days. Enjoy these treats as part of a festive snack table or as a sweet surprise in your family’s lunchboxes!
Storage Tips for Halloween Pretzels
-
Room Temperature: Store your Halloween pretzels in an airtight container at room temperature to keep them fresh for up to 7 days. Avoid direct sunlight to maintain their vibrant colors.
-
Refrigerator: If your kitchen is warm, you can store the pretzels in the fridge for a short period. Ensure they are covered tightly to prevent moisture from affecting their texture.
-
Freezer: For longer storage, freeze your Halloween pretzels for up to 3 months. Place them in an airtight container with parchment between layers to prevent sticking.
-
Reheating: If you’d like to enjoy them warmed, briefly microwave them for about 5-10 seconds, but be cautious not to melt the candy coating! Enjoy your festive treats at their best!
Expert Tips for Halloween Pretzels
-
Melt Wisely: Ensure the candy melts are fully melted for the best coverage. Stir often and avoid overheating to maintain a smooth consistency.
-
Creative Toppings: Encourage kids to mix and match toppings to create unique designs. This keeps the process fun and results in personalized Halloween pretzels!
-
Avoid Sticking: Always use parchment paper on your baking sheet; this prevents your decorated pretzels from sticking and makes clean-up a breeze.
-
Dry Time: Allow the pretzels to harden completely before transferring them. This ensures that the decorations stay intact and your treats remain beautiful.
-
Storage Tips: Store the Halloween pretzels in an airtight container to maintain freshness; they last up to 7 days, perfect for snacking throughout the week!
Halloween Pretzels Variations & Substitutions
Let your creativity shine by customizing your Halloween pretzels with these delightful variations!
-
Chocolate Lovers: Swap the candy melts for rich milk chocolate or dark chocolate for a more indulgent treat. This twist will have chocolate fans rejoicing!
-
Gluten-Free Twist: Use gluten-free pretzels to make this recipe accessible for all your friends and family. Everyone deserves a crunchy treat!
-
Nutty Crunch: Add crushed nuts, like almonds or peanuts, as an extra topping for a satisfying crunch. They balance perfectly with the sweetness of the candy melts.
-
Spice It Up: Incorporate a sprinkle of cinnamon or pumpkin spice into the melted candy for a warm flavor profile. It’s like autumn in every bite!
-
Whimsical Colors: Use different colored candy melts or chocolate to create unique designs for each pretzel. Think beyond Halloween with pastel sits for any occasion!
-
Flavor Infusion: Mix in vanilla or almond extract into your melted candy melts for a hint of extra flavor with every bite. It’s a simple addition that enhances the overall taste.
-
DIY Sprinkles: Instead of store-bought sprinkles, create your own using colored sugar or edible glitter to add a personal touch. The kids will love this fun idea!
-
Savoury Switch: Use cheese-flavored pretzels instead of traditional mini pretzels for an unconventional and savory surprise. They can be a fun departure from the usual sweet treats!
Explore more ways to make your Halloween treats unique and delicious! If you’re interested in wholesome bites for family gatherings, don’t forget to check out our family-friendly recipes and elevate your snack game with creative ideas.
Make Ahead Options
These Halloween Pretzels are perfect for meal prep, making your festive celebrations even more enjoyable! You can prepare the pretzels by coating them with melted candy up to 3 days in advance, allowing you to focus on other treats or activities as Halloween approaches. To do this, simply follow the dipping and decorating instructions, then store the finished pretzels in an airtight container to maintain their freshness. When you’re ready to serve, allow them to sit at room temperature for a few minutes to restore their delightful crunch. Just imagine the joy of having these vibrant Halloween treats ready ahead of time, ensuring you’re stress-free during your spooky gatherings!
What to Serve with Easy No-Bake Halloween Pretzels
Nothing brings a festive spirit to your gathering like a vibrant spread alongside these spooky treats!
- Hot Apple Cider: Warm and spicy, this classic drink complements the sweet and salty flavors perfectly, enhancing the autumn vibe.
- Pumpkin Spice Dip: Creamy and seasonal, it’s a fun twist to dip your pretzels into, adding a delightful contrast to the crunch.
- Fruity Skewers: Fresh-cut fruits like oranges and grapes add brightness and balance to your dessert table, refreshing the palate.
- Chocolate Dipped Apples: This treat shares a similar sweet-salty dynamic and is always a crowd-pleaser, making it a perfect companion.
Gather the kids around to not just enjoy the Halloween Pretzels, but also these scrumptious ideas! Each addition builds a magical snack experience that they’ll remember fondly.
- Caramel Corn: The sweet and crunchy texture of caramel corn enhances the festive feelings and pairs beautifully with the pretzels.
- Ghost Cupcakes: Decorated with whimsical ghosts, these spooky treats create excitement and fun on your snack table.
- Spooky Mocktails: Offer non-alcoholic beverages with a twist, like grape juice with gummy worms, adding to the Halloween spirit!
- Candy Corn Parfait: Layered with whipped cream and fruit, this sweet treat invites both visual appeal and a delightful taste!
Halloween Pretzels Recipe FAQs
How do I choose the right mini pretzels for this recipe?
Absolutely! Look for mini pretzels that are fresh, without dark spots or any visible damage. If you’re catering to gluten-free diets, there are fantastic gluten-free pretzel options available that can provide the same salty crunch as traditional ones.
What’s the best way to store Halloween pretzels?
I recommend keeping your Halloween pretzels in an airtight container at room temperature to maintain their freshness for up to 7 days. Make sure to store them away from direct sunlight to keep those vibrant colors intact!
Can I freeze my Halloween pretzels for later?
Yes, you can freeze your Halloween pretzels! To do so, layer them in an airtight container with parchment paper between each layer to prevent sticking. They can be stored in the freezer for up to 3 months. When you’re ready to enjoy them, simply let them thaw at room temperature for about 30 minutes.
What should I do if my candy melts are too thick?
No worries! If your candy melts are too thick, you can add a small amount of coconut oil or vegetable oil to the mixture and stir until you achieve a smoother consistency. This will help the candy melt evenly and coat your pretzels beautifully.
Are there any dietary considerations with the toppings?
Very much! When selecting your toppings, you can always opt for allergy-friendly options. For instance, use dairy-free chocolate chips for candy melts, and check that your sprinkles are free from common allergens. It’s a fantastic way to ensure everyone can enjoy these delicious Halloween pretzels!
How can I make Halloween pretzels more visually appealing?
Encourage creativity! Use a variety of colored sprinkles, and mix and match different toppings for a fun look. You could even drizzle different colors of candy melts over the pretzels for added visual flair. The more, the merrier when it comes to spooky decoration!
Halloween Pretzels That Kids Will Love Making Together
Ingredients
Equipment
Method
- Prepare Your Baking Surface: Line a baking sheet with parchment paper to prevent sticking.
- Melt the Candy Melts: Heat candy melts in a microwave-safe bowl in 30-second intervals, stirring until smooth.
- Dip the Pretzels: Coat each pretzel in the melted mixture, letting excess drip off before placing them back on the baking sheet.
- Add Fun Toppings: While the coating is tacky, sprinkle with Halloween sprinkles and add candy eyes or crushed Oreos.
- Allow to Harden: Let pretzels sit at room temperature for 15 minutes to fully harden.
- Store Your Treats: Transfer hardened pretzels to an airtight container, storing at room temperature for up to 7 days.
")


