")
Introduction to Healthy Twix Bar Recipe
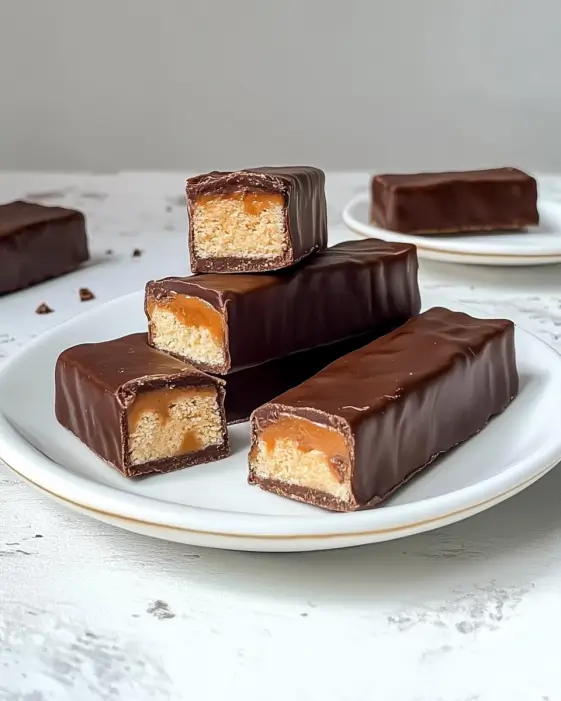
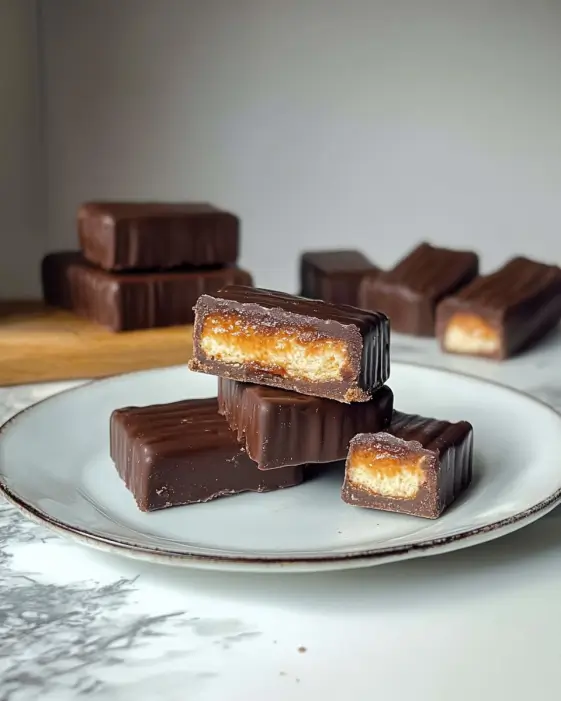
Are you craving something sweet but want to keep it healthy? Look no further! This Healthy Twix Bar Recipe is the perfect solution. It combines the delightful flavors of caramel, chocolate, and a nutty base, all while being nutritious. You can enjoy a treat that satisfies your sweet tooth without the guilt. Let’s dive into what makes this recipe so special!
What Makes This Healthy Twix Bar Recipe Unique?
This Healthy Twix Bar Recipe stands out because it uses wholesome ingredients. Instead of refined sugars and unhealthy fats, we use natural sweeteners like agave syrup and healthy fats from coconut oil and nut butters. The base is made from almond meal and coconut flour, which are both gluten-free and packed with nutrients. This means you can indulge in a delicious dessert while still nourishing your body.
Moreover, the recipe is customizable! You can easily swap ingredients to suit your dietary needs. Whether you’re vegan, gluten-free, or simply looking for a healthier option, this recipe has got you covered. The combination of flavors and textures creates a delightful experience that will leave you wanting more.
Benefits of Choosing a Healthy Twix Bar Recipe
Choosing a Healthy Twix Bar Recipe offers numerous benefits. First, it allows you to enjoy a sweet treat without the added preservatives and artificial ingredients found in store-bought candies. This means you can feel good about what you’re eating.
Additionally, this recipe is rich in healthy fats and protein, which can help keep you full longer. The almond meal and cashew butter provide essential nutrients, while the dark chocolate adds antioxidants. By making your own bars, you control the ingredients, ensuring they are both delicious and nutritious.
Lastly, preparing these bars at home can be a fun activity! Involving family or friends in the process can make it even more enjoyable. So, gather your ingredients and get ready to create a delightful treat that everyone will love!
Ingredients for Healthy Twix Bar Recipe
To create your own Healthy Twix Bars, you’ll need a selection of wholesome ingredients. Each component plays a vital role in achieving that perfect balance of flavor and texture. Here’s what you’ll need:
- 1 cup almond meal: This serves as the base, providing a nutty flavor and a good source of protein.
- 1/4 cup coconut flour: This adds fiber and helps bind the ingredients together.
- 1/4 cup agave syrup: A natural sweetener that gives the bars a touch of sweetness without refined sugars.
- 1/4 cup melted coconut oil: This healthy fat helps create a rich texture and adds moisture.
- 1/2 teaspoon almond extract: This enhances the nutty flavor, making the bars even more delicious.
- 1/4 teaspoon sea salt: A pinch of salt balances the sweetness and enhances the overall flavor.
- 1/2 cup creamy cashew butter: This acts as the caramel layer, providing creaminess and healthy fats.
- 1/2 cup dark chocolate chunks (at least 70% cocoa): For the chocolate coating, offering rich flavor and antioxidants.
- 1 tablespoon coconut oil (for chocolate melting): This helps the chocolate melt smoothly and evenly.
Feel free to get creative! For added crunch, consider mixing in some chopped walnuts or sunflower seeds into the base. If you need a nut-free option, sunflower seed butter can easily replace the cashew butter. This flexibility allows you to tailor the recipe to your taste and dietary preferences.
Step-by-Step Preparation of Healthy Twix Bar Recipe
Now that you have all your ingredients ready, it’s time to bring this Healthy Twix Bar Recipe to life! Follow these simple steps to create a delicious treat that everyone will love. Each step is easy to follow, ensuring a fun and rewarding cooking experience.
Step 1: Preparing the Base for Healthy Twix Bar Recipe
Start by making the base of your Healthy Twix Bars. In a mixing bowl, combine the almond meal, coconut flour, agave syrup, melted coconut oil, almond extract, and sea salt. Use a spatula or your hands to mix everything together until a cohesive dough forms. It should be slightly sticky but hold together well.
Next, transfer this mixture into an 8×8-inch baking dish lined with parchment paper. Press the dough down firmly to create an even base. Make sure it’s compact, as this will help the bars hold their shape later. Once you’ve pressed it down, chill the crust in the refrigerator for about 20 minutes. This step is crucial as it helps the base set properly.
Step 2: Making the Caramel Layer in Healthy Twix Bar Recipe
After the base has chilled, it’s time to add the caramel layer. Take your creamy cashew butter and spread it generously over the chilled base. Use a spatula to ensure an even layer, covering the entire surface. This layer adds a rich, creamy texture that mimics traditional caramel.
Once you’ve spread the cashew butter, you can set the dish aside while you prepare the chocolate coating. This layer is what makes these bars truly irresistible!
Step 3: Creating the Chocolate Coating for Healthy Twix Bar Recipe
For the chocolate coating, grab a microwave-safe bowl and combine the dark chocolate chunks with 1 tablespoon of coconut oil. Heat the mixture in the microwave in 30-second bursts. Stir after each interval until the chocolate is fully melted and silky smooth. Be careful not to overheat it, as chocolate can burn easily.
Once melted, drizzle the chocolate over the cashew butter layer. Use a spatula to smooth it out evenly, ensuring every bite is filled with delicious chocolate goodness. This step adds a rich flavor and a beautiful finish to your Healthy Twix Bars.
Step 4: Assembling the Healthy Twix Bar Recipe
Now that you have all the layers prepared, it’s time to assemble your Healthy Twix Bars! Place the dish back in the refrigerator for at least 30 minutes. This allows the chocolate to harden completely, making it easier to cut the bars later.
After the chocolate has set, carefully lift the bars out using the edges of the parchment paper. Place them on a cutting board and slice them into squares or rectangles, depending on your preference. Each piece will be a delightful combination of nutty, creamy, and chocolatey goodness!
Variations of Healthy Twix Bar Recipe
One of the best things about the Healthy Twix Bar Recipe is its versatility. You can easily modify it to suit different dietary needs or personal preferences. Here are some exciting variations to consider!
Vegan Options for Healthy Twix Bar Recipe
If you’re following a vegan diet, you can still enjoy these delicious bars! The original recipe is already quite close to being vegan-friendly. To ensure it’s completely plant-based, simply replace the creamy cashew butter with a vegan alternative, such as almond butter or sunflower seed butter. Both options provide a creamy texture and rich flavor.
Additionally, make sure to use dark chocolate that is labeled vegan. Many brands offer dairy-free chocolate options that are perfect for this recipe. By making these simple swaps, you can create a delightful vegan treat that everyone will love!
Gluten-Free Alternatives in Healthy Twix Bar Recipe
This Healthy Twix Bar Recipe is naturally gluten-free, thanks to the use of almond meal and coconut flour. However, if you want to explore other gluten-free options, consider using oat flour or a gluten-free all-purpose flour blend. These alternatives can provide a different texture while still keeping the bars delicious.
For those who are sensitive to gluten, always check the labels of your ingredients. Ensure that the almond meal and coconut flour are certified gluten-free. This way, you can enjoy your Healthy Twix Bars without any worries!
Feel free to experiment with these variations. The beauty of this recipe lies in its adaptability, allowing you to create a treat that fits your lifestyle and taste preferences. Enjoy the process of making these bars your own!

Cooking Note for Healthy Twix Bar Recipe
When preparing your Healthy Twix Bars, a few cooking notes can help ensure your success. First, always measure your ingredients accurately. This is crucial for achieving the right texture and flavor. Using a kitchen scale can be beneficial, especially for the almond meal and coconut flour.
Next, be mindful of the temperature of your ingredients. For instance, if your coconut oil is too hot, it can affect the consistency of your dough. Allow it to cool slightly before mixing it with other ingredients. This will help maintain the integrity of the base.
Additionally, when melting the chocolate, stir gently and frequently. This prevents it from burning and ensures a smooth, glossy finish. If you find the chocolate is too thick, you can add a little more coconut oil to achieve the desired consistency.
Lastly, patience is key! Allowing the bars to chill properly in the refrigerator is essential for setting the layers. Rushing this step can lead to a messy cut and a less enjoyable texture. So, take your time and let the bars firm up before slicing.
By following these cooking notes, you’ll create Healthy Twix Bars that are not only delicious but also visually appealing. Enjoy the process and the delightful results!
Serving Suggestions for Healthy Twix Bar Recipe
Once your Healthy Twix Bars are ready, it’s time to think about how to serve them! These bars are not only delicious but also versatile, making them perfect for various occasions. Here are some delightful serving suggestions to enhance your experience:
- As a Snack: Enjoy these bars as a quick snack between meals. They are perfect for curbing cravings and providing a boost of energy thanks to their healthy fats and protein content.
- With a Cup of Tea or Coffee: Pair your Healthy Twix Bars with a warm cup of tea or coffee. The rich flavors of chocolate and nutty goodness complement the warmth of your beverage beautifully.
- As a Dessert: Serve these bars as a healthier dessert option after dinner. You can even add a scoop of dairy-free ice cream on the side for an extra treat!
- At Parties: Cut the bars into smaller pieces and serve them at gatherings or parties. They make a great finger food that everyone can enjoy without feeling guilty.
- With Fresh Fruit: For a refreshing twist, serve your Healthy Twix Bars with a side of fresh fruit. Slices of strawberries, bananas, or apples can add a burst of flavor and color to your plate.
Feel free to get creative with your serving ideas! The Healthy Twix Bars can be enjoyed in many ways, making them a delightful addition to any meal or occasion. No matter how you choose to serve them, you’re sure to impress your family and friends with this tasty treat!
Tips for Perfecting Your Healthy Twix Bar Recipe
Creating the perfect Healthy Twix Bars is all about attention to detail and a few helpful tips. With these suggestions, you can ensure that your bars turn out delicious every time. Let’s explore some key tips to elevate your baking experience!
Use Quality Ingredients
First and foremost, the quality of your ingredients matters. Opt for high-quality dark chocolate with at least 70% cocoa. This not only enhances the flavor but also adds more antioxidants. Similarly, choose organic nut butters and natural sweeteners for the best taste and health benefits.
Chill Between Layers
After preparing each layer, don’t skip the chilling step! Allowing the base and the cashew butter to set in the refrigerator helps maintain the structure of the bars. This makes cutting them easier and ensures that each layer holds its shape.
Experiment with Flavors
Feel free to get creative with flavors! You can add spices like cinnamon or vanilla extract to the base for an extra kick. Additionally, consider mixing in some dried fruits or seeds for added texture and flavor. The possibilities are endless!
Cutting Techniques
When it’s time to cut your bars, use a sharp knife for clean edges. Warming the knife slightly under hot water can help make slicing easier. This way, you’ll achieve neat squares or rectangles that look as good as they taste.
Store Properly
To keep your Healthy Twix Bars fresh, store them in an airtight container in the refrigerator. They can last up to a week, but they’re so delicious, they might not last that long! If you want to keep them longer, consider freezing them. Just make sure to wrap them well to prevent freezer burn.
By following these tips, you’ll be well on your way to mastering the Healthy Twix Bar Recipe. Enjoy the process and the delightful results that come with it!
Breakdown of Time for Healthy Twix Bar Recipe
Understanding the time needed to prepare your Healthy Twix Bars can help you plan better. Here’s a simple breakdown of the time required for each step, ensuring you can enjoy these delicious treats without any surprises!
Prep Time for Healthy Twix Bar Recipe
The prep time for this Healthy Twix Bar Recipe is approximately 15 minutes. This includes gathering all your ingredients, measuring them accurately, and mixing the base. It’s a quick and straightforward process, making it easy to whip up these bars even on a busy day!
Cooking Time for Healthy Twix Bar Recipe
Once you’ve prepared the base, the cooking time is minimal. You’ll need about 20 minutes for the base to chill in the refrigerator. After that, spreading the cashew butter and melting the chocolate takes another 10 minutes. So, the total cooking time is around 30 minutes, including chilling and assembly.
Total Time for Healthy Twix Bar Recipe
In total, you can expect to spend about 45 minutes to 1 hour from start to finish. This includes prep time, cooking time, and the necessary chilling time for the layers to set properly. Once you’ve made these bars, you’ll have a delightful treat ready to enjoy!
With this time breakdown, you can easily fit the Healthy Twix Bar Recipe into your schedule. Whether you’re making them for a special occasion or just for yourself, the effort is well worth it!
Nutritional Information for Healthy Twix Bar Recipe
Understanding the nutritional content of your Healthy Twix Bars is essential for making informed choices. This recipe not only satisfies your sweet cravings but also provides valuable nutrients. Let’s break down the key nutritional components of these delicious bars!
Calories in Healthy Twix Bar Recipe
Each serving of the Healthy Twix Bars contains approximately 180 calories. This makes them a great option for a sweet treat without going overboard on calories. The combination of healthy fats and protein helps keep you satisfied, making it easier to enjoy just one or two bars at a time.
Protein Content in Healthy Twix Bar Recipe
These bars pack a protein punch, offering about 5 grams of protein per serving. The protein comes from the almond meal and cashew butter, both of which are excellent sources of plant-based protein. This makes the Healthy Twix Bars a great snack option, especially for those looking to increase their protein intake while enjoying a sweet treat.
Sodium Levels in Healthy Twix Bar Recipe
In terms of sodium, each serving contains around 50 milligrams. This is relatively low, especially when compared to many store-bought snacks. The small amount of sea salt used in the recipe helps enhance the flavors without adding excessive sodium. This makes the Healthy Twix Bars a heart-healthy choice for those monitoring their sodium intake.
Overall, the nutritional profile of these Healthy Twix Bars makes them a smart choice for a guilt-free indulgence. With a balance of calories, protein, and low sodium, you can enjoy these bars while feeling good about what you’re eating!
FAQs about Healthy Twix Bar Recipe
Can I substitute ingredients in the Healthy Twix Bar Recipe?
Absolutely! This Healthy Twix Bar Recipe is quite flexible. You can swap almond meal for other nut flours, like hazelnut or pecan flour, if you prefer. If you need a nut-free option, sunflower seed flour works well too. For the sweetener, feel free to use maple syrup or honey instead of agave syrup. Just keep in mind that these alternatives may slightly change the flavor and texture.
How long do Healthy Twix Bars last?
Your Healthy Twix Bars can last up to a week when stored properly. Keep them in an airtight container in the refrigerator to maintain freshness. If you want to enjoy them longer, consider freezing them. Just make sure to wrap them well to prevent freezer burn. They can last for up to three months in the freezer!
Can I freeze the Healthy Twix Bar Recipe?
Yes, you can freeze your Healthy Twix Bars! After slicing them, place the bars in a single layer on a baking sheet and freeze until solid. Then, transfer them to an airtight container or freezer bag. This way, you can enjoy a sweet treat anytime you want without the hassle of making them from scratch each time!
What are some common mistakes to avoid in the Healthy Twix Bar Recipe?
One common mistake is not measuring ingredients accurately. This can affect the texture and flavor of your bars. Another mistake is skipping the chilling time between layers. This step is crucial for ensuring the bars hold their shape when cut. Lastly, be careful not to overheat the chocolate when melting it. Stir frequently and use short bursts in the microwave to achieve a smooth consistency. By avoiding these pitfalls, you’ll create delicious Healthy Twix Bars every time!
Conclusion on Healthy Twix Bar Recipe
In conclusion, the Healthy Twix Bar Recipe is a delightful way to satisfy your sweet cravings while keeping your health in check. With its rich layers of nutty goodness, creamy cashew butter, and luscious dark chocolate, this recipe offers a guilt-free indulgence that everyone can enjoy. Not only is it easy to make, but it also allows for customization to fit various dietary needs.
By using wholesome ingredients like almond meal, coconut flour, and natural sweeteners, you can create a treat that is both delicious and nutritious. The benefits of making your own bars are numerous, from controlling the ingredients to enjoying a fun cooking experience with family and friends. Plus, with the ability to modify the recipe for vegan or gluten-free options, there’s something for everyone!
So, whether you’re looking for a quick snack, a dessert to impress guests, or a healthy treat to enjoy with your coffee, these Healthy Twix Bars are the perfect choice. Remember to follow the tips and variations provided to make them your own. With a little creativity and patience, you’ll master this recipe and have a delicious treat ready to share or savor all on your own.
Now, it’s time to gather your ingredients and get started! Enjoy the process of making these delightful bars, and most importantly, enjoy every bite of your Healthy Twix Bars. Happy baking!
")