")
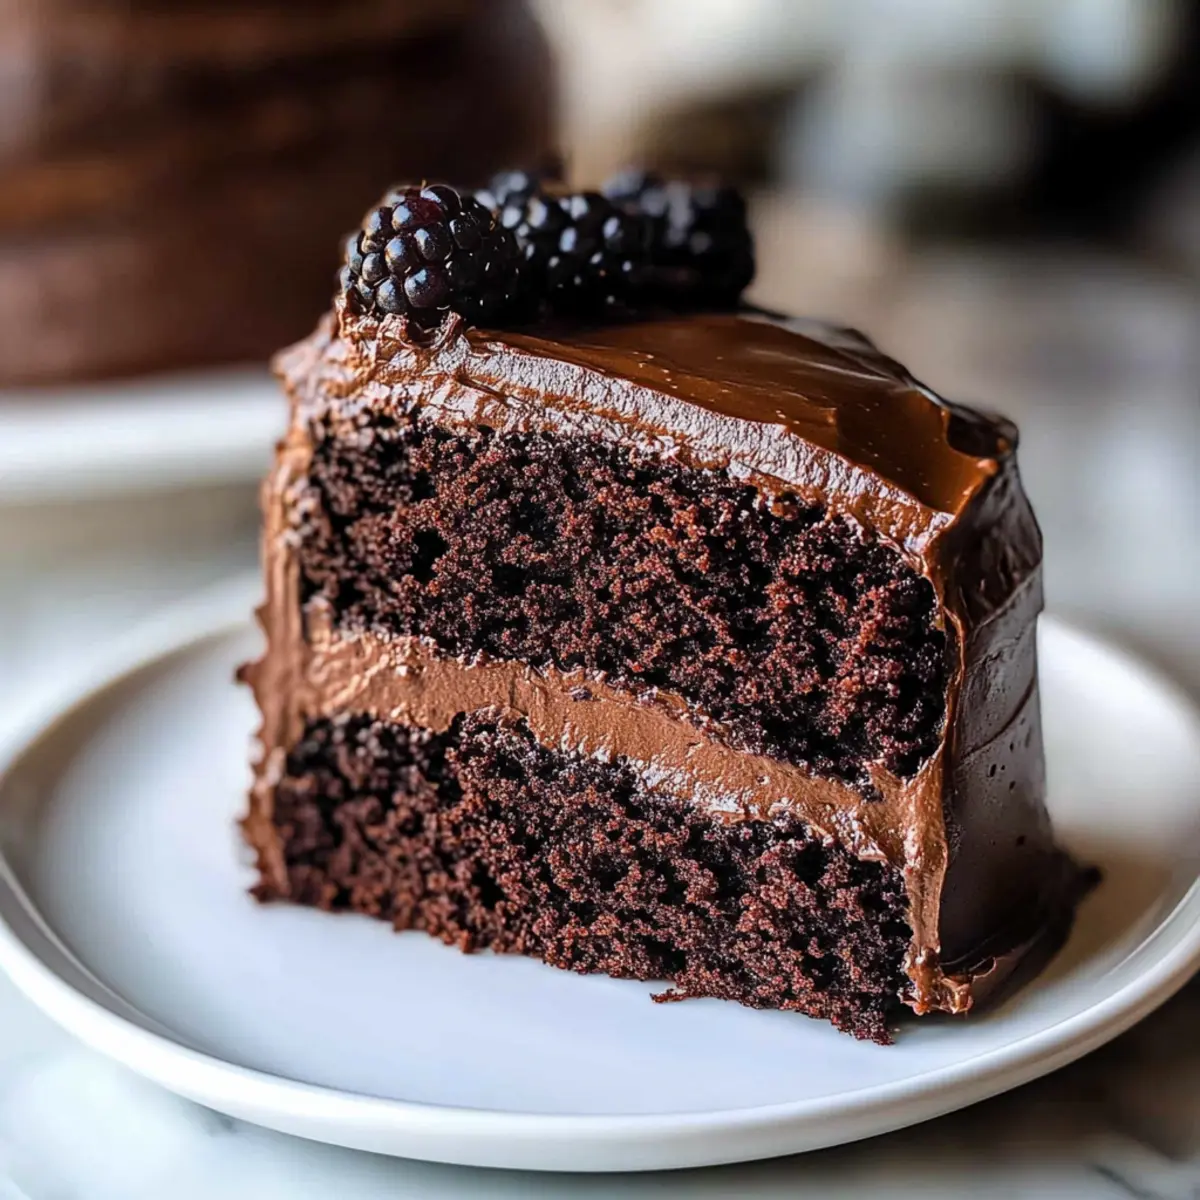
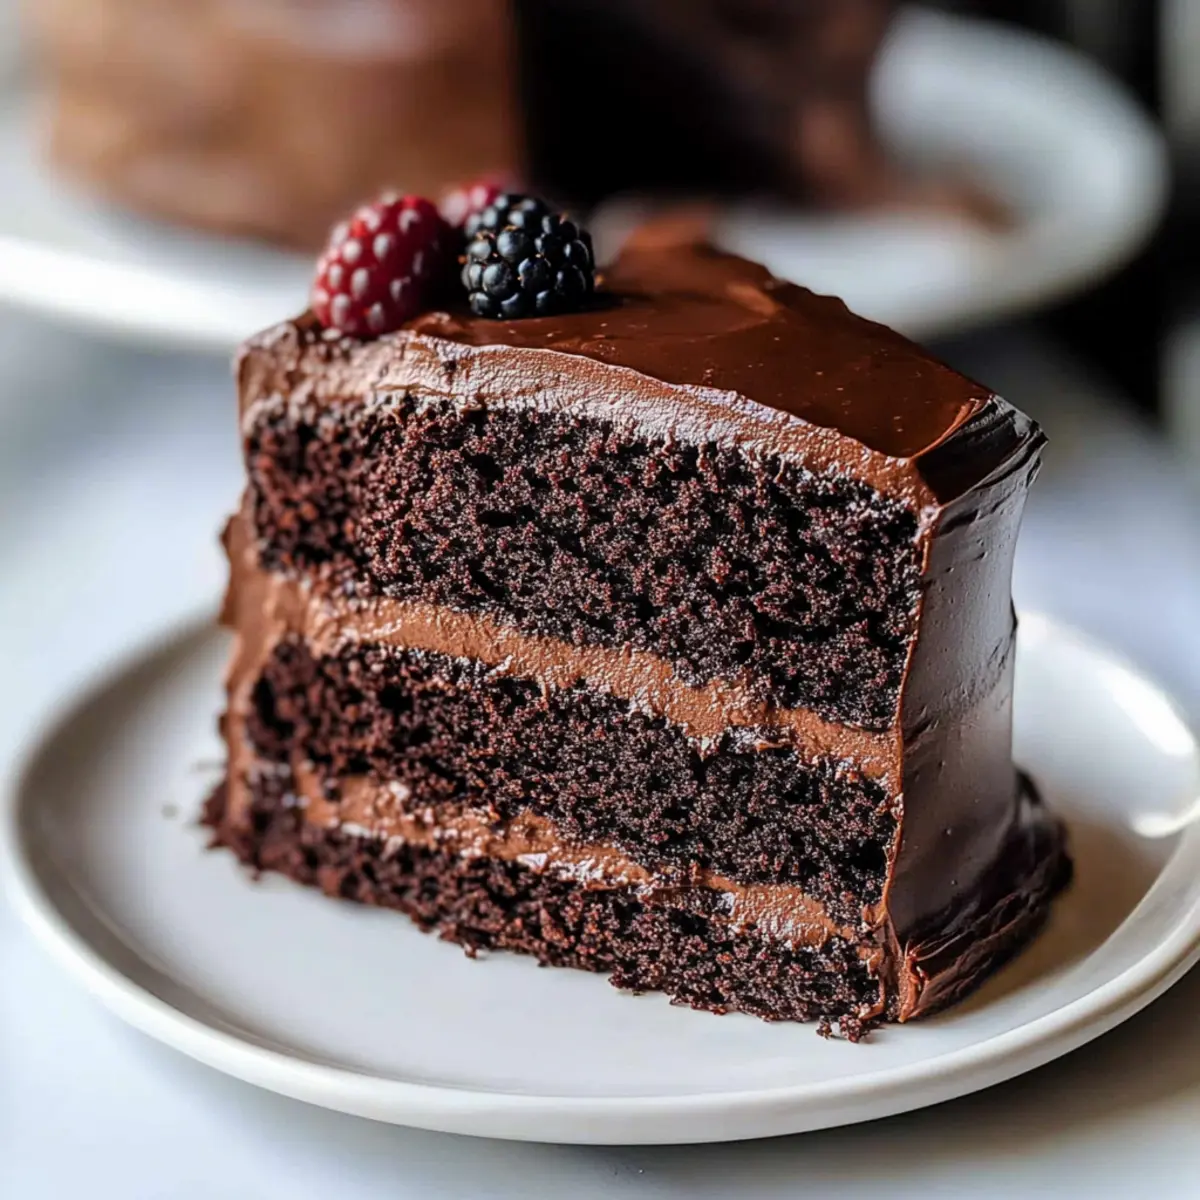
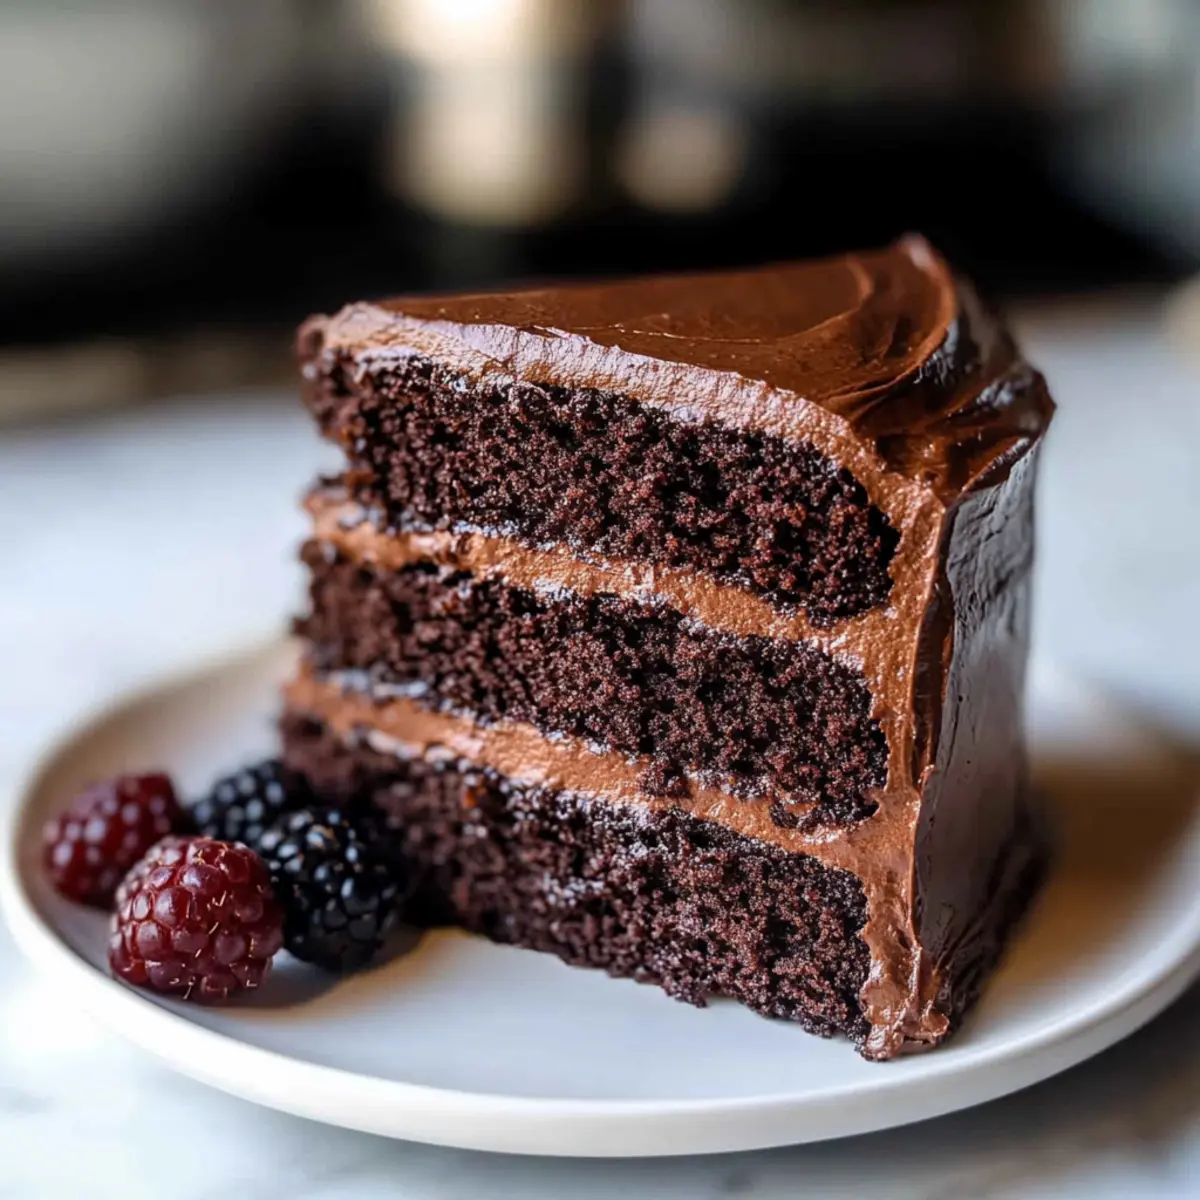
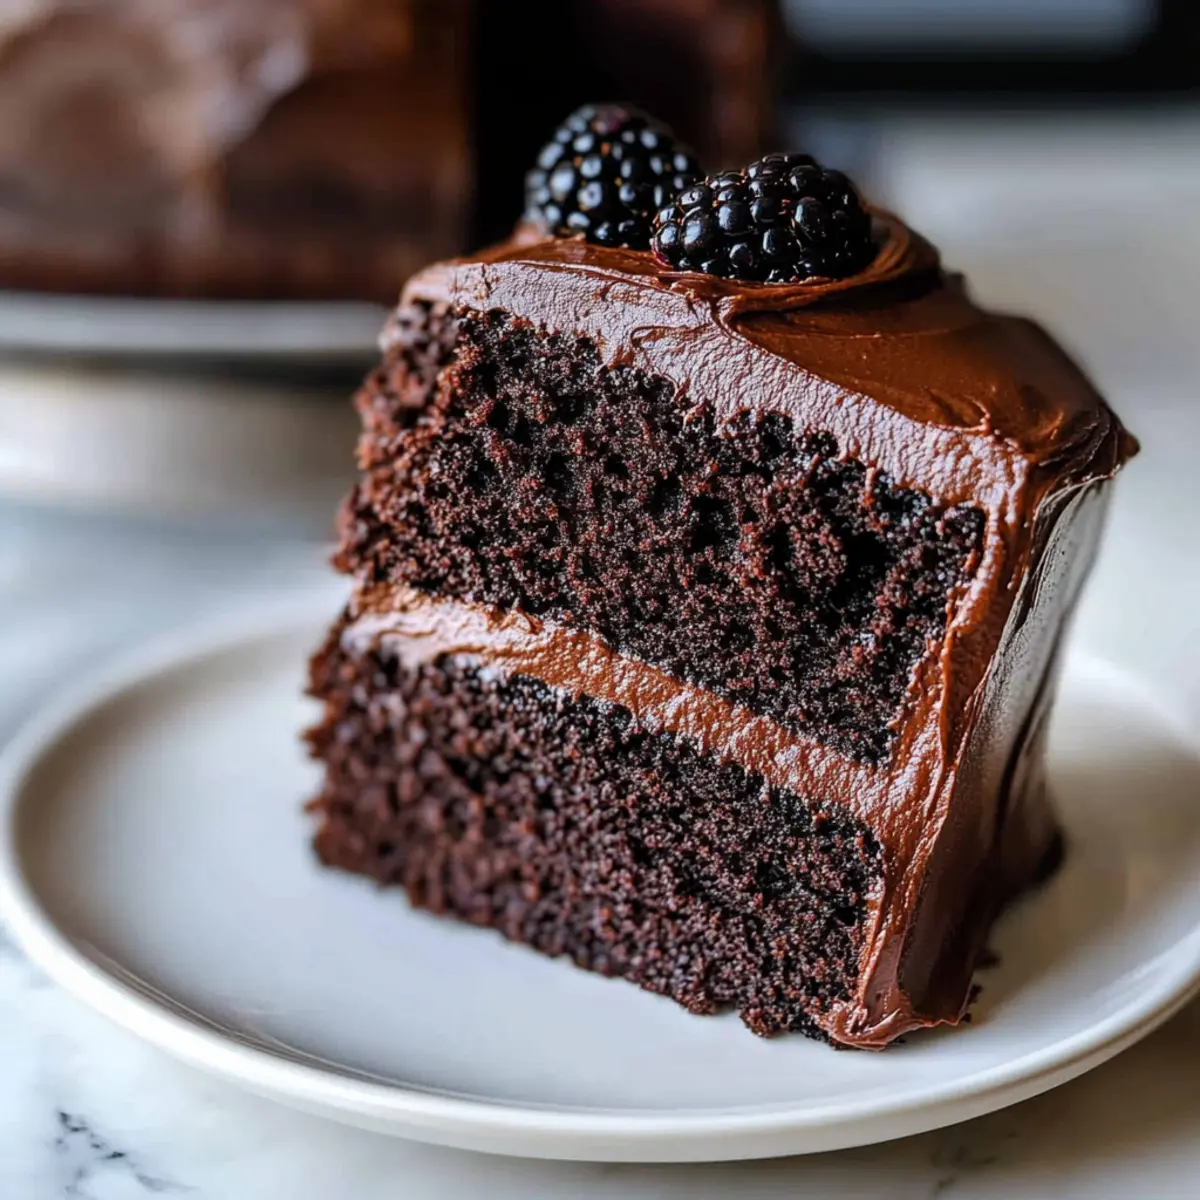
The moment the oven door creaks open, a wave of rich cocoa aroma fills the kitchen, instantly lifting spirits and stirring nostalgia. This Classic Homemade Chocolate Cake is not just any dessert; it’s a slice of happiness that evokes fond memories and creates new traditions in our homes. What makes this recipe so enchanting is its simplicity—despite being a crowd-pleaser, it requires just 30 minutes of your time, perfect for busy lifestyles. With gluten-free options available, everyone can indulge in its moist, tender crumb. Whether you’re celebrating a special occasion or simply satisfying a chocolate craving, this cake brings joy to every bite. Are you ready to whip up a masterpiece that will have your loved ones asking for seconds?
Why Is This Homemade Chocolate Cake Special?
Irresistibly Moist: This cake boasts a tender crumb that melts in your mouth, thanks to the secret ingredient of boiling water which activates the cocoa beautifully.
Quick and Easy: In just 30 minutes, you can have a delightful dessert ready, making it perfect for the busiest of nights.
Versatile Ingredients: With gluten-free and non-dairy substitutions, everyone can enjoy this classic treat without compromise.
Nostalgic Comfort: Each slice offers a taste of nostalgia, evoking warmth from childhood celebrations and creating new sweet memories.
Festive and Fun: Whether adorned with fresh berries or a drizzle of caramel, this cake captures the joy of every occasion. Elevate your dessert game with this delectable Chocolate Chalet Cake or explore a delightful Fricassee Cake Global to satisfy your baking cravings!
Homemade Chocolate Cake Ingredients
For the Cake
• All-purpose flour – Provides structure and texture; for a gluten-free option, use a gluten-free 1:1 flour blend.
• Granulated sugar – Adds sweetness and moistness to the cake.
• Unsweetened cocoa powder – Delivers a rich chocolate flavor that defines this homemade chocolate cake.
• Baking powder – Acts as a leavening agent for a delightful cake rise.
• Baking soda – Enhances the leavening and browning of the cake.
• Salt – Balances sweetness and enhances the overall flavor profile.
• Eggs – Binds the ingredients together and contributes moisture.
• Milk – Adds richness and moisture; for lactose-free versions, consider almond milk or another non-dairy milk.
• Vegetable oil – Keeps the cake tender and moist.
• Vanilla extract – Elevates and enhances the overall flavor of the cake.
• Boiling water – Activates the cocoa powder, ensuring a moist and rich texture.
For the Frosting
• Butter – The creamy base for frosting that adds richness.
• Powdered sugar – Sweetens and thickens the frosting to your desired consistency.
• Vanilla extract (for frosting) – Infuses flavor, making the frosting irresistible.
Get ready to create a moist and delicious homemade chocolate cake that will delight everyone at your table!
Step‑by‑Step Instructions for Homemade Chocolate Cake
Step 1: Preheat the Oven
Begin by preheating your oven to 350°F (175°C). While it’s heating, prepare two 9-inch round cake pans by greasing them with butter or vegetable oil, then dusting them lightly with flour. This will prevent your moist homemade chocolate cake from sticking, allowing for a perfect release after baking.
Step 2: Combine the Dry Ingredients
In a large mixing bowl, whisk together 1 and 3/4 cups of all-purpose flour, 2 cups of granulated sugar, 3/4 cup unsweetened cocoa powder, 1 and 1/2 teaspoons of baking powder, 1 and 1/2 teaspoons of baking soda, and 1 teaspoon of salt. This step is crucial to ensure even distribution of the leavening agents, creating a uniformly moist cake.
Step 3: Add the Wet Ingredients
To the dry mixture, add 2 large eggs, 1 cup of milk, 1/2 cup of vegetable oil, and 2 teaspoons of vanilla extract. Using an electric mixer, beat on medium speed for about 2 minutes until smooth and well-blended. The batter should feel quite thick and glossy, indicating it’s ready for the next step.
Step 4: Incorporate Boiling Water
Carefully stir in 1 cup of boiling water to the batter. This will create a thin batter, which may seem unusual, but it’s essential for achieving the moist texture of your homemade chocolate cake. Mix until the batter is entirely smooth and well-combined, ensuring there are no lumps.
Step 5: Bake the Cake
Divide the thin batter evenly between the prepared cake pans. Place them in the preheated oven and bake for 30 to 35 minutes, or until a toothpick inserted into the center comes out clean or with a few moist crumbs. Keep an eye on them; once baked, the cakes should spring back when lightly touched.
Step 6: Cool the Cakes
Once baked, remove the cake pans from the oven and let them cool in the pans for about 10 minutes. Then, carefully transfer the cakes to wire racks to cool completely. This step is crucial, as a fully cooled cake will be easier to frost and will hold up better to any decorations.
Step 7: Prepare the Frosting
While your cakes cool, start on the frosting. In a mixing bowl, beat together 1/2 cup of softened butter and 2/3 cup of unsweetened cocoa powder until creamy. Gradually add 3 cups of powdered sugar and about 1/3 cup of milk, mixing until you achieve a smooth and spreadable frosting. Adjust the consistency with more milk if necessary.
Step 8: Frost the Cakes
Once the cakes are completely cooled, place one layer on a serving plate. Spread a generous layer of frosting on top, then carefully position the second layer on top. Use the remaining frosting to cover the top and sides of your cake, creating a beautiful and indulgent finish that’s perfect for your homemade chocolate cake.
Homemade Chocolate Cake Variations
Feel free to explore creative twists on this delightful recipe to make it truly your own!
- Gluten-Free: Swap all-purpose flour for a gluten-free 1:1 flour blend for a delicious cake that everyone can enjoy guilt-free.
- Dairy-Free: Use almond milk or another non-dairy milk option to enjoy a cake that’s equally moist and rich, while accommodating lactose intolerance.
- Egg-Free: Substitute eggs with flax eggs or unsweetened applesauce for a delightful vegan version that still packs a chocolatey punch!
- Flavor Boost: Add a teaspoon of espresso powder for a deep, rich flavor, enhancing the chocolate’s natural qualities and creating a more sophisticated taste!
- Chocolate Chips: Fold in 1 cup of chocolate chips into the batter before baking, adding delightful bursts of chocolate in every slice.
- Frosting Variety: For a twist on the traditional frosting, try a peanut butter frosting for a sweet and salty combination—sure to be a hit!
- Berry Bliss: Top the cake with fresh berries or raspberry sauce for a refreshing contrast that balances the rich chocolate beautifully.
- Spicy Kick: Add a pinch of cayenne pepper or chili powder to the batter for a surprising hint of heat that complements the chocolate flavor!
There’s no limit to how you can customize this classic! As you experiment, don’t forget to try pairing your cake with a scoop of vanilla ice cream or drizzling it with some homemade Strawberry Cake Filling for an indulgent treat. Happy baking!
Make Ahead Options
These Classic Homemade Chocolate Cake components are perfect for meal prep enthusiasts! You can prepare the dry ingredients (flour, sugar, cocoa powder, baking powder, baking soda, and salt) up to 24 hours in advance and store them in an airtight container to maintain freshness. Additionally, the cake layers can be baked a day ahead; just be sure to cool them completely and wrap them tightly in plastic wrap before refrigerating—this will help keep them moist. When you’re ready to serve, simply make the frosting and assemble the cake. With these make-ahead options, you’ll enjoy a delightful dessert while saving precious time on busy weeknights!
How to Store and Freeze Homemade Chocolate Cake
Room Temperature: Store your homemade chocolate cake in an airtight container at room temperature for up to 3 days to maintain its moist texture.
Fridge: If you’d like to extend freshness, keep the cake refrigerated for up to a week. Ensure it is well-wrapped or in a container to prevent it from drying out.
Freezer: For longer storage, wrap individual slices of the cake tightly in plastic wrap and then in aluminum foil. This can keep them frozen for up to 3 months without losing moisture.
Reheating: To enjoy leftovers, thaw the cake slices in the fridge overnight and gently warm them in the microwave for 10-15 seconds before serving for that fresh-baked taste!
Expert Tips for Homemade Chocolate Cake
Room Temperature Ingredients: Ensure that your eggs and milk are at room temperature before mixing; this helps create a smoother batter and a more consistent rise in your homemade chocolate cake.
Accurate Measuring: Scoop flour using a spoon and lightly level it with a knife to avoid packing it down. This prevents a dry cake due to excess flour.
Don’t Overbake: Always use the toothpick test! Insert a toothpick in the center of the cake; it should come out with a few moist crumbs for perfect doneness.
Boiling Water Importance: Incorporating boiling water is a key step. It activates the cocoa for a deeper flavor while ensuring your cake remains as moist as possible.
Cooling Time: Allow cakes to cool fully before frosting them. This step is vital to prevent melting your frosting on a warm cake and ensures a clean slice when served.
Frosting Consistency: If your frosting is too thick, add milk in small increments until you reach the desired spreadable consistency. A smooth frosting elevates your homemade chocolate cake!
What to Serve with Classic Homemade Chocolate Cake
Indulging in a slice of this delightful chocolate cake is just the beginning of your culinary adventure. Let’s explore some perfect pairings that elevate your dessert experience!
-
Creamy Vanilla Ice Cream: The rich chocolate flavor beautifully contrasts with the cool creaminess of vanilla ice cream, creating a classic combination that’s hard to resist.
-
Fresh Berries: Sweet strawberries or tart raspberries add a burst of freshness, bringing balance and a pop of color to your dessert plate.
-
Whipped Cream: Light and fluffy, whipped cream complements the dense chocolate cake perfectly, enhancing its richness without overwhelming it.
-
Chocolate Ganache: For the ultimate chocolate lover, adding a glossy layer of ganache brings an extra indulgence that makes every bite even more decadent.
-
Espresso or Coffee: A warm cup of coffee or a shot of espresso cuts through the sweetness, enhancing the chocolatey notes of the cake and elevating your dessert experience.
-
Sparkling Wine: A glass of bubbly adds a festive touch to your meal, and its effervescence contrasts nicely with the cake’s moist texture.
Any of these delightful pairings will create a memorable culinary experience, ensuring that your classic homemade chocolate cake shines even brighter on the table!
Homemade Chocolate Cake Recipe FAQs
How do I choose the right cocoa powder for my cake?
Absolutely! For the best flavor in your homemade chocolate cake, opt for high-quality Dutch-processed cocoa powder. It has a milder flavor and a darker color compared to regular cocoa powder, enhancing the richness of your cake. Look for cocoa with a deep, intense color and a flavor that captures the essence of chocolate. Remember, the fresher the cocoa, the better the taste!
What’s the best way to store leftover cake?
Very! Store your homemade chocolate cake in an airtight container at room temperature for up to 3 days. If you want to extend its freshness, refrigerate it for up to a week. Ensure it’s well-wrapped to keep that moist texture intact. If you find yourself with more cake than you can eat within that timeframe, freezing is always a great option!
How can I freeze my chocolate cake properly?
Absolutely! To freeze your homemade chocolate cake, first, ensure it’s completely cooled. Slice the cake into individual portions, then wrap each slice tightly in plastic wrap. For extra protection, wrap each slice in aluminum foil as well. This method helps prevent freezer burn. Your cake can be frozen for up to 3 months! When ready to enjoy, simply thaw overnight in the fridge and warm in the microwave for about 10-15 seconds for that fresh-baked taste.
What if my cake turns out dry?
Oh no! If your homemade chocolate cake ends up dry, it could be due to overbaking or incorrect measurements. To counteract this, ensure you’re using the toothpick test—insert one into the center of the cake; if it comes out with a few moist crumbs, it’s done! Additionally, keep an eye on baking times and use room temperature ingredients for a smooth mix. If you’ve already baked the cake, a simple syrup can be brushed on top to add moisture back in; just combine equal parts sugar and water, heat until dissolved, and let cool before applying!
Can I make substitutions to cater to dietary restrictions?
Very! You can easily make your homemade chocolate cake more inclusive by using a gluten-free 1:1 flour blend as a substitute for all-purpose flour. For a dairy-free option, almond milk works beautifully instead of regular milk. Eggs can be substituted with flax eggs or unsweetened applesauce for a vegan version. Just keep in mind that substitutions may slightly alter the texture and flavor, so do a little experimenting!
What allergens should I be aware of?
Great question! While this homemade chocolate cake is nut-free and can be made gluten-free and dairy-free, always check your ingredient labels for cross-contamination. If you’re baking for someone with severe allergies, look for certified gluten-free flour and dairy alternatives to ensure safety. Enjoy baking with peace of mind!
Decadent Homemade Chocolate Cake That Melts in Your Mouth
Ingredients
Equipment
Method
- Preheat the oven to 350°F (175°C) and prepare two 9-inch round cake pans.
- In a large mixing bowl, whisk together flour, sugar, cocoa powder, baking powder, baking soda, and salt.
- Add eggs, milk, oil, and vanilla to dry ingredients and beat on medium speed for 2 minutes until smooth.
- Stir in boiling water to the batter until smooth; the batter will be thin.
- Divide batter between prepared pans and bake for 30 to 35 minutes, checking with a toothpick.
- Cool the cakes in pans for 10 minutes, then transfer to wire racks to cool completely.
- For the frosting, beat together butter and cocoa until creamy. Gradually add powdered sugar and milk.
- Once cooled, frost the cakes, layering with frosting in between and on top.
")