")
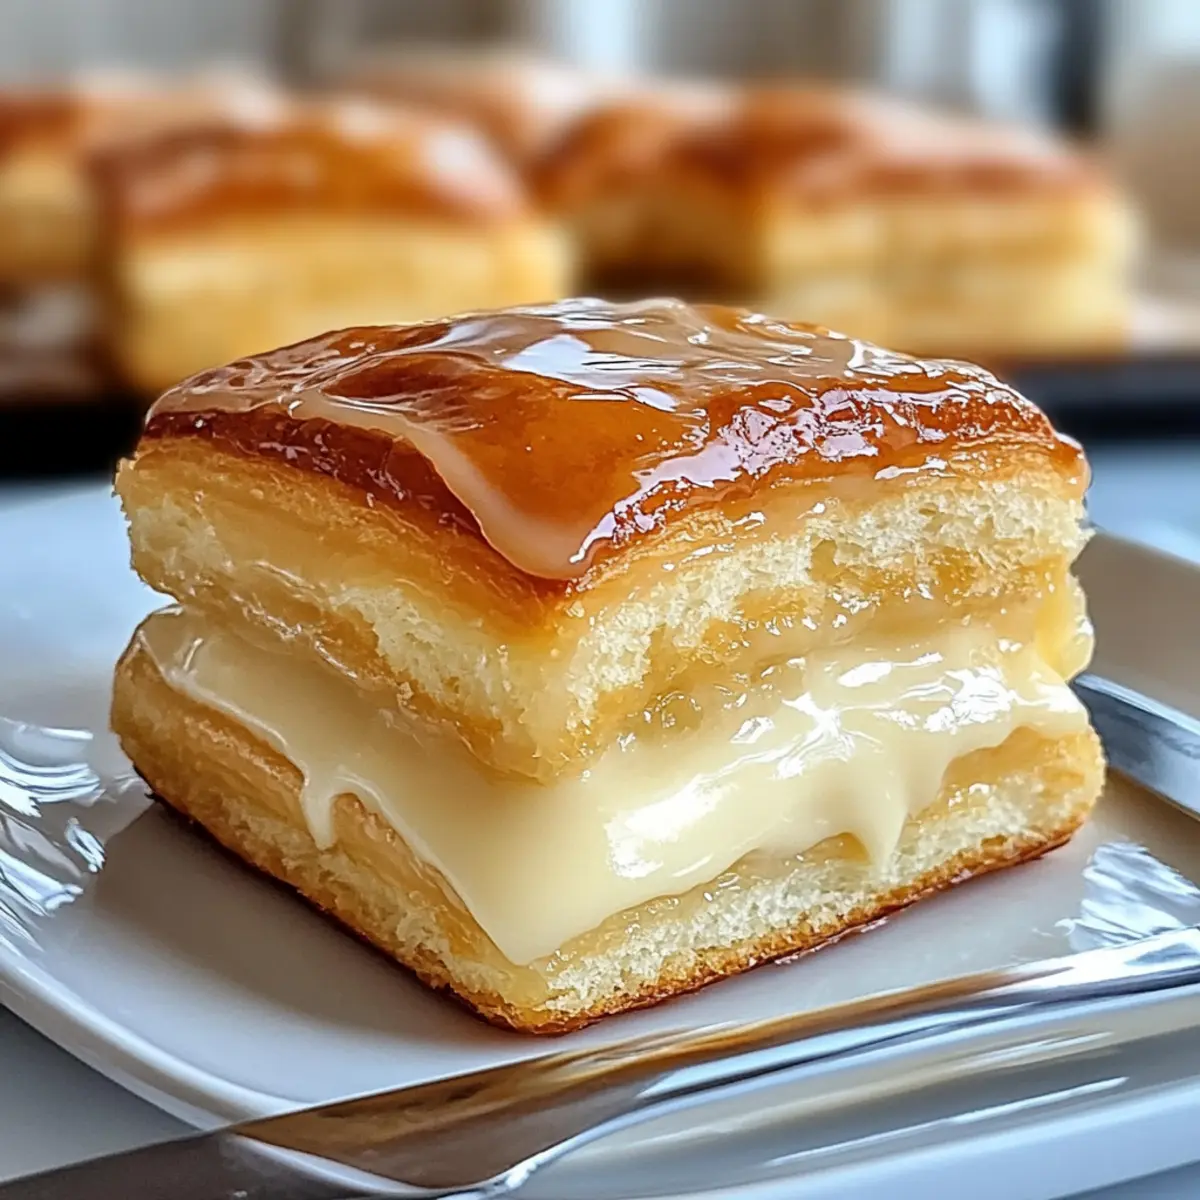
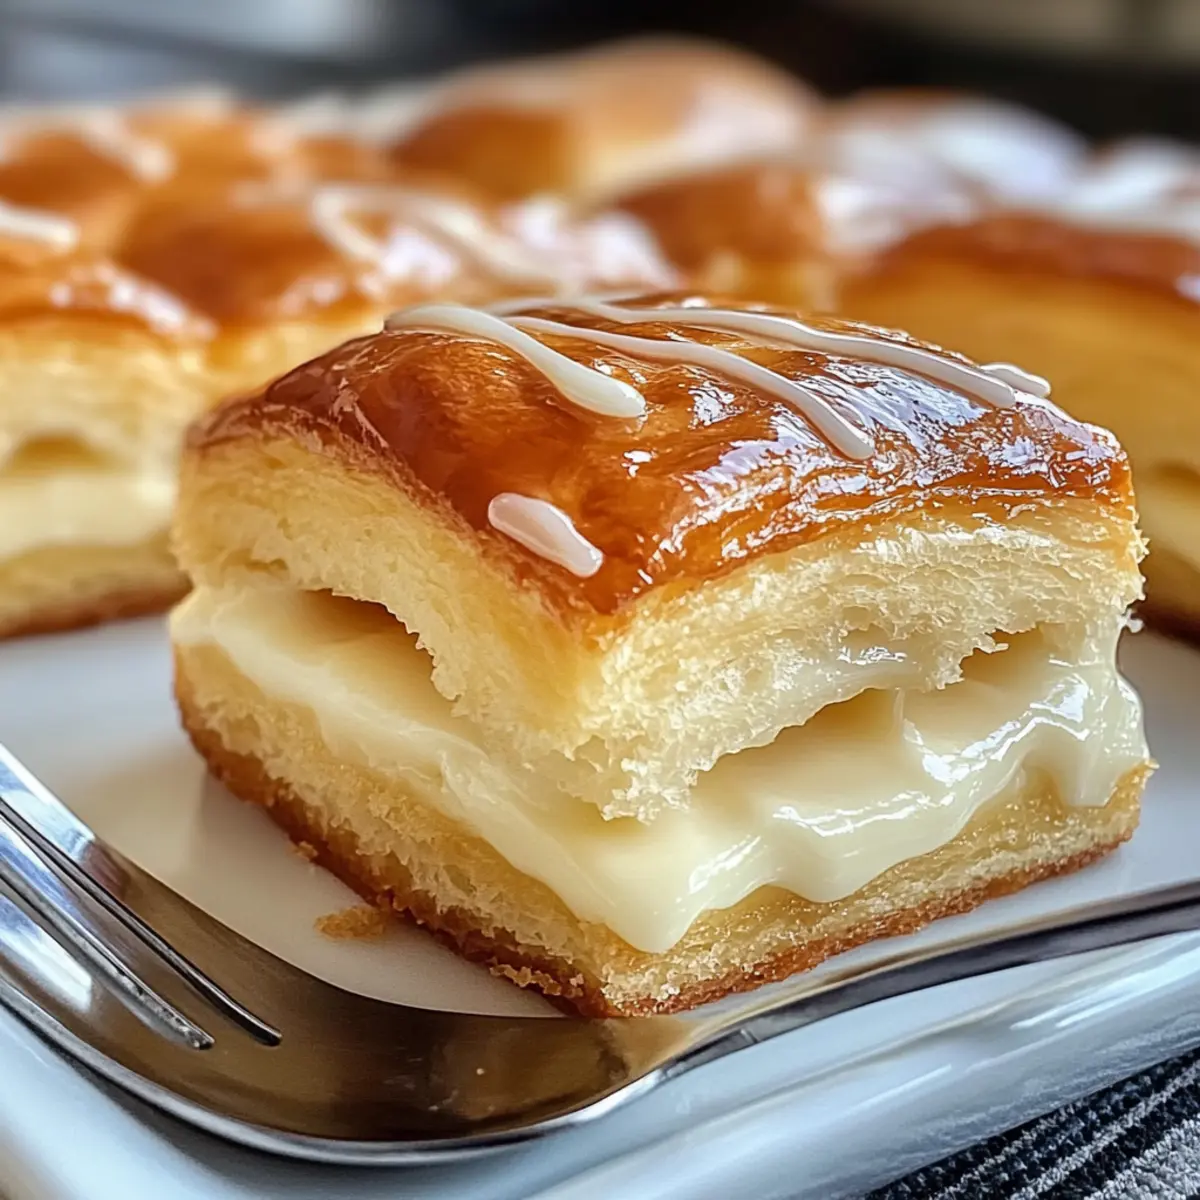
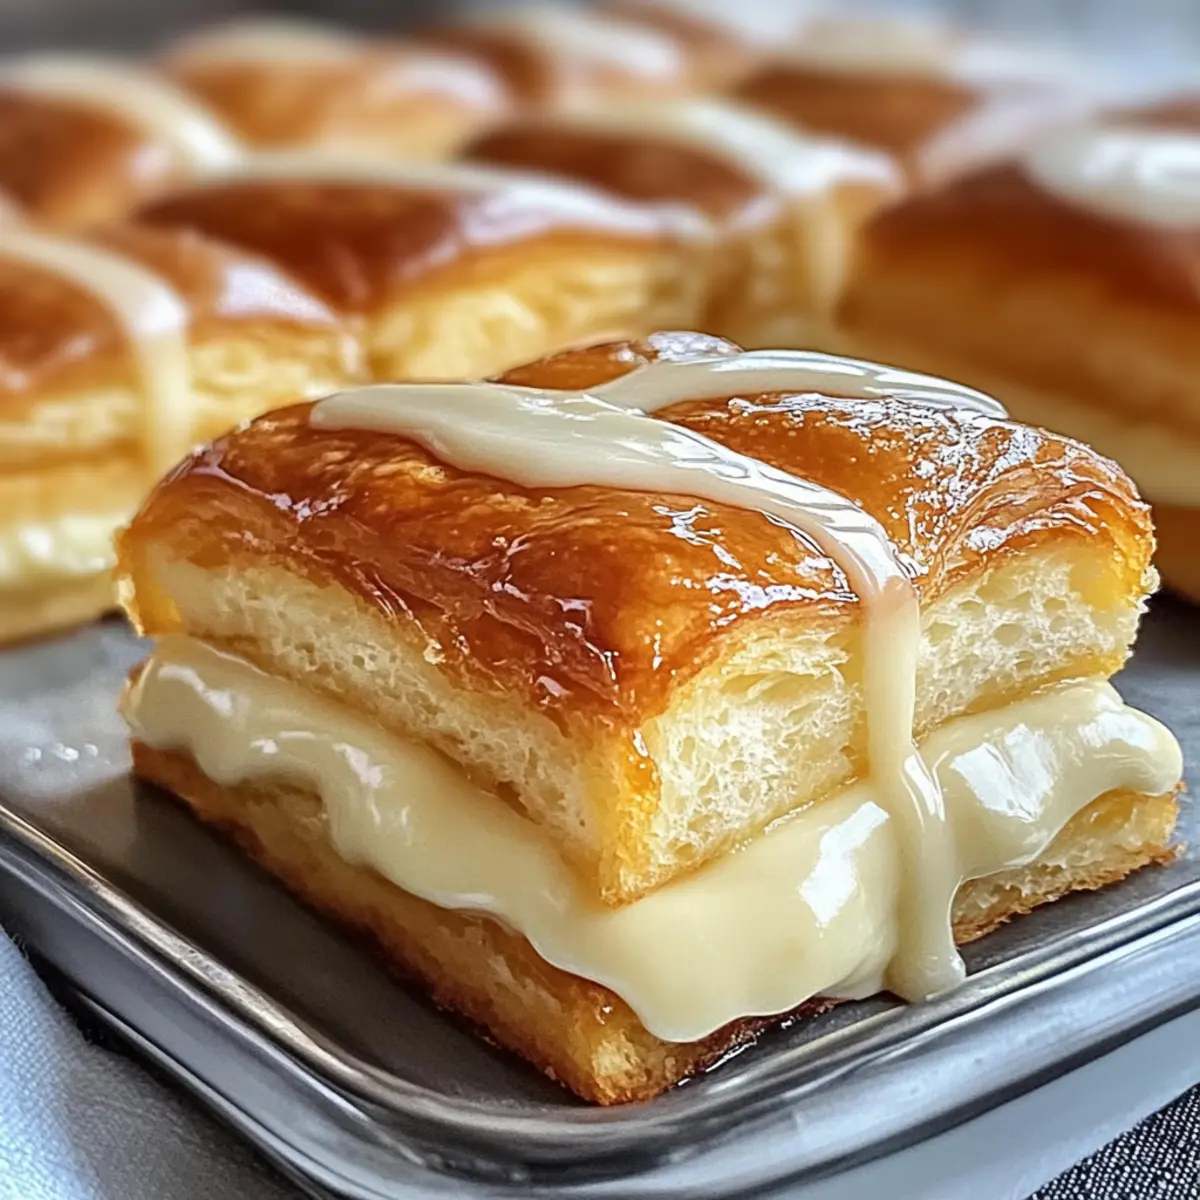
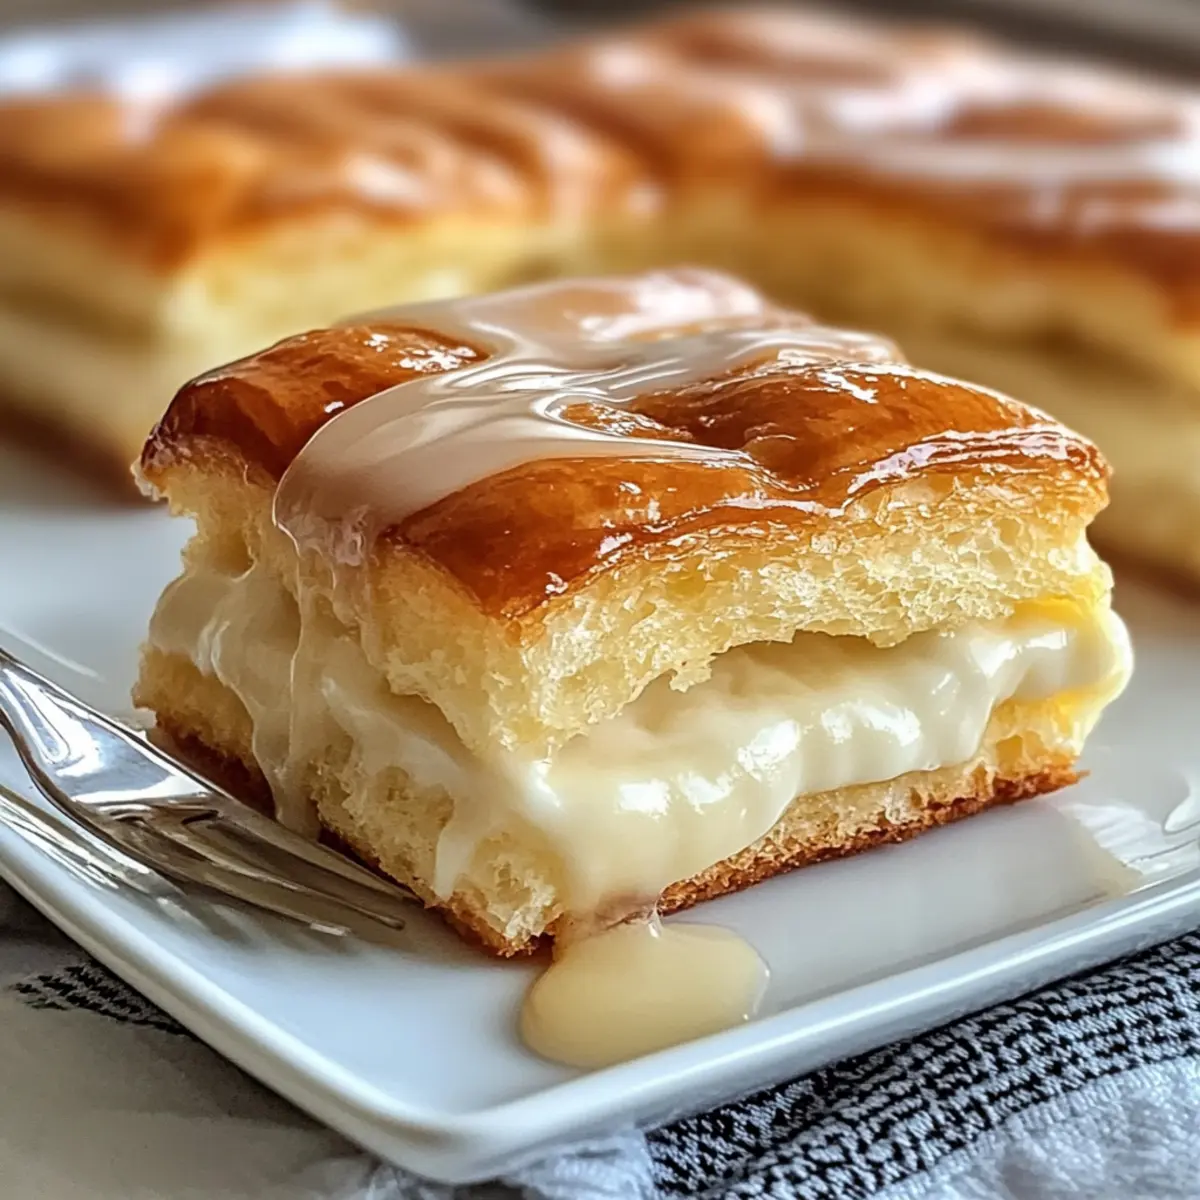
“Have you ever stumbled upon a recipe that just sings comfort and indulgence? That’s exactly how I felt when I first tried my hand at the King’s Hawaiian Cheesecake Danish! This delightful creation combines the sweet, soft goodness of King’s Hawaiian Rolls with a creamy cheesecake filling, making it an irresistible option for brunch or a cozy family breakfast. What I love most about this recipe is its quick prep time—seriously, you can whip it up with minimal fuss—and it’s a guaranteed crowd-pleaser. The addition of a silky vanilla glaze takes this treat over the top, making every bite feel special. Ready to dive into a sweet twist on your brunch routine? Let’s get started!”
Why is this Danish so special?
Simplicity at its Finest: The King’s Hawaiian Cheesecake Danish is incredibly easy to make, requiring just a few ingredients and minimal prep time, making it perfect for any home cook.
Decadent Flavor Pairing: The combination of sweet King’s Hawaiian Rolls and creamy cheesecake filling creates a delightful balance of flavors.
Versatile Delight: Customize your Danish with various toppings such as fresh fruit or chocolate chips, elevating it to your personal taste.
Perfect for Any Occasion: Whether it’s for brunch with friends or a cozy family dessert, this treat will impress everyone at the table. Discover more delicious ideas with Making Cheesecake Dip to complement your meal!
Quick and Crowd-Pleasing: Not only will you enjoy the rich flavors, but it also comes together in just about 30 minutes, making it a go-to recipe for any gathering.
King’s Hawaiian Cheesecake Danish Ingredients
• Here’s everything you need for this delightful treat!
For the Danish Base
- King’s Hawaiian Rolls – The star of the dish, adding delightful sweetness; substitute with any soft sweet bread if needed.
For the Creamy Filling
- Cream Cheese – This rich filling is essential for creaminess; softened cream cheese works best or swap with mascarpone for a lighter twist.
- Sugar – Sweetens the filling perfectly; adjust according to your taste, or consider a sugar substitute for a healthier option.
- Vanilla Extract – Enhance flavors; using pure vanilla extract is recommended for the best taste.
- Egg – Binds the filling together; make sure it’s at room temperature for optimal mixing.
- Sour Cream – Adds a slight tang and creaminess; use Greek yogurt for a lighter option.
For the Vanilla Glaze
- Powdered Sugar – Creates the sweet glaze; sift it for a smoother consistency.
- Milk – Helps achieve your desired glaze consistency; adjust quantity as necessary for your preference.
- Vanilla Extract – Again, enhances the glaze flavor; use pure for a richer taste.
With these simple yet indulgent ingredients, your King’s Hawaiian Cheesecake Danish is just a whisk away!
Step‑by‑Step Instructions for King’s Hawaiian Cheesecake Danish
Step 1: Prepare Filling
In a mixing bowl, beat together 8 ounces of softened cream cheese, 1 cup of sugar, 1 teaspoon of vanilla extract, 1 room temperature egg, and ½ cup of sour cream. Use a hand mixer on medium speed until the mixture is smooth and creamy, about 2-3 minutes. You’ll know it’s ready when there are no lumps, and the filling is fluffy.
Step 2: Assemble Danish
Preheat your oven to 350°F (175°C). In a greased 9×13 inch baking dish, flatten out the King’s Hawaiian Rolls by gently pressing them down. Ensure the rolls cover the bottom of the dish well, forming a solid base. Pour the silky cheesecake filling over the flattened rolls, spreading it evenly with a spatula for a uniform layer.
Step 3: Bake
Place your assembled King’s Hawaiian Cheesecake Danish in the preheated oven. Bake for approximately 25 minutes, or until the filling is set and the edges turn a light golden color. To check, gently shake the dish; the filling should jiggle slightly but not be sloshy.
Step 4: Cool
Once baked, carefully remove the Dutch from the oven and let it cool at room temperature for about 10-15 minutes. This step is crucial as it allows the filling to firm up a bit more, making slicing easier later on.
Step 5: Prepare Glaze
While the Danish is cooling, whisk together 1 cup of powdered sugar, 2 tablespoons of milk, and 1 teaspoon of vanilla extract in a small bowl. Mix until the glaze is smooth and glossy. If it’s too thick, add a splash more milk; if too thin, sprinkle in powdered sugar until you reach your desired consistency.
Step 6: Serve
Once cooled, slice your King’s Hawaiian Cheesecake Danish into squares. Drizzle the prepared vanilla glaze generously over the top for that finishing touch. Serve warm or at room temperature, and watch as your family and friends delight in this exquisite brunch treat!
What to Serve with King’s Hawaiian Cheesecake Danish
Elevate your meal with delightful pairings that enhance the sweet, creamy experience of this indulgent treat.
- Fresh Berries: The tartness of strawberries, blueberries, or raspberries adds a burst of freshness, balancing the richness of the cheesecake.
- Whipped Cream: Light and airy, a dollop of freshly whipped cream brings an elegant touch, perfect for creating that dreamy brunch moment.
- Coffee or Espresso: The robust flavors of coffee complement the sweetness beautifully, making for a cozy morning pairing that everyone will savor.
- Chilled Sparkling Lemonade: The fizzy citrus notes refresh the palate, offering a bright contrast to the creamy texture of the Danish.
- Cinnamon Sugar Dusting: A sprinkle of cinnamon sugar over the top adds warmth and a lovely crunch, beautifully accentuating the soft rolls.
- Vanilla Ice Cream: Indulge further by serving a scoop of vanilla ice cream alongside the warm Danish; the melting ice cream creates an irresistible sauce.
- Nutty Granola: For a surprising texture contrast, a handful of crunchy granola adds a delightful crunch that pairs elegantly with each creamy bite.
- Zesty Fruit Salad: A vibrant mix of tropical fruits like pineapple and mango adds a refreshing sweetness that harmonizes with the cake’s flavors.
Expert Tips for the Best King’s Hawaiian Cheesecake Danish
- Room Temperature Ingredients: Make sure all dairy ingredients, including cream cheese and eggs, are at room temperature. This ensures a smoothly blended filling without lumps.
- Don’t Overmix: When preparing your cheesecake filling, mix just until combined. Overmixing can lead to a dense texture, going against the fluffy nature of the King’s Hawaiian Cheesecake Danish.
- Watch Baking Time: Keep a close eye on your Danish while it bakes. Ovens often vary, and you want it golden on the edges but not overbaked.
- Use Fresh Toppings: For added flavor, top with fresh fruit like strawberries or blueberries just before serving to enhance the indulgent taste of the Danish.
- Adjust Glaze Consistency: If your vanilla glaze is too thin, gradually add more powdered sugar; if too thick, a splash of milk will help achieve the desired pourable consistency.
Make Ahead Options
Preparing the King’s Hawaiian Cheesecake Danish ahead of time is a fantastic way to save precious minutes on busy mornings! You can assemble the Danish, including the filling, up to 24 hours in advance by following the initial steps and storing it in the refrigerator, tightly covered. To maintain the lovely texture and flavor, make sure to let it sit at room temperature for about 30 minutes before baking. When you’re ready to serve, simply bake as directed, and enjoy the delightful warmth and creaminess that feels freshly made. This prep-ahead strategy ensures you have an impressive brunch treat with minimal fuss, perfect for any gathering!
King’s Hawaiian Cheesecake Danish Variations
Get ready to elevate your King’s Hawaiian Cheesecake Danish with these delightful twists that will tantalize your taste buds!
-
Fruit-Filled Delight: Add fresh berries like strawberries, raspberries, or blueberries on top of the glaze or mixed into the filling for a burst of color and freshness. The tanginess of the fruit pairs beautifully with the creamy cheesecake.
-
Chocolate Indulgence: Incorporate chocolate chips into the cheesecake filling for a rich, decadent variation. If you’re a chocolate lover, this addition will take your Danish to the next level.
-
Lemon Zest Glaze: Swap the vanilla glaze for a zesty lemon glaze for a refreshing citrusy kick. Mixing in some lemon zest will also brighten up the cheesecake filling, creating a delightful contrast.
-
Nutty Crunch: Top the finished Danish with toasted walnuts or pecans for some crunchy texture. Nuts add a lovely, earthiness that complements the sweetness.
-
Coconut Bliss: Sprinkle toasted coconut flakes over the glaze or mix coconut cream into the filling for a tropical twist that friends and family will adore.
-
Maple Syrup Drizzle: For a cozy, fall-inspired flavor, replace the vanilla glaze with a maple syrup drizzle. You can simply warm up some pure maple syrup and drizzle over each serving.
-
Spicy Kick: Add a pinch of cayenne or chili powder to the filling for a surprising hint of heat. This combination creates a nice juxtaposition between sweet and spicy, perfect for those looking for something unique.
Don’t forget to explore other delightful ideas, like Making Cheesecake Dip, to pair with your brunch spread. Whether you’re sticking to the classic or trying something new, your King’s Hawaiian Cheesecake Danish is sure to impress!
How to Store and Freeze King’s Hawaiian Cheesecake Danish
Fridge: Store leftovers in an airtight container for up to 3-4 days. For the best taste, reheat individual portions in the microwave briefly before serving.
Freezer: You can freeze the cheesecake Danish for up to 2 months. Wrap it tightly in plastic wrap and then aluminum foil to prevent freezer burn.
Thawing: When ready to enjoy, thaw in the fridge overnight and then reheat in the oven at 350°F (175°C) for about 10-15 minutes until warmed through.
Serving Tips: For best results, drizzle the vanilla glaze just before serving for a fresh and glossy finish. This will keep your King’s Hawaiian Cheesecake Danish looking and tasting its best!
King’s Hawaiian Cheesecake Danish Recipe FAQs
How do I know if my King’s Hawaiian Rolls are ripe enough for this recipe?
Absolutely! The best King’s Hawaiian Rolls for your Danish should be fresh and soft, without any dark spots or dryness. Look for rolls that are slightly squishy to the touch — they should feel fluffy and light. If they are too hard, they won’t provide that deliciously airy base for your cheesecake filling.
What’s the best way to store leftovers of this Danish?
Very! Store any leftover King’s Hawaiian Cheesecake Danish in an airtight container in the refrigerator. It will stay delicious for about 3-4 days. If you’d like to keep it fresher for longer, simply cover it tightly with plastic wrap before placing it in the container. To enjoy it best, reheat individual portions in the microwave right before serving.
Can I freeze King’s Hawaiian Cheesecake Danish? If so, how?
Of course! Freezing your King’s Hawaiian Cheesecake Danish is a great option if you want to enjoy it later. Wrap the cooled Danish tightly with plastic wrap, then again with aluminum foil to prevent freezer burn. It can be frozen for up to 2 months. Just remember, when you’re ready to eat it, thaw in the fridge overnight and reheat in a 350°F (175°C) oven for about 10-15 minutes until warmed through.
What should I do if my cheesecake filling is too chunky?
Don’t worry! If your filling ends up chunky, it might be due to the cream cheese being too cold at the start. Make sure all your dairy ingredients are at room temperature before mixing for a smooth texture. If it ends up chunky, you can also try beating it a bit longer with a hand mixer or food processor until it’s silky and combined.
Can my pets eat any of the ingredients in this recipe?
No, it’s important to keep your furry friends away from this Danish. Ingredients like cream cheese and sugar aren’t ideal for pets and can lead to stomach upsets. Always be careful to keep this delicious treat safely stored and out of reach from pets and consider checking labels if unsure of any substitute ingredients!
Are there any allergy considerations I should be aware of?
Definitely! This King’s Hawaiian Cheesecake Danish contains common allergens like dairy and eggs, which are important to consider for anyone with allergies. If you’re cooking for someone with specific dietary needs, you might want to substitute items like using dairy-free cream cheese or egg replacements to accommodate allergies. I often make adjustments based on my guests’ preferences!
Irresistible King’s Hawaiian Cheesecake Danish for Brunch Bliss
Ingredients
Equipment
Method
- In a mixing bowl, beat together the cream cheese, sugar, vanilla extract, egg, and sour cream using a hand mixer until smooth and creamy.
- Preheat your oven to 350°F (175°C). In a greased 9×13 inch baking dish, flatten out the King's Hawaiian Rolls to form a solid base.
- Pour the cheesecake filling over the flattened rolls and spread it evenly.
- Bake in the preheated oven for approximately 25 minutes, until the filling is set and edges are golden.
- Allow to cool at room temperature for 10-15 minutes before slicing.
- Whisk together powdered sugar, milk, and vanilla extract to make the glaze until smooth and glossy.
- Slice into squares and drizzle the glaze over the top before serving.
")