")
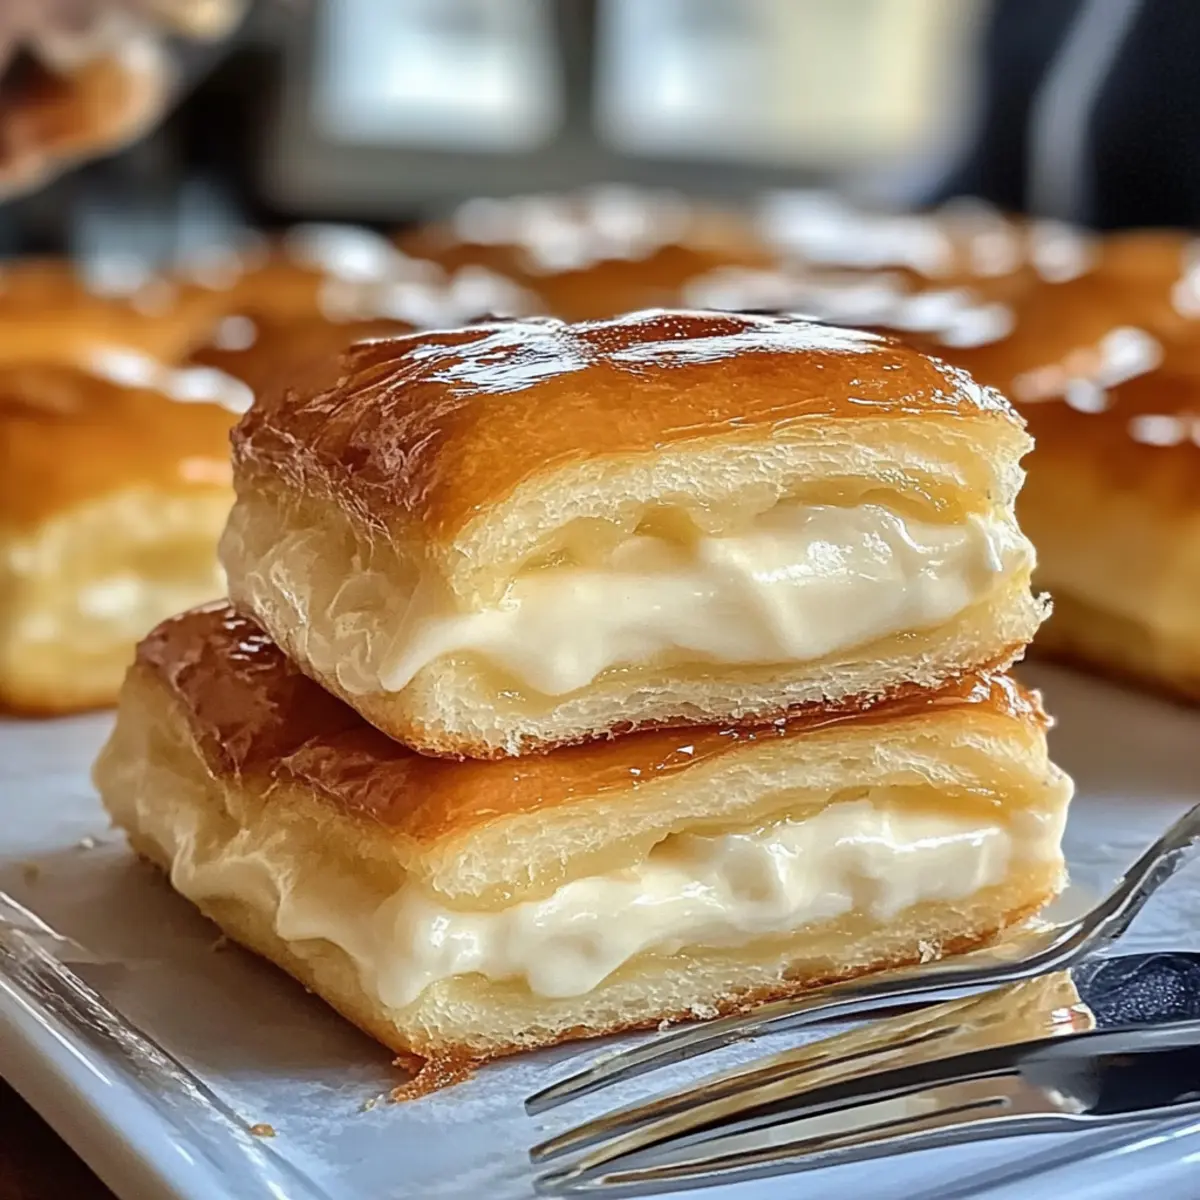
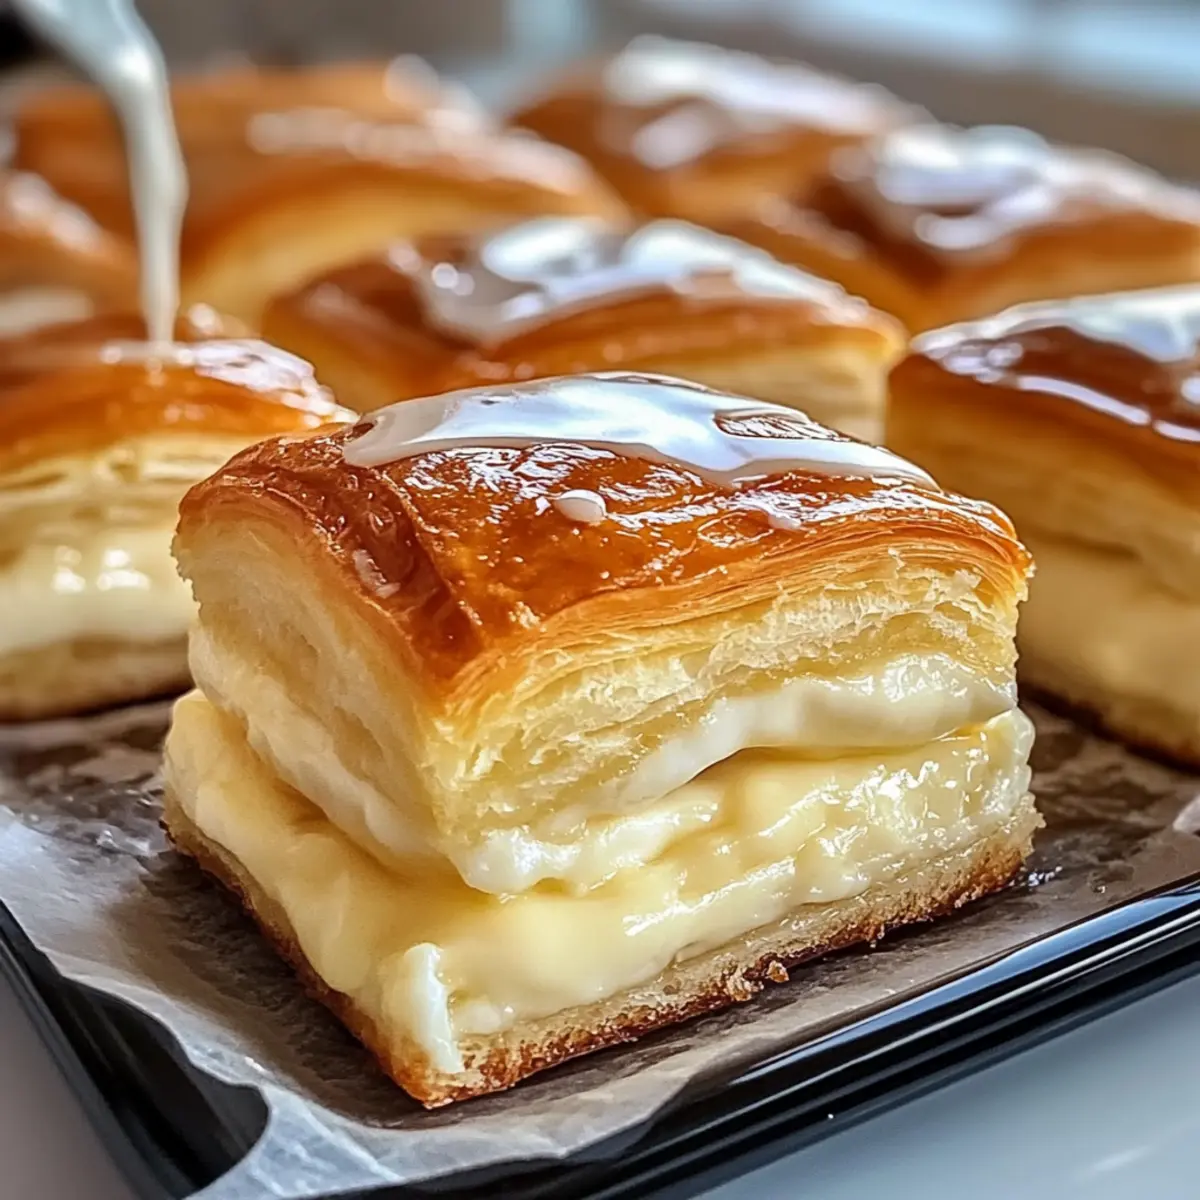
As I wandered through a vibrant food market, the sweet aroma of freshly baked bread caught my attention. It reminded me of a warm, tropical island, which led me straight to the inspiration for my King’s Hawaiian Cheesecake Danish. Imagine sinking your teeth into a soft, fluffy roll that cradles a creamy, indulgent cheesecake filling—a perfect blend of flavors that is too good to resist. This easy-to-make dessert not only elevates your brunch table but also offers a delightful surprise for family gatherings. The best part? You can whip it up quickly, turning everyday ingredients into something extraordinary. Curious how a few simple steps can transform your morning or impress guests at your next gathering? Let’s dive in!
Why Make King’s Hawaiian Cheesecake Danish?
Decadent Flavor: This heavenly combination of sweet Hawaiian Rolls with creamy cheesecake creates a taste sensation that will leave your taste buds singing.
Effortless Preparation: Great news! This recipe features straightforward steps, ensuring that even novice bakers can impress their loved ones with little effort.
Versatile Delight: Not just for brunch—serve this delightful treat at parties, holiday breakfasts, or cozy family evenings. Its appeal knows no bounds!
Gorgeous Presentation: Drizzled with a silky vanilla glaze and accented with fresh berries, this dessert looks as stunning as it tastes.
If you love cheesecake, don’t miss out on other delicious variations! Check out my guide on Making Cheesecake Dip for an easy and fun twist that your guests will adore.
King’s Hawaiian Cheesecake Danish Ingredients
For the Danish Base
- King’s Hawaiian Rolls – These rolls provide a soft, sweet base that perfectly cradles the cheesecake filling.
- Eggs – Essential for binding the filling; make sure they’re at room temperature for the best results.
For the Cheesecake Filling
- Cream Cheese – The star of the show, lending creamy richness to your cheesecake.
- Sugar – Balances the flavors of the cheesecake; feel free to use a sugar alternative if desired.
- Vanilla Extract – Enhance the overall taste; opt for pure vanilla for the most authentic flavor.
For the Glaze
- Silky Vanilla Glaze – Made from sugar and milk or cream, this glossy finish elevates the sweetness and look of your dessert. Adjust the milk for your preferred thickness!
Step‑by‑Step Instructions for King’s Hawaiian Cheesecake Danish
Step 1: Preheat the Oven
Begin by preheating your oven to 350°F (175°C). This step is crucial for ensuring even baking of your King’s Hawaiian Cheesecake Danish. While the oven warms up, gather your ingredients and let the cream cheese soften at room temperature for easier blending, which will help achieve a smooth and creamy cheesecake filling.
Step 2: Prepare the Cheesecake Filling
In a large mixing bowl, combine the softened cream cheese, sugar, eggs, and vanilla extract. Use an electric mixer to blend the ingredients on medium speed until the mixture is smooth and creamy, about 2-3 minutes. Look for a fluffy, lump-free consistency, as this will create a delightful texture in your cheesecake filling for the Danish.
Step 3: Prepare the Baking Dish
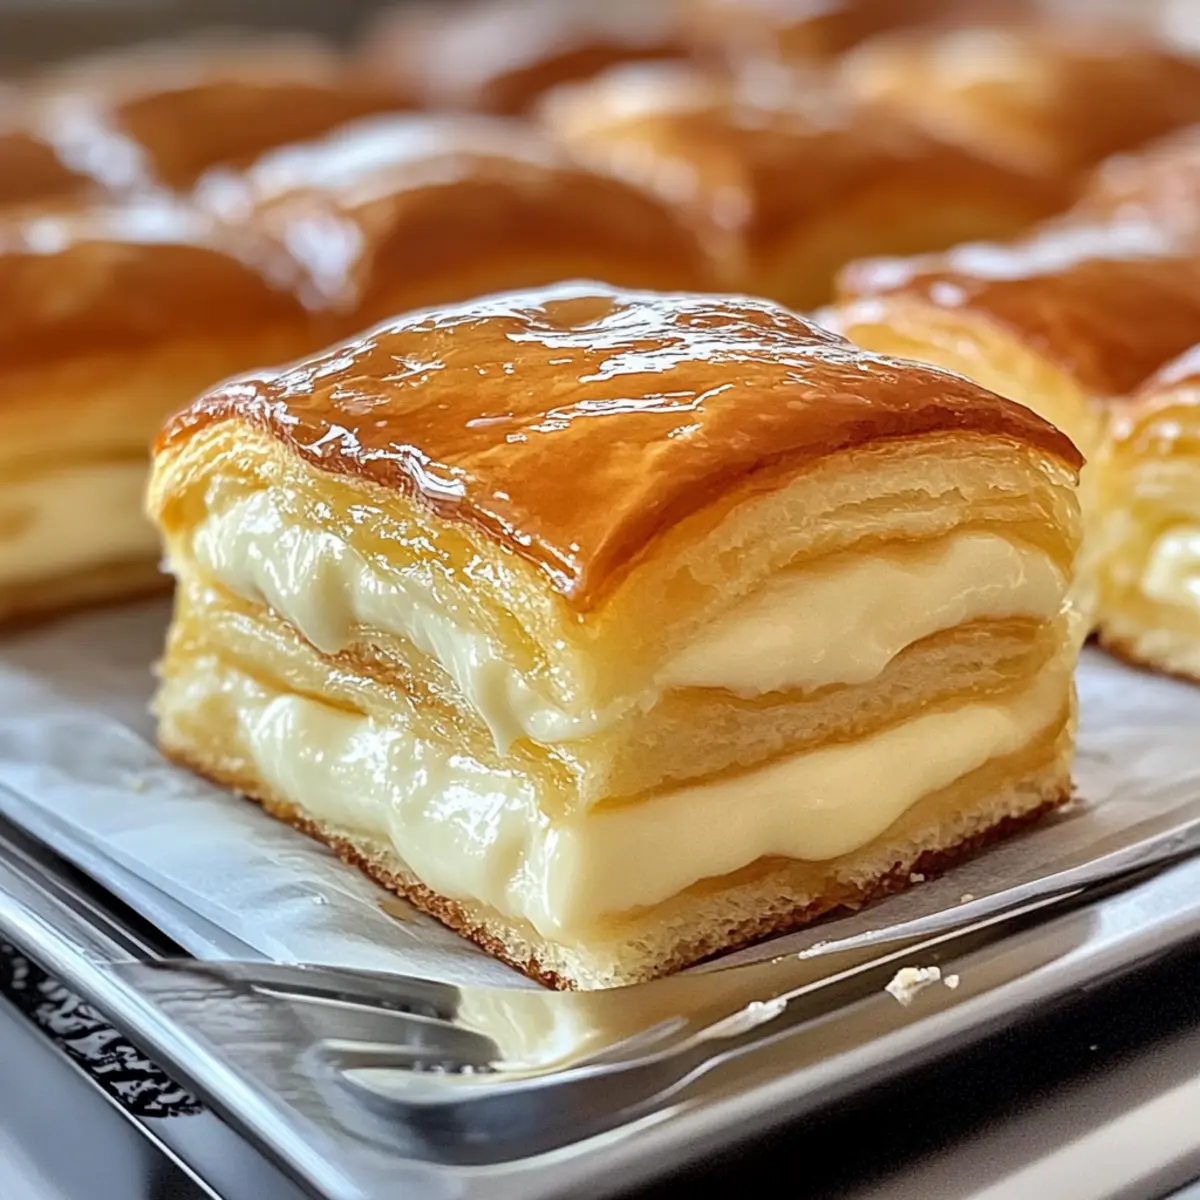
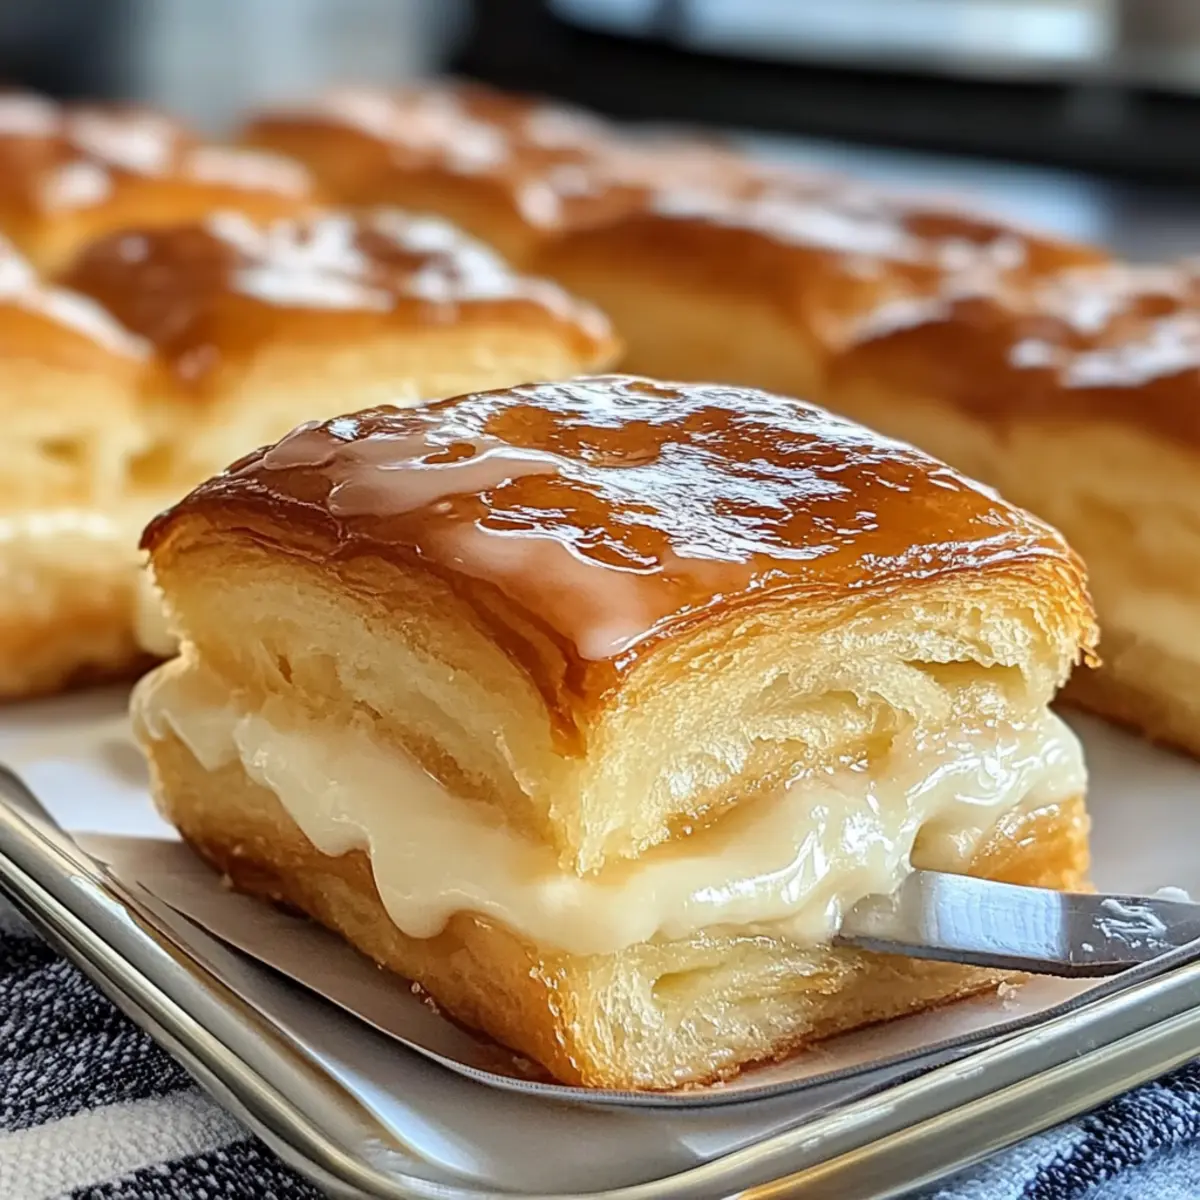
Grab a 9×13 inch baking dish and lightly grease it with non-stick spray or butter. Open your package of King’s Hawaiian Rolls and carefully slice each roll in half horizontally. Layer the bottom of the baking dish with the halved rolls, ensuring they fit snugly together, which will serve as the sweet base for your cheesecake filling.
Step 4: Pour the Filling
Once your rolls are in place, pour the creamy cheesecake filling evenly over the layered Hawaiian Rolls. Use a spatula to spread it gently, making sure every roll is well-covered. The cheesecake should fill the gaps, creating a delightful blend of sweet bread and luscious filling in each bite of the King’s Hawaiian Cheesecake Danish.
Step 5: Bake the Danish
Place the baking dish in the preheated oven and bake for 25 minutes, keeping an eye on the edges. You’ll know it’s ready when the filling is set and the edges start developing a light golden color. A slight jiggle in the center is okay; it indicates the cheesecake will firm up as it cools, ensuring a velvety finish.
Step 6: Cool and Glaze
After baking, carefully remove the King’s Hawaiian Cheesecake Danish from the oven and let it cool in the dish for about 20-30 minutes. This cooling period is essential for the flavors to meld. While it’s cooling, prepare your silky vanilla glaze by combining sugar and milk or cream to your desired thickness, and drizzle it over the Danish once it’s ready to serve.
What to Serve with King’s Hawaiian Cheesecake Danish?
Elevate your indulgent treat into a full festive meal with these delightful pairings that complement its sweet richness.
-
Fresh Berries: Bright, juicy berries add a burst of freshness, balancing the creaminess of the cheesecake perfectly. They also enhance the visual appeal on your brunch table.
-
Coffee or Espresso: A rich cup of coffee provides a deep contrast to the sweetness, creating an ideal pairing for a cozy morning experience. Sip while enjoying each decadent bite for a comforting start to your day.
-
Crispy Bacon: The salty crunch of bacon beautifully contrasts the creamy sweetness, adding an extra layer of flavor that your guests will love. Serve it on the side for a deliciously savory touch.
-
Whipped Cream: A dollop of light, airy whipped cream enhances the dessert’s luxury, adding a textural component that invites joy in every bite. It pairs beautifully with the silky glaze for a dreamy finish.
-
Mint Tea: For a refreshing beverage option, serve a warm cup of mint tea. Its soothing properties and light flavor profile provide a wonderful counterbalance to the dessert’s richness.
-
Vanilla Ice Cream: A scoop of rich vanilla ice cream makes for an indulgent contrast to the warm Danish, melting slightly to create a luscious combination that’s hard to resist.
-
Chocolate Sauce Drizzle: A light drizzle of chocolate sauce adds a decadent touch that complements both flavors while pleasing chocolate lovers. It brings extra elegance to your dessert plate!
-
Pecan Topping: Toasted pecans add a delightful crunch with a sweet, nutty flavor that complements the creamy cheesecake, enhancing both taste and texture in this indulgent treat.
-
Greek Yogurt: A dollop of tangy Greek yogurt can help cut through the sweetness, offering a creamy yet refreshing twist that brings balance to every bite.
Make Ahead Options
These King’s Hawaiian Cheesecake Danish are perfect for meal prep, allowing busy home cooks to enjoy a deliciously indulgent dessert without the last-minute stress. You can prepare the filling and assemble the Danish up to 24 hours in advance by layering the halved rolls and cheesecake mixture in the baking dish, then covering it tightly with plastic wrap to prevent drying out. Just refrigerate overnight to keep it fresh. When you’re ready to bake, simply remove the dish from the fridge and let it sit at room temperature for about 15-20 minutes, then pop it in the oven. This way, your King’s Hawaiian Cheesecake Danish will still be just as delicious, with a light, fluffy texture interacting perfectly with the creamy cheesecake!
Expert Tips for King’s Hawaiian Cheesecake Danish
-
Cream Cheese Consistency: Ensure your cream cheese is at room temperature; this prevents lumps in your cheesecake filling and achieves a smooth texture.
-
Monitor Baking Time: Keep an eye on the Danish while it’s baking. A slight jiggle in the center indicates it’s perfectly cooked; overbaking can lead to a dry texture.
-
Chill for Flavor: After cooling, allow the King’s Hawaiian Cheesecake Danish to chill for a few hours in the fridge for flavors to develop even further before serving.
-
Perfect Glaze: When making your silky vanilla glaze, adjust the milk to achieve your desired thickness; if it’s too runny, add more sugar to thicken it up.
-
Fresh Fruit Topping: Add a burst of color and flavor by garnishing with fresh berries; they not only enhance presentation but also complement the sweetness of the Danish beautifully.
How to Store and Freeze King’s Hawaiian Cheesecake Danish
Fridge: Store any leftovers in an airtight container in the refrigerator for up to three days to maintain freshness and flavor.
Freezer: For longer storage, wrap individual portions tightly in plastic wrap and then place them in a freezer-safe bag. They can be frozen for up to three months.
Reheating: To enjoy your King’s Hawaiian Cheesecake Danish again, thaw overnight in the fridge and reheat slices in the oven at 350°F (175°C) for about 10 minutes, or until warmed through.
Cooling: Allow the Danish to cool completely before storing, as this prevents excessive moisture buildup that can make the dessert soggy.
King’s Hawaiian Cheesecake Danish Variations
Feel free to explore these delicious twists that will make your King’s Hawaiian Cheesecake Danish even more delightful!
-
Chocolate Chip Addition: Stir in some chocolate chips with the cheesecake filling for an indulgent chocolatey surprise. Each bite becomes a luscious treat that chocolate lovers won’t want to miss.
-
Almond Extract Twist: Replace vanilla extract with almond extract for a unique flavor profile. This subtle change can elevate your Danish to a whole new level of deliciousness.
-
Coconut Cream Flavor: Incorporate shredded coconut into the cheesecake filling for a tropical touch. This variation will bring a rich, chewy texture to every slice, reminiscent of sun-kissed islands.
-
Berry Swirl: Add a swirl of berry puree to the cheesecake filling before baking. Blueberries or raspberries add a beautiful color and a tangy flavor that enhances every bite.
-
Dairy-Free Option: Substitute cream cheese with a dairy-free alternative made from cashew or coconut. You can still enjoy the creamy texture without the dairy, perfect for lactose-sensitive friends.
-
Spicy Heat: For those who love a little heat, incorporate a dash of cayenne pepper into the cheesecake filling. This unexpected kick can create a unique flavor experience that intrigues your palate.
-
Cinnamon Sugar Topping: Sprinkle a mixture of cinnamon and sugar over the top before baking for a lovely crunchy finish. This hint of spice adds warmth and inviting aroma to your Danish.
-
Different Bread Base: If you can’t find King’s Hawaiian Rolls, feel free to use sweet challah or brioche instead. These alternatives will still provide that soft, fluffy texture while creating a delightful variation.
If you want more cheesecake ideas, don’t hesitate to explore my guide on Making Cheesecake Dip, which offers another fun way to enjoy this beloved dessert!
King’s Hawaiian Cheesecake Danish Recipe FAQs
How do I choose ripe ingredients for the King’s Hawaiian Cheesecake Danish?
Absolutely! For the best results, use King’s Hawaiian Rolls that are soft and fresh, ideally about a day or two old to enhance their absorbency and flavor. Make sure your cream cheese is at room temperature—this makes blending much easier and results in a creamy filling. Check for eggs that are clean and unbroken, as quality matters in this indulgent dessert.
What is the best way to store leftovers of the King’s Hawaiian Cheesecake Danish?
I often recommend storing any leftovers in an airtight container in the refrigerator. They will stay fresh for 3 to 4 days. Simply allow the cheesecake to cool completely before putting it away; this helps prevent moisture build-up which can make the Danish soggy.
Can I freeze King’s Hawaiian Cheesecake Danish?
Yes, indeed! To freeze your King’s Hawaiian Cheesecake Danish, wrap individual portions tightly in plastic wrap, then place them in a freezer-safe bag. This will prevent freezer burn. You can keep them in the freezer for up to 3 months. When you’re ready to enjoy, simply thaw overnight in the fridge, and then reheat in the oven at 350°F (175°C) for about 10 minutes.
What should I do if my cheesecake filling is lumpy?
If you find your cheesecake filling has lumps, don’t worry! This often happens if the cream cheese isn’t softened properly. To remedy this, ensure that your cream cheese is at room temperature before mixing. If lumps persist, you can use a hand mixer or blender to smooth it out further.
Are there any dietary considerations for the King’s Hawaiian Cheesecake Danish?
Very much so! For those with dietary restrictions, you can consider using low-fat cream cheese and sugar alternatives to create a lighter version of this dessert. Always double-check labels for allergens, especially if making this for guests, as dairy and eggs are key ingredients. If serving to pets, please keep it out of their reach, as cheesecake is not suitable for them.
How long do I need to cool the King’s Hawaiian Cheesecake Danish before serving?
It’s important to let the Danish cool for about 20-30 minutes after baking. This cooling time allows the flavors to meld beautifully, enhancing the experience. If you have the patience, allowing it to chill in the refrigerator for a few hours will deepen the flavors even more, making each bite truly irresistible!
King’s Hawaiian Cheesecake Danish
Ingredients
Equipment
Method
- Preheat your oven to 350°F (175°C) and let the cream cheese soften.
- In a large mixing bowl, combine softened cream cheese, sugar, eggs, and vanilla extract. Blend until smooth, about 2-3 minutes.
- Grease a 9x13 inch baking dish. Slice King’s Hawaiian Rolls in half horizontally and layer them in the dish.
- Pour the cheesecake filling over the layered rolls and spread gently.
- Bake in the preheated oven for 25 minutes until edges are golden and the filling is set.
- Let the Danish cool for 20-30 minutes before glazing with a mixture of sugar and milk or cream.
")