")
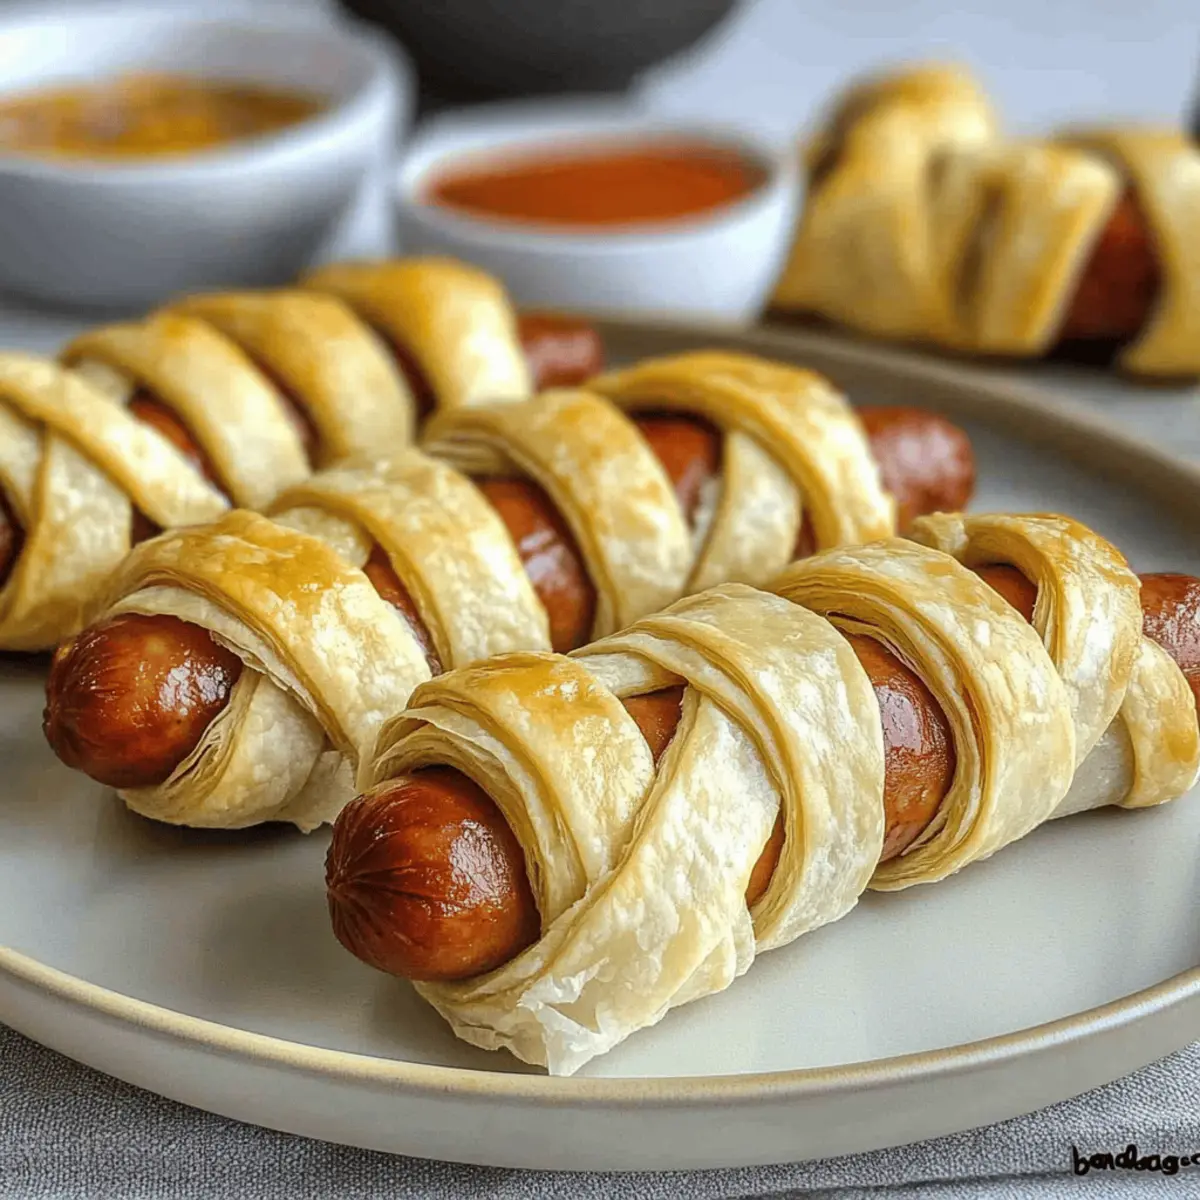
As the autumn leaves swirl and the days shorten, I find myself daydreaming about the delightful surprises Halloween brings—especially in the kitchen. This year, I’m excited to share one of my favorites: Mummy Dogs! These spooky snacks are not just visually captivating, but they also deliver a comforting crunch from flaky pastry that wraps around juicy sausages. Whether you’re hosting a haunted gathering or looking for a fun Halloween treat to share, Mummy Dogs are sure to impress. The beauty of this recipe lies in its customizable nature, allowing you to mix and match different types of sausages—be it turkey, chicken, or even a vegetarian option. And best of all, they’re effortlessly easy to prepare, making them the perfect go-to for busy home chefs. So, are you ready to roll up your sleeves and create some deliciously creepy delights in your kitchen?
Why are Mummy Dogs a Must-Try?
Simplicity: Mummy Dogs are incredibly easy to prepare, making them perfect for any level of home cook.
Customizable: You can tailor these spooky snacks to suit your taste by using different sausages like turkey, chicken, or even a delicious vegetarian option.
Crowd-Pleaser: Kids and adults alike will be drawn to the fun, spooky presentation, making them a hit at any Halloween gathering.
Delicious Crunch: The flaky puff pastry enveloping juicy sausages creates a delightful texture that satisfies every bite.
Versatile Dipping Options: Pair your Mummy Dogs with fun themed sauces like “blood” ketchup or zesty sriracha mayo for a tasty twist!
Whip up these Mummy Dogs and check out more fun and festive ideas to complement your Halloween spread with our guide to Halloween party foods.
Mummy Dogs Ingredients
For the Sausages
• Sausages – Choose your favorite type; turkey, chicken, or vegetarian options add amazing variety!
For the Dough
• Puff Pastry or Crescent Roll Dough – This creates the signature mummy look; feel free to use homemade dough for a personal touch.
For the Glossy Finish
• Egg Wash (optional) – This adds a beautiful golden sheen when baked; water works in a pinch if you’re keeping it simple.
For Dipping Sauces
• Ketchup, Mustard, or Sriracha Mayo – These sauces elevate the flavor and make each bite even more exciting; get creative with themed options!
Gather these essentials, and you’re on your way to making unforgettable Mummy Dogs, the ultimate Halloween snack!
Step‑by‑Step Instructions for Mummy Dogs
Step 1: Preheat Your Oven
Begin by preheating your oven to 350°F (175°C). This ensures that as soon as your Mummy Dogs are ready, they’ll bake evenly and perfectly golden. Take out a baking sheet and line it with parchment paper for easy cleanup, allowing your spooky snacks to shine when they come out of the oven.
Step 2: Prepare the Dough
Unroll your puff pastry or crescent roll dough on a lightly floured work surface. Using a sharp knife or pizza cutter, cut the dough into long, thin strips about ½ inch wide. Make sure the strips are uniform in size to create an appealing mummy look when wrapping around the sausages.
Step 3: Wrap the Sausages
Take each sausage and start wrapping it with the dough strips, leaving small gaps for a “bandage” effect. Ensure the ends of the strips are pressed together to secure them in place. Continue wrapping until the sausage is mostly covered, resembling a mummy, and set them aside on the prepared baking sheet to await their turn in the oven.
Step 4: Prepare for Baking
Once all the Mummy Dogs are wrapped and lined up, it’s time to add a touch of shine. If using an egg wash, beat an egg in a small bowl and brush it gently over the wrapped sausages for a beautiful golden finish. If you prefer a simpler option, brush them lightly with water instead.
Step 5: Bake the Mummy Dogs
Place the baking sheet in the preheated oven and bake the Mummy Dogs for about 15 minutes. Keep an eye on them, and when they puff up and turn a delightful golden brown, you’ll know they’re done! The smell will be delicious as they finish baking, creating excitement for your Halloween gathering.
Step 6: Serve and Enjoy
Remove the Mummy Dogs from the oven and let them cool slightly before serving. Arrange them on a platter with your choice of fun dipping sauces like ketchup, sriracha mayo, or mustard for an extra spooky touch. These Mummy Dogs are best enjoyed warm, so gather your friends and family to indulge in this festive Halloween treat!

What to Serve with Mummy Dogs
As you gather around for a festive Halloween celebration, consider these delightful pairings to elevate your Mummy Dogs experience.
-
Witch’s Brew Punch: A vibrant, bubbling punch that adds a fun, spooky touch, perfect for adults and kids alike.
-
Ghostly Veggie Platters: Fresh, crisp vegetables that offer a palate cleanser, paired with a zesty ranch dip for extra flavor.
-
Crispy Sweet Potato Fries: Their natural sweetness complements the savory Mummy Dogs, creating a perfect balance of flavors.
-
Spooky Pasta Salad: This colorful salad with olives as “eyeballs” adds a playful element to your spread while being satisfying and refreshing.
-
Cheesy Garlic Bread: Soft and warm, it pairs beautifully with the crunchy texture of Mummy Dogs to soothe every craving.
-
Mini Pumpkin Pies: End your meal with a seasonal favorite that brings warm spices and sweetness to the table, captivating every palate.
Mix and match these sides to craft a memorable Halloween feast that friends and family will rave about long after the festivities have ended!
How to Store and Freeze Mummy Dogs
Fridge: Store leftover Mummy Dogs in an airtight container for up to 3 days to maintain freshness and flavor.
Freezer: If you want to make Mummy Dogs ahead of time, freeze them in a single layer on a baking sheet before transferring to a freezer-safe container or bag for up to 1-2 months.
Reheating: To enjoy your frozen Mummy Dogs, bake them directly from frozen at 350°F (175°C) for about 20-25 minutes, or until heated through and crispy. Alternatively, microwaving is quicker but may result in a softer pastry.
Make-Ahead Tip: Assemble the Mummy Dogs in advance and keep them in the fridge, but remember to add extra baking time if cooking them straight from cold for an optimal experience!
Mummy Dogs Variations & Substitutions
Feel free to get creative and personalize your Mummy Dogs with these delightful twists!
- Turkey Swaps: Substitute regular sausages for turkey options for a leaner snack that doesn’t compromise on flavor!
- Veggie Delight: Use vegetarian sausages for a plant-based alternative that everyone can enjoy. These are just as flavorful and fun!
- Spicy Kick: Try using spicy sausages or adding diced jalapeños to the mix for an extra heat that will thrill adventurous eaters.
- Cheesy Surprise: Before wrapping the sausage, sprinkle some shredded cheese on top of it to incorporate melty goodness inside; who doesn’t love cheese?
- Herbed Dough: Infuse your dough with herbs or spices for added flavor. A touch of garlic powder or Italian seasoning works wonders for an aromatic twist!
- Dippity Doo-Dah: Get playful with your dipping sauces! Mix up themed sauces like “witch’s brew” avocado sauce or a smoky chipotle mayo for an extra zing.
- Crunchy Coating: For a textured treat, coat the wrapped sausages in crushed cornflakes before baking; it adds a delightful crunch that invites every bite!
Whichever variation you choose, these customizable Mummy Dogs are sure to be a smash hit at your Halloween gathering! And if you’re looking for even more spooky ideas, check out our guide to Halloween party foods for more treats that will delight your guests!
Expert Tips for Mummy Dogs
-
Fully Cooked Sausages: Make sure your sausages are fully cooked before wrapping them in dough; otherwise, they won’t be safe to eat.
-
Dough Handling: Lightly dust your work surface with flour or use parchment paper for easier dough handling. This prevents sticking and allows for a smooth wrapping process.
-
Make Ahead: Assemble Mummy Dogs ahead of time and refrigerate them. If baking directly from cold, add an extra few minutes to the baking time for a perfect finish.
-
Dough Variations: Experiment with different types of dough, like homemade pastry or biscuit dough, to switch up the texture and flavor profile of your Mummy Dogs.
-
Creative Dips: Enhance your Mummy Dogs with themed dipping sauces, such as a “blood” ketchup or spicy mayo, to make your Halloween spread even more fun!
Make Ahead Options
These Mummy Dogs are a fantastic choice for busy home cooks looking to save time! You can prepare the Mummy Dogs by wrapping the sausages in dough up to 24 hours in advance, then store them in the refrigerator. If you’re short on time, assembling them a day ahead means you can have them ready to pop in the oven right before serving. When you’re ready to bake, simply preheat your oven and add a few extra minutes to the baking time if cooking from cold. To maintain their quality, make sure the wrapped sausages are tightly sealed and keep them covered to prevent the dough from drying out. Enjoy these deliciously spooky snacks without the last-minute rush!

Mummy Dogs Recipe FAQs
What type of sausages should I use for Mummy Dogs?
Absolutely! You can use a variety of sausages for Mummy Dogs, including turkey, chicken, or vegetarian options like plant-based sausages. Choosing lean meats might be healthier, while spicier or herby sausages can add extra flavor. The more the merrier, so feel free to mix and match according to your preferences!
How should I store leftover Mummy Dogs?
After indulging in your Mummy Dogs, any leftovers can be stored in an airtight container in the refrigerator for up to 3 days. To keep them fresh, make sure they are cooled completely before sealing the container. This will help maintain their delightful crunch!
Can I freeze Mummy Dogs for later use?
Yes! To freeze your Mummy Dogs, it’s best to first bake them, then let them cool entirely. Place them in a single layer on a baking sheet and freeze until solid. Once frozen, transfer them to a freezer-safe container or bag, where they can be stored for up to 1-2 months. When you’re ready to enjoy, simply bake them straight from the freezer at 350°F (175°C) for about 20-25 minutes or until heated through.
What if my dough is sticking while wrapping the sausages?
Very! If you find your dough is sticking while wrapping the sausages, try dusting your work surface with a light layer of flour or use parchment paper for rolling out the dough. This helps create a non-stick surface and allows for a smoother wrapping process, preventing frustration in creating those “mummy” bandages.
Are Mummy Dogs safe for pets?
While Mummy Dogs are a fun treat for humans, it’s essential to keep them away from pets. The sausages, especially if seasoned, may not be suitable for them, and the flaky pastry can pose choking hazards. Always stick to pet-approved snacks when treating your furry friends!
Can I make Mummy Dogs in advance?
Absolutely! You can assemble Mummy Dogs a day ahead and keep them in the refrigerator. Just remember to add a few extra minutes to the baking time if you bake them straight from the cold. This preparation makes it easier to serve fresh, warm Mummy Dogs at your Halloween gathering!

Mummy Dogs: Spooky Snacks with a Savory Twist for Halloween
Ingredients
Equipment
Method
- Preheat your oven to 350°F (175°C) and line a baking sheet with parchment paper.
- Unroll your puff pastry or crescent roll dough and cut it into long, thin strips about ½ inch wide.
- Wrap each sausage with the dough strips, ensuring to leave gaps for a 'bandage' effect and press the ends together.
- Beat an egg and brush it over the wrapped sausages for a golden finish, or brush lightly with water.
- Bake the Mummy Dogs for about 15 minutes, until golden brown and puffed up.
- Remove from the oven and let cool slightly, then serve with your choice of dipping sauces.
")