")
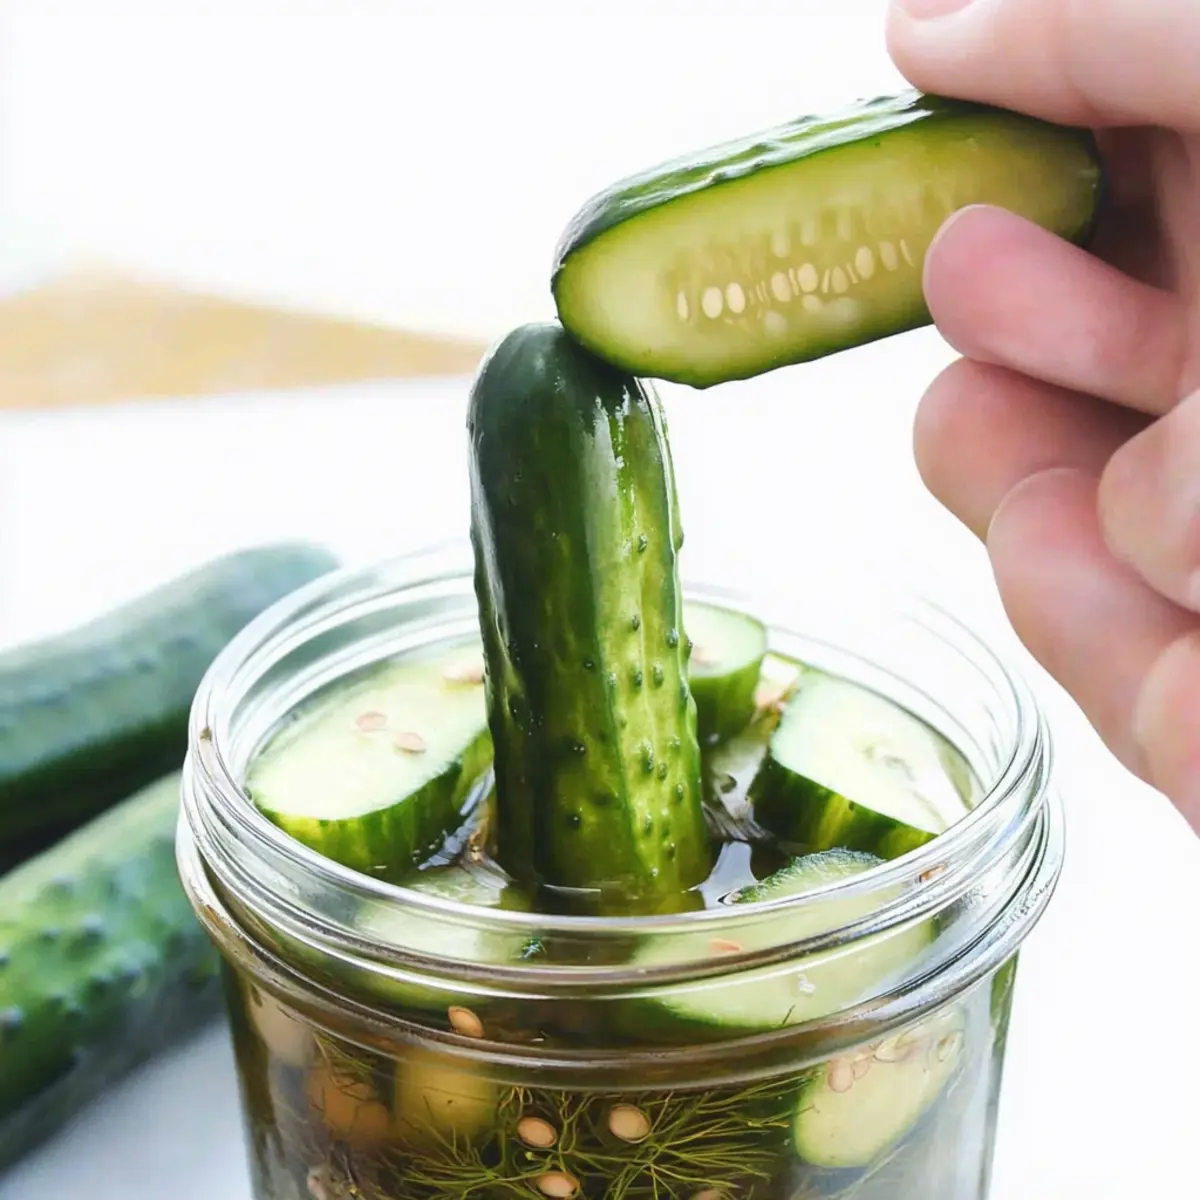
The moment I opened my fridge, I was hit with the zesty aroma of fresh dill and garlic—an instant reminder of the bright, crunchy goodness of homemade refrigerator dill pickles. With summer just around the corner, there’s no better way to elevate picnics or backyard BBQs than having these quick, tangy delights on hand. What’s really exciting about this Quick and Easy Refrigerator Dill Pickles recipe is that you don’t need any canning expertise, just a handful of pantry staples. In a flash, you can create a vibrant snack that brightens up your sandwiches and adds zing to your meals! Plus, they’re ready in just 24 hours and will stay crisp for weeks. So, are you ready to add a splash of freshness to your summer meals? Let’s dive in!
Why Make Refrigerator Dill Pickles?
Crunchy Texture: These pickles are delightfully crisp, maintaining their crunch even after a few weeks in the fridge.
Bold Flavors: The combination of fresh dill and garlic delivers a zesty punch that elevates any dish, from sandwiches to salads.
Quick Prep: No need for canning skills! This recipe makes pickling easy and fast, letting you enjoy your creations within 24 hours.
Customizable: Feel free to experiment with different herbs and spices, like swapping in tarragon for a unique twist.
Perfect for All Occasions: Whether at a summer BBQ or a casual snack, these refrigerator dill pickles are a crowd-pleaser. Want more refreshing flavors? Check out our Dill Pickle Soup for another way to enjoy that tangy goodness!
Refrigerator Dill Pickles Ingredients
For the Pickles
- Cucumbers – The main ingredient that provides the crunch; using Kirby cucumbers enhances texture.
- Garlic – Adds a savory depth; for a milder taste, you can omit it or replace it with shallots.
- White Vinegar – This gives the pickles their tangy flavor; apple cider vinegar can be used for a sweeter profile.
- Kosher Salt – Essential for flavor and preservation; coarse salt is key, as table salt may over-salt your pickles.
- White Sugar – Balances acidity; feel free to replace it with honey or omit altogether for a less sweet version.
- Water – Helps to dilute the brine; stick with filtered water for the best results.
For the Seasoning
- Coriander Seeds – Introduces aromatic notes; dill seeds can be a suitable alternative for a different flavor.
- Mustard Seeds – Provides a mild, tangy flavor; they’re optional but recommended for deeper taste.
- Red Pepper Flakes – Add a touch of heat; you can exclude them or use jalapeños for a spicier kick.
These Refrigerator Dill Pickles are sure to add a delicious crunch to your meals and can be customized to suit your taste preferences!
Step‑by‑Step Instructions for Refrigerator Dill Pickles
Step 1: Prepare the Cucumbers
Start by washing your cucumbers thoroughly under cold water. Slice them lengthwise into quarters, ensuring each piece is evenly cut to maintain uniformity. This allows the brine to penetrate better. Once sliced, set them aside momentarily while you gather your packing jars for the Refrigerator Dill Pickles.
Step 2: Pack the Jars
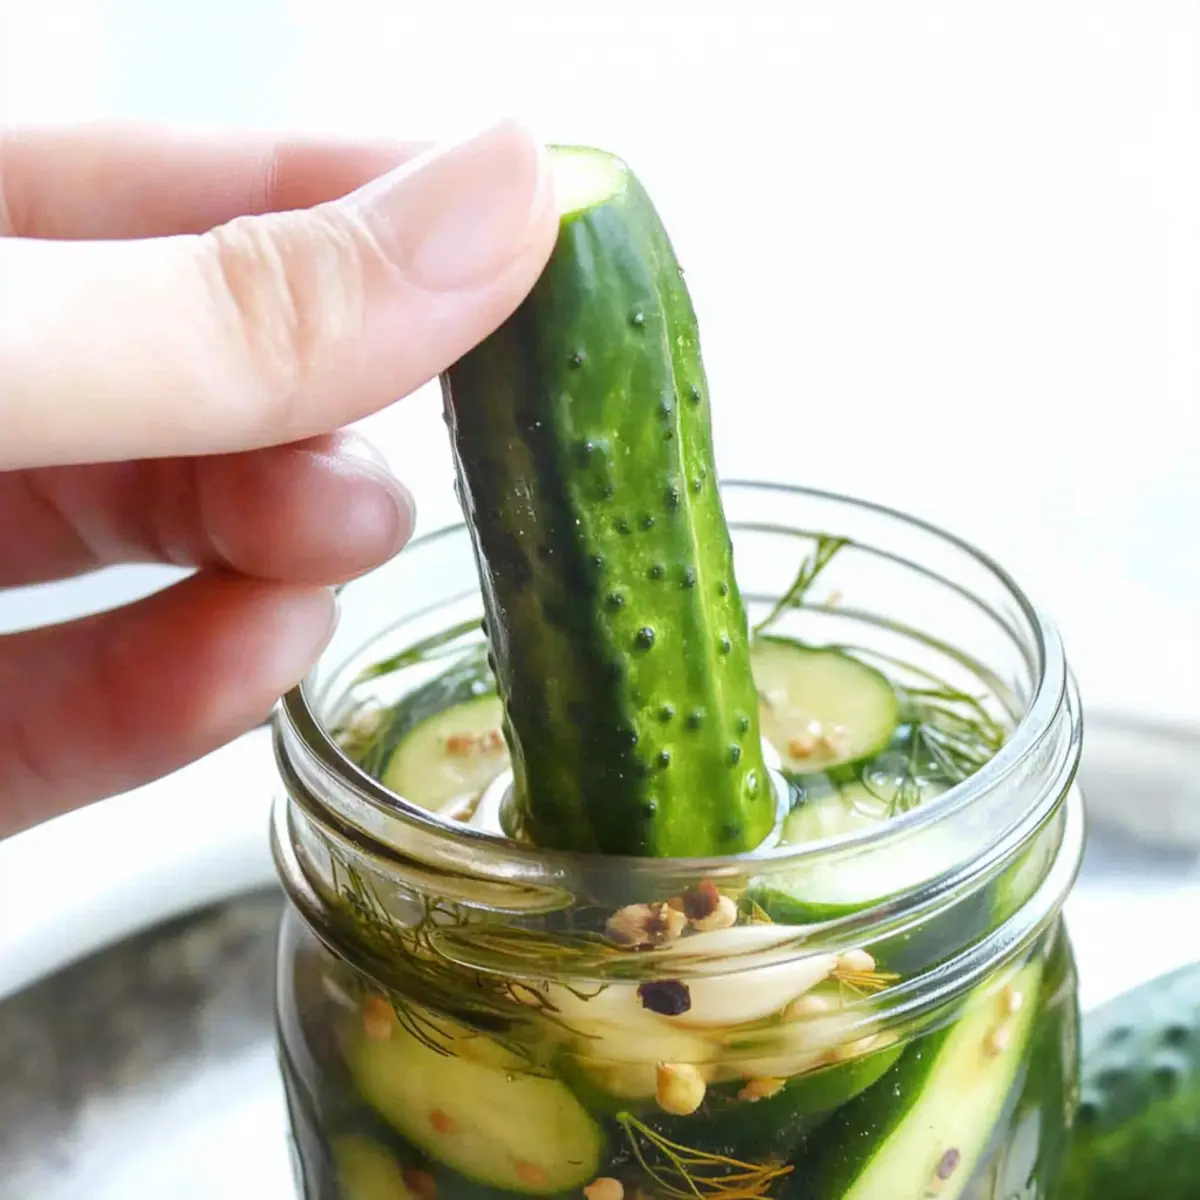
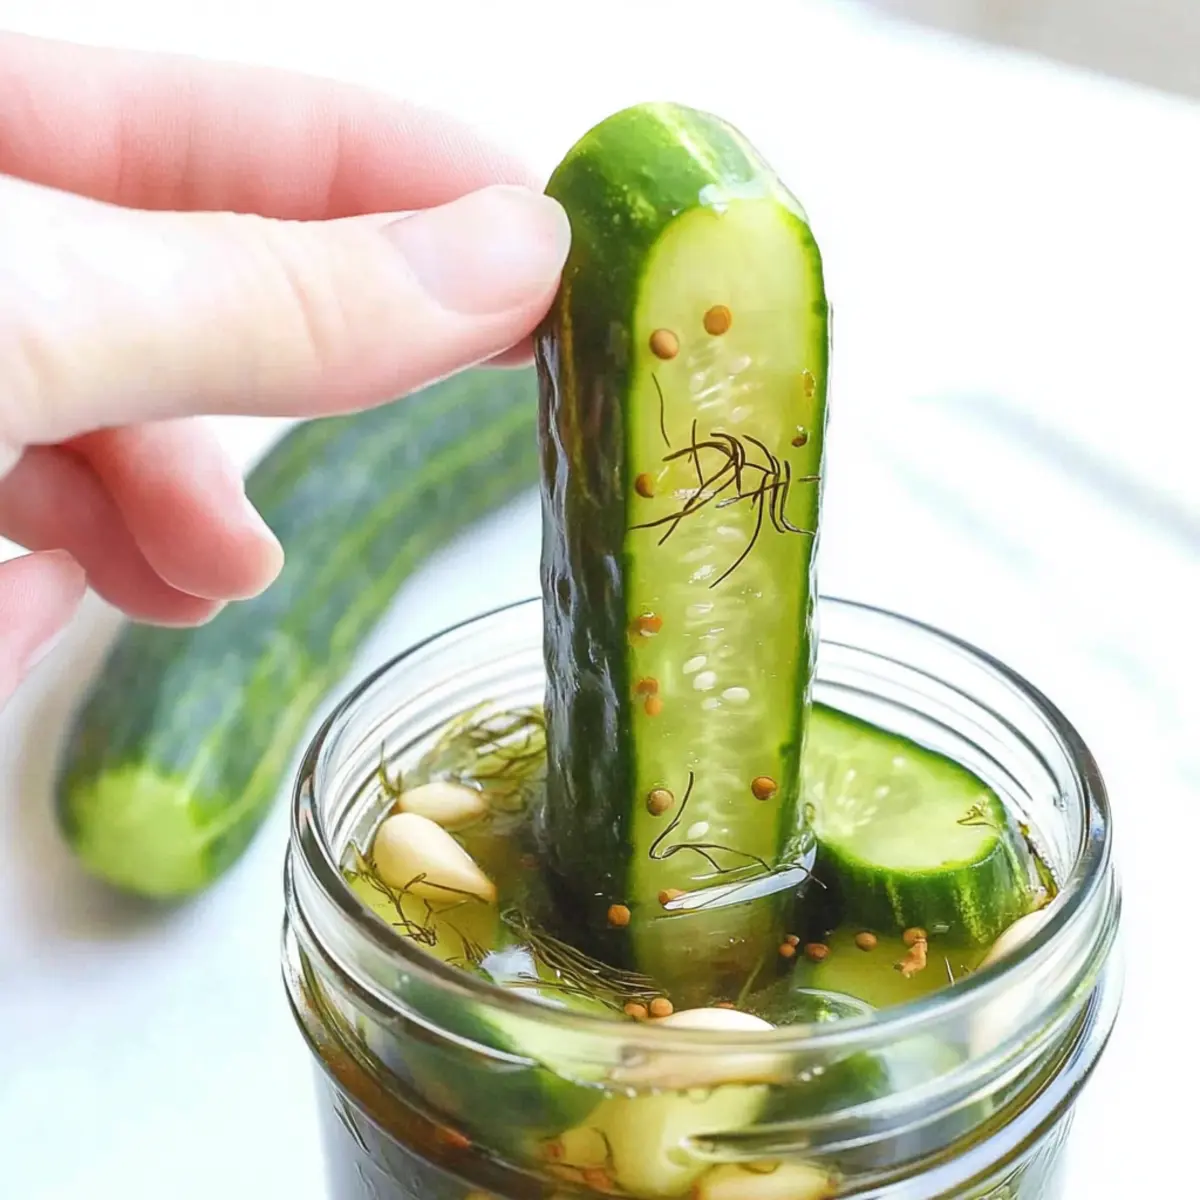
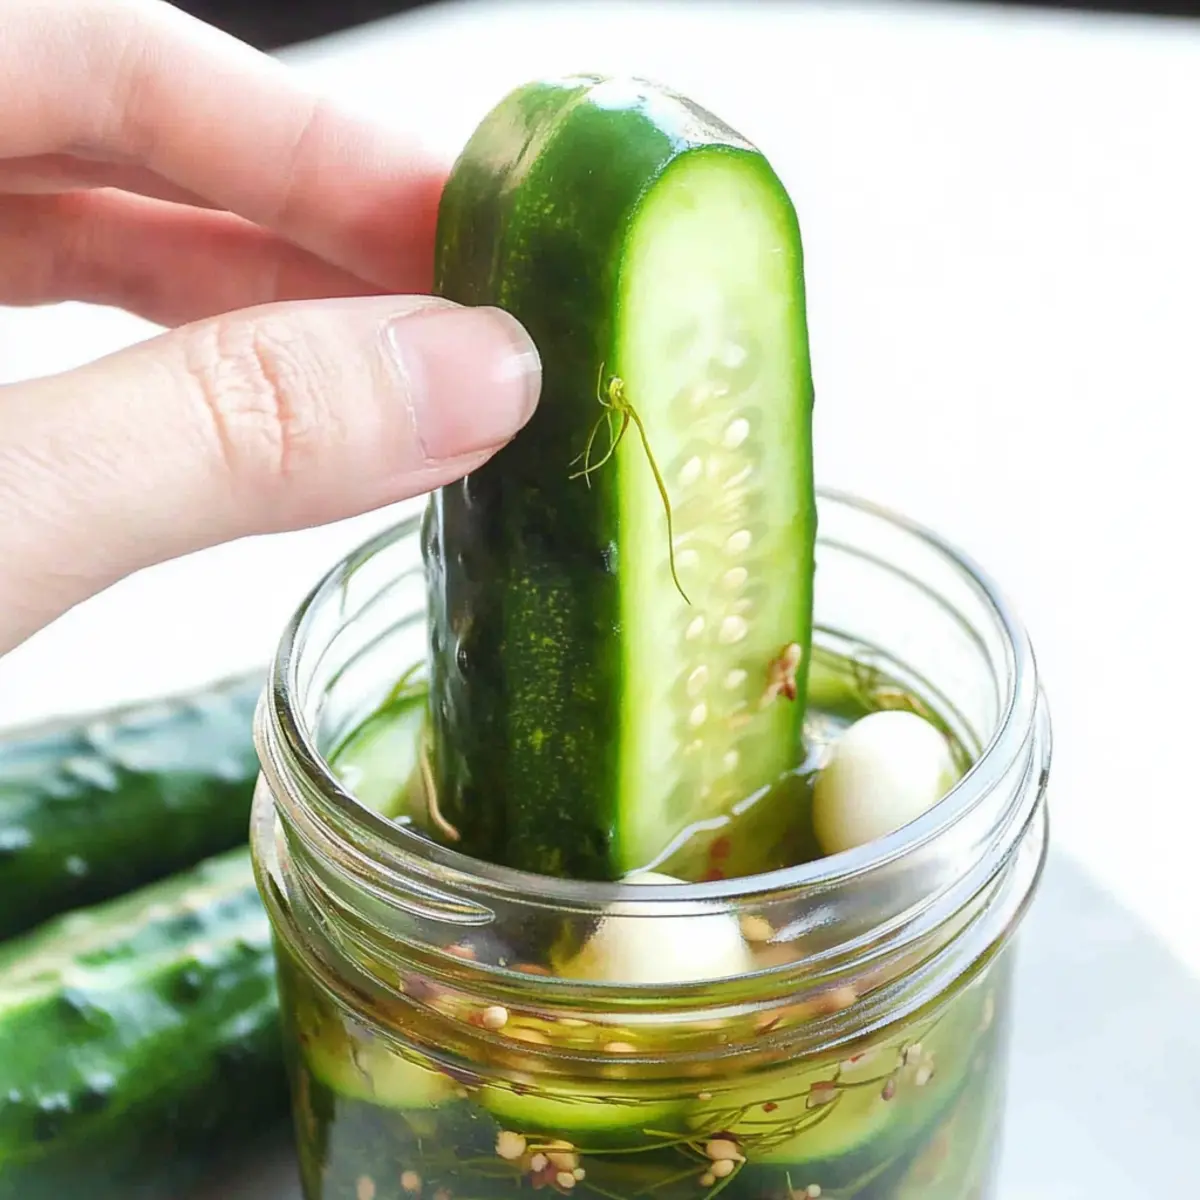
Take clean mason jars and begin packing the cucumber slices into them. Layer the cucumbers tightly, but without forcing them, as this helps keep them crisp. As you pack, feel free to add peeled garlic cloves and a few sprigs of fresh dill or your choice of herbs in between the layers for a burst of flavor.
Step 3: Make the Brine
In a medium saucepan, combine 1 cup of white vinegar, 1 cup of filtered water, 2 tablespoons of kosher salt, and 2 tablespoons of sugar. Heat over medium heat, stirring occasionally until the salt and sugar dissolve completely, which should take about 3-5 minutes. You’ll know it’s ready when it starts to simmer gently.
Step 4: Add Seasonings
Once the brine has dissolved, remove the saucepan from heat. Stir in 1 tablespoon of coriander seeds, 1 tablespoon of mustard seeds, and ½ teaspoon of red pepper flakes if you like a bit of heat. Allow the mixture to cool for about 10 minutes, letting those aromatic flavors blossom before pouring.
Step 5: Pour the Brine
Carefully pour the warm brine over the packed cucumbers in the jars. Make sure the cucumbers are fully submerged in the brine; if necessary, add more water to cover them completely. This ensures that the flavors infuse well into your Refrigerator Dill Pickles.
Step 6: Seal and Refrigerate
Seal each mason jar tightly with its lid, ensuring a good fit to keep air out. Place the jars in the refrigerator and let them chill for at least 24 hours. This resting time allows the flavors to meld beautifully, so try to resist the temptation to taste them right away!
Step 7: Enjoy Your Pickles
After 24 hours, grab your jars from the fridge and open one to sample your Refrigerator Dill Pickles. If they taste perfect to you, enjoy them in sandwiches, salads, or straight from the jar. Remember, they can last up to three weeks, as long as they are kept submerged in their brine.
Make Ahead Options
These Refrigerator Dill Pickles are a fantastic choice for meal prep enthusiasts! You can slice your cucumbers and pack them into jars up to 3 days in advance, allowing the pickles to be ready at a moment’s notice. Simply prepare the brine and pour it over the packed cucumbers just 24 hours before you plan to serve. To maintain their crunch, ensure the cucumbers stay submerged in the brine and avoid introducing any dirty utensils when serving. When you’re ready to enjoy, just pull a jar from the fridge, and you’ll have fresh, zesty pickles that are just as delicious as the day you made them!
What to Serve with Quick and Easy Refrigerator Dill Pickles
Elevate your meals with delightful side dishes and pairings that enhance the fresh crunch of these zesty pickles.
-
Grilled Cheese Sandwich: Warm, gooey cheese between toasted bread pairs perfectly with the tangy crunch of the pickles. The contrasting textures create a delightful bite.
-
Classic Potato Salad: Creamy and rich potato salad balances the sharpness of the pickles, making each forkful a satisfying experience at summer BBQs.
-
Deviled Eggs: These savory bites are complemented beautifully by the tangy crunch of the pickles, adding a fresh contrast to the creamy eggs.
-
Pulled Pork Sliders: The bright acidity of the pickles cuts through the richness of the pork, enhancing every mouthful with a burst of flavor.
-
Pasta Salad: Incorporate diced pickles into a cold pasta salad for an unexpected twist. They brighten up the dish with their vinegar punch.
-
Charcuterie Board: Serve these pickles as part of a meat and cheese platter. Their zing elevates the flavors of cured meats and cheese, creating a well-rounded spread.
-
Beer or Cider: Pair your pickles with a light, crisp beer or a refreshing cider for a delightful drink complement that enhances their flavor.
Each of these pairings brings something unique to the table, perfectly accentuating the crunchy, tangy goodness of your Refrigerator Dill Pickles!
How to Store and Freeze Refrigerator Dill Pickles
Fridge: Store your refrigerator dill pickles in the fridge for up to three weeks, keeping them submerged in the brine to maintain their crunch.
Jar Sealing: Ensure jars are sealed tightly to prevent air exposure and extend freshness. A good seal keeps the flavorful essence intact!
Reheating: There’s no need to reheat these pickles; enjoy them cold directly from the jar as a snack or added to your favorite dishes.
Freezer Tip: While not ideal for freezing, if you must, pack pickles in a freezer-safe container, ensuring they’re well-submerged in brine; consume them within three months for the best flavor.
Refrigerator Dill Pickles Variations
Get ready to explore delightful twists on your homemade pickles that heighten flavors and textures, making them truly your own!
-
Herb Swap: Use fresh tarragon or basil instead of dill for unexpected herbal notes. This simple swap opens up a world of flavor—imagine the aromatic interplay these herbs offer!
-
Onion Addition: Slice red onions to add a sweet crunch. Their vibrant color and flavor can transform your pickles into a tangy, crunchy treat that’s irresistible!
-
Spicy Kick: Replace red pepper flakes with sliced jalapeños for more heat. This substitution introduces a lively spiciness that will surely excite your taste buds.
-
Sweet Alternative: Swap white sugar for honey, offering a natural sweetness. Honey will impart a subtle floral flavor, enhancing the overall complexity of your pickles.
-
Vinegar Variety: Experiment with apple cider vinegar or red wine vinegar for different acidic profiles. These options allow for a unique twist that can cater to your many culinary moods.
-
Flavor Blast: Add a tablespoon of pickling spice for an extra flavor dimension. This blend can elevate your refrigerator dill pickles, giving them a robust taste that’s hard to resist.
-
Crunchy Teasers: Throw in sliced carrots or radishes for an additional crunch and a pop of color. This playful variation not only makes your pickles visually appealing but also adds exciting new flavors.
For more inspiration to complement your pickles, consider our delicious Dill Pickle Soup, or explore unique twists on classics like our Discover Unique Quesadilla. Dive into creativity and make these pickles uniquely yours!
Expert Tips for Refrigerator Dill Pickles
• Use Fresh Cucumbers: Fresh, firm cucumbers yield the best crunch. Opt for Kirby cucumbers for a delightful texture in your refrigerator dill pickles.
• Mind the Salt: Always use kosher salt rather than table salt, as it helps create the perfect brine without making the pickles too salty.
• Cool the Brine: Let the brine cool a bit before pouring it over cucumbers to avoid cooking them, allowing for maximum crispness in your refrigerator dill pickles.
• Experiment with Flavors: Don’t hesitate to try different herbs and spices, like tarragon or red pepper flakes, to customize your pickle experience and find your favorite flavor combination.
• Seal Efficiently: Make sure to seal jars tightly to keep air out, which helps preserve the quality of your refrigerator dill pickles and keeps them tasting fresh.
Refrigerator Dill Pickles Recipe FAQs
How do I choose the right cucumbers for pickling?
Absolutely! For the crispiest and most flavorful refrigerator dill pickles, I highly recommend using Kirby cucumbers. Their firm texture ensures they hold up well in the brine. Look for cucumbers that are medium-sized, firm, and have a vibrant dark green color. Avoid any with dark spots or soft areas, as these could indicate overripeness and may result in mushy pickles.
How should I store my refrigerator dill pickles?
Very important! Store your refrigerator dill pickles in the fridge, where they can last up to three weeks. Make sure they are always submerged in their brine to maintain their lovely crunch. Using clean utensils when removing the pickles helps extend their shelf life, and don’t forget to keep jars sealed tightly to keep air out!
Can I freeze refrigerator dill pickles?
While it’s not the best option for these pickles, if you must, you can freeze them! Pack pickles into a freezer-safe container and make sure they are completely submerged in brine. To enjoy the best texture and flavor, consume them within three months of freezing. Keep in mind that freezing may alter their crunchiness a bit.
What if my pickles turn out too salty?
If your refrigerator dill pickles are too salty for your taste, don’t worry; this can happen sometimes! A quick fix is to rinse the pickles under cold water before serving to wash off some of the excess salt. Going forward, ensure you are measuring the kosher salt accurately. Using less might be a good idea for your next batch, and feel free to adjust the salt to suit your preference!
Are these pickles safe for pets?
It’s best to keep these refrigerator dill pickles away from your pets, particularly dogs. The pickling spices and vinegar can upset their stomachs and are not healthy for them. While pickles aren’t toxic, it’s always best to play it safe and not share them with your furry friends to avoid any gastrointestinal issues.
Can I alter the recipe for dietary preferences?
Yes, you can! This recipe is very customizable. If you’re looking to make it healthier, try substituting the white sugar with honey or completely omitting it for a no-sugar version. If you’re avoiding vinegar, consider using lemon juice for a different tang. Just remember that altering ingredients can change the final flavor of your refrigerator dill pickles, but that’s part of the fun of cooking!
Crunchy Refrigerator Dill Pickles Made Easy at Home
Ingredients
Equipment
Method
- Wash the cucumbers thoroughly under cold water and slice them lengthwise into quarters.
- Pack the cucumber slices into clean mason jars, layering tightly but without forcing them.
- In a medium saucepan, combine white vinegar, filtered water, kosher salt, and sugar. Heat over medium heat until dissolved, about 3-5 minutes.
- Remove from heat and stir in coriander seeds, mustard seeds, and red pepper flakes. Allow to cool for about 10 minutes.
- Pour the warm brine over the packed cucumbers, ensuring they are fully submerged.
- Seal each jar tightly and refrigerate for at least 24 hours.
- Enjoy your pickles in sandwiches, salads, or straight from the jar after 24 hours.
")