
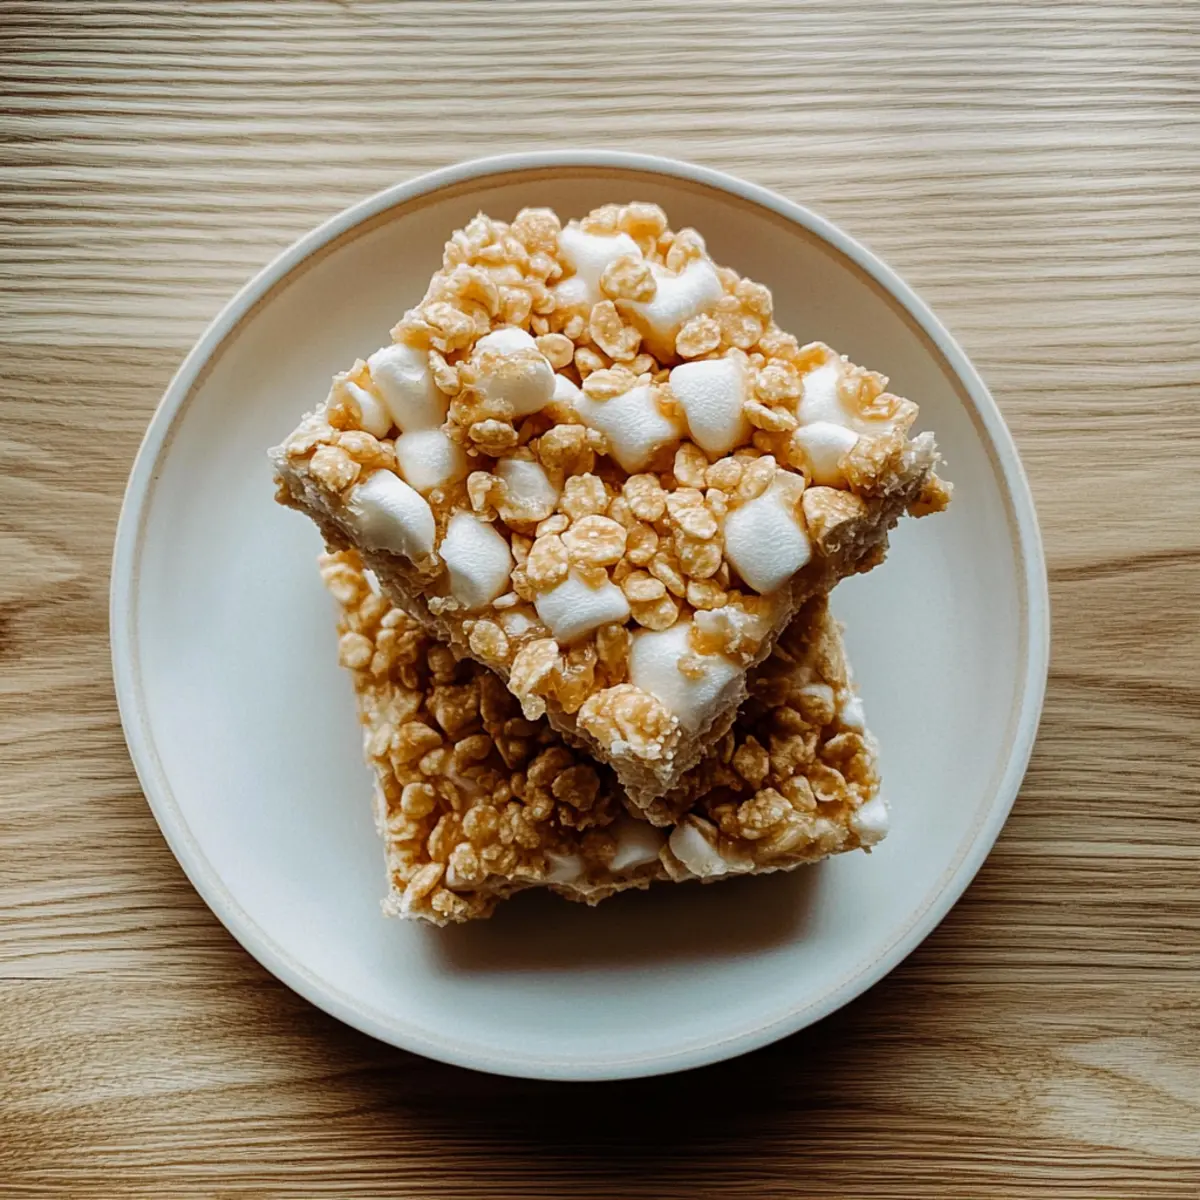
“Did you hear about the newest dessert sensation?” After that delightful exchange, I dove right into the kitchen, ready to create something truly special: Salted Brown Butter Crispy Treats. This recipe melds sweet marshmallows with the nutty richness of browned butter, sprinkled with a touch of flaky sea salt to elevate each crispy bite. Best of all, these salty-sweet snacks take just 20 minutes to whip up, making them perfect for when you crave something homemade yet effortlessly quick. Whether you’re hosting friends or just treating yourself, these treats are sure to be an instant hit. Curious to find out how to achieve that perfect crispy texture? Let’s get started!
How are these treats uniquely irresistible?
Quick, Delicious: You’ll be amazed at how just 20 minutes can transform simple ingredients into a dessert that’s both addictive and satisfying.
Nutty Aroma: The richness of browned butter adds a depth of flavor that elevates these treats above the standard crispy rice bars.
Perfectly Salted: A sprinkle of flaky sea salt on top creates a delightful contrast, making each bite a burst of sweet and savory.
Customize Your Way: Feeling adventurous? Experiment with different cereals or mix in some chocolate chips for an extra touch.
Crowd Favorite: Whether it’s snack time or a party, these treats are sure to make you the star! Serve them alongside your favorite Peanut Butter Crackers for an unbeatable combo!
Salted Brown Butter Crispy Treats Ingredients
• Get ready to create a sweet-salty wonder!
For the Base
- Unsalted Butter – Adds richness and flavor; make sure to brown it for deeper taste.
- Mini or Standard Marshmallows (24 oz) – These serve as the sweet base; opt for standard marshmallows so they melt faster.
For the Crunch
- Rice Crisp Cereal – Creates a foundational crispy texture; it’s essential for the structure of the treats.
- Cornflakes – Adds additional crunch and flavor; feel free to adjust the amount based on your preference.
For the Flavor
- Kosher Salt – Balances the sweetness with a subtle crunch; using Diamond Crystal is recommended for best results.
- Flaky Sea Salt – Provides a finishing touch with extra texture; consider Maldon Sea Salt Flakes for a gourmet feel.
These Salted Brown Butter Crispy Treats are sure to turn heads and tantalize taste buds, so let’s get cooking!
Step‑by‑Step Instructions for Salted Brown Butter Crispy Treats
Step 1: Brown the Butter
In a medium saucepan over medium heat, melt 4 tablespoons of unsalted butter. Keep a close eye on it as it simmers, stirring occasionally, until it transitions to a golden brown color and releases a nutty aroma—this should take about 5-7 minutes. Remove the saucepan from heat immediately to prevent burning.
Step 2: Mix in Marshmallows
Add 24 ounces of mini or standard marshmallows to the browned butter. Stir continuously over low heat until the marshmallows are fully melted and the mixture becomes smooth, which should take about 3-4 minutes. Watch closely as this mixture can bubble up slightly, so keep stirring to combine the flavors seamlessly.
Step 3: Combine Dry Ingredients
In a large mixing bowl, mix together 4 cups of rice crisp cereal and 2 cups of cornflakes. These will provide a delightful crunch and texture to your Salted Brown Butter Crispy Treats. Once combined, drizzle the warm marshmallow mixture over the cereal blend, using a spatula to gently mix everything together until all pieces are evenly coated.
Step 4: Press into Pan
Prepare a 9×13 inch baking pan by greasing it lightly with a butter wrapper or cooking spray for easy release. Transfer the crispy mixture into the pan, using an offset spatula or your greased hands to press it down firmly and evenly. Aim for a compact layer, as this will ensure your treats hold their shape once cooled.
Step 5: Finish with Flaky Salt
While the mixture is still warm, take a pinch of flaky sea salt and generously sprinkle it over the top of the treats. This finishing touch will enhance the flavor, creating that lovely salty-sweet contrast that makes these Salted Brown Butter Crispy Treats irresistible. Let the treats sit for about 10-15 minutes to cool slightly.
Step 6: Cool and Cut
Allow the treats to cool completely in the pan, ideally at room temperature for about 30 minutes. Once set, use a sharp knife to cut them into squares or rectangles for serving. Each bite will offer a delightful crunch, perfectly balanced with the buttery, salty sweetness of your delicious creation!

What to Serve with Salted Brown Butter Crispy Treats
Elevate your dessert experience by pairing these treats with complementary flavors and textures that appeal to your palate.
-
Creamy Vanilla Ice Cream: A scoop of rich vanilla ice cream contrasts beautifully with the crispy treats, adding a luscious creaminess.
-
Fresh Berries: The tartness of raspberries or strawberries brightens the palate, balancing the sweetness of the treats perfectly.
-
Chocolate Dipping Sauce: Drizzle warm chocolate sauce over the crispy bars for an indulgent, decadent dessert experience that will satisfy your sweet tooth.
-
Coconut Whipped Cream: This light and fluffy topping brings a tropical flair, enhancing the overall flavor profile with a dreamy consistency.
-
Homemade Hot Chocolate: Cozy up with a warm mug of hot cocoa, its rich chocolatey goodness pairing flawlessly with the salty-sweet nature of the treats.
-
Nutty Trail Mix: A handful of nutty, crunchy trail mix adds a satisfying texture contrast and a touch of healthy fats to balance your snack.
-
Lemonade Spritzers: Refreshing and zesty, these spritzers provide a bright note that cuts through the richness of the treats, making each bite feel lighter.
-
Gourmet Popcorn: Savory popcorn sprinkled with herbs or cheese can create an exciting flavor pairing, drawing out the buttery notes in the treats.
-
Peanut Butter Cookies: For a homemade snack table, serve with chewy peanut butter cookies to create dual salty-sweet sensations for your guests!
Salted Brown Butter Crispy Treats Variations
Feel free to get creative with these treats and take them to the next level of deliciousness!
-
Nutty Delight: Substitute creamy peanut butter for some of the butter for a delightful nutty twist that pairs beautifully with the marshmallows.
-
Chocolate Boost: Stir in chocolate chips or mini marshmallows into the mixture for an extra layer of sweetness and texture that no one can resist.
-
Coconut Craze: Add a cup of sweetened shredded coconut to the cereal mix for a tropical flair and chewy texture that contrasts delightfully with the crunch.
-
Spiced Up: Sprinkle in a dash of cinnamon or pumpkin spice as you melt the marshmallows for a cozy, fall-inspired flavor that warms the heart.
-
Cereal Remix: Experiment with different cereals, like Cocoa Krispies or Fruity Pebbles, for a colorful and playful variation, making snack time a bit more fun for all ages.
-
Add Some Heat: For those who enjoy a kick, mix in a pinch of cayenne pepper or red pepper flakes for a surprising heat that complements the sweetness.
-
Fruity Fun: Toss in some dried fruit, like cranberries or chopped apricots, for a chewy addition that adds a burst of flavor along with added nutrients.
-
Gourmet Topping: Drizzle melted dark chocolate over the treats before slicing to create a rich, gourmet treat that’s perfect for impressing guests at a party.
With these variations, you can create countless versions of these Salted Brown Butter Crispy Treats. Each one has its own unique character! And if you’re a fan of delightful desserts, you might also enjoy trying your hand at Condensed Milk Brownies or the indulgent layers of Slutty Brownies. Happy cooking!
How to Store and Freeze Salted Brown Butter Crispy Treats
Airtight Container: Store in an airtight container at room temperature for up to 1 week to maintain freshness and crispiness.
Refrigerator: For longer storage, keep in the fridge for up to 2 weeks, but note that the texture may become slightly firmer.
Freezer: Freeze the treats by wrapping them tightly in plastic wrap and then placing in a freezer-safe bag. They can last up to 2 months, ensuring a delicious treat is always on hand.
Reheating: To enjoy them warm, simply microwave for 10-15 seconds. This will bring back their delightful texture and flavors in every bite.
Make Ahead Options
These Salted Brown Butter Crispy Treats are perfect for busy home cooks seeking to save time in the kitchen! You can prepare the crispy mixture up to 24 hours in advance by following the initial instructions through Step 4, pressing the mixture firmly into the pan, then cooling it completely. Once set, cover the pan tightly with plastic wrap to maintain freshness and prevent them from becoming stale. When you’re ready to serve, simply sprinkle with flaky sea salt and cut into squares. This way, you’ll have a delightful, sweet-salty treat ready to impress at a moment’s notice!
Expert Tips for Salted Brown Butter Crispy Treats
-
Butter Watch: Monitor the butter closely as it browns; it can quickly go from perfect to burnt in moments. Golden brown is the goal!
-
Accurate Measurements: Weigh your marshmallows for precise measurements. Using 24 ounces ensures the right texture for your Salted Brown Butter Crispy Treats.
-
Press Firmly: Ensure you press the mixture into the pan firmly to avoid crumbly treats later. An even layer makes all the difference!
-
Flavor Variations: Experiment with add-ins like mini chocolate chips or different cereals to customize your treats. Get creative and discover your favorite twist!
-
Cooling Time: Be patient—allow the treats to cool completely before cutting. This will help them set properly and hold their shape when served.
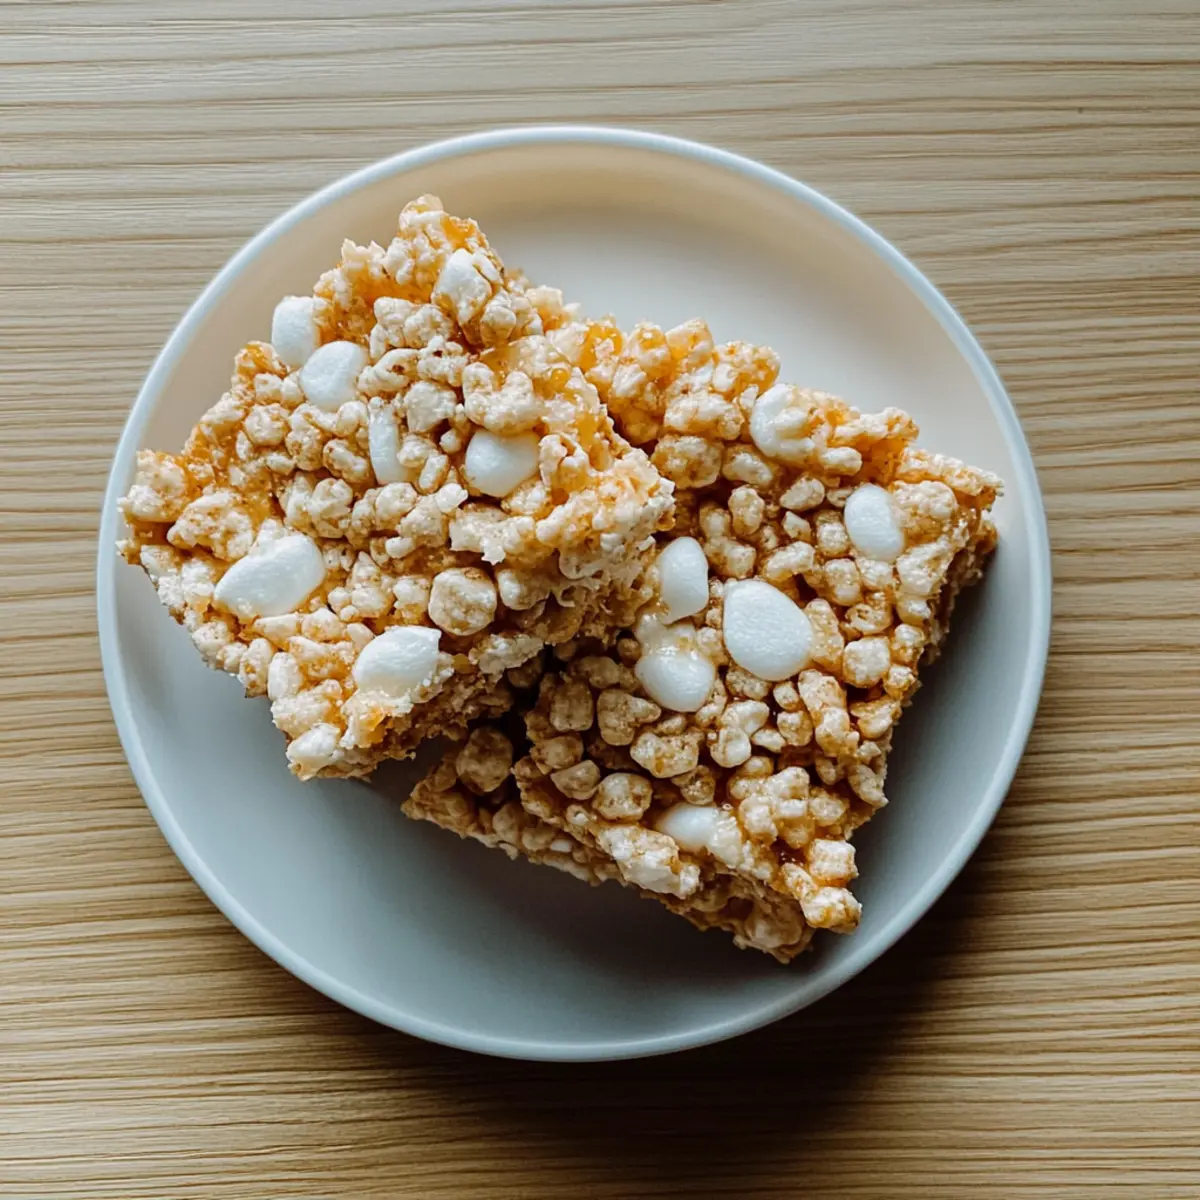
Salted Brown Butter Crispy Treats Recipe FAQs
How do I select the right butter for this recipe?
It’s best to use unsalted butter for the rich flavor it provides. I like to brown it myself to enhance its nuttiness, but if you’re in a pinch, store-bought browned butter can also work! Just be sure to keep an eye on it while cooking to avoid burning.
How should I store my Salted Brown Butter Crispy Treats?
Store your treats in an airtight container at room temperature for up to 1 week. To keep them fresh, a good tip is to layer them with parchment paper, especially if they tend to stick together!
Can I freeze these treats?
Absolutely! To freeze, wrap the cooled treats tightly in plastic wrap and place them in a freezer-safe bag or container. They’ll stay fresh for up to 2 months. When you’re ready to enjoy, simply thaw at room temperature or microwave for 10-15 seconds to restore their delightful texture.
What should I do if my marshmallows didn’t melt smoothly?
If your marshmallows aren’t melting smoothly, make sure you’re stirring continuously over low heat; this prevents them from cooking unevenly. If the mixture thickens, try adding a splash of milk or water—just a teaspoon at a time—to help loosen it up.
Are these treats safe for those with allergies?
These treats contain marshmallows, butter, and cereals that may contain allergens like gluten or dairy. Always check the labels for specific allergen information, especially if you’re serving guests who might have dietary restrictions.
Can I substitute ingredients in this recipe?
Yes! I often mix things up by substituting peanut butter for half of the butter, or adding chocolate chips, nuts, or different types of cereals for extra flavor and texture. Feel free to get creative with your Salted Brown Butter Crispy Treats!
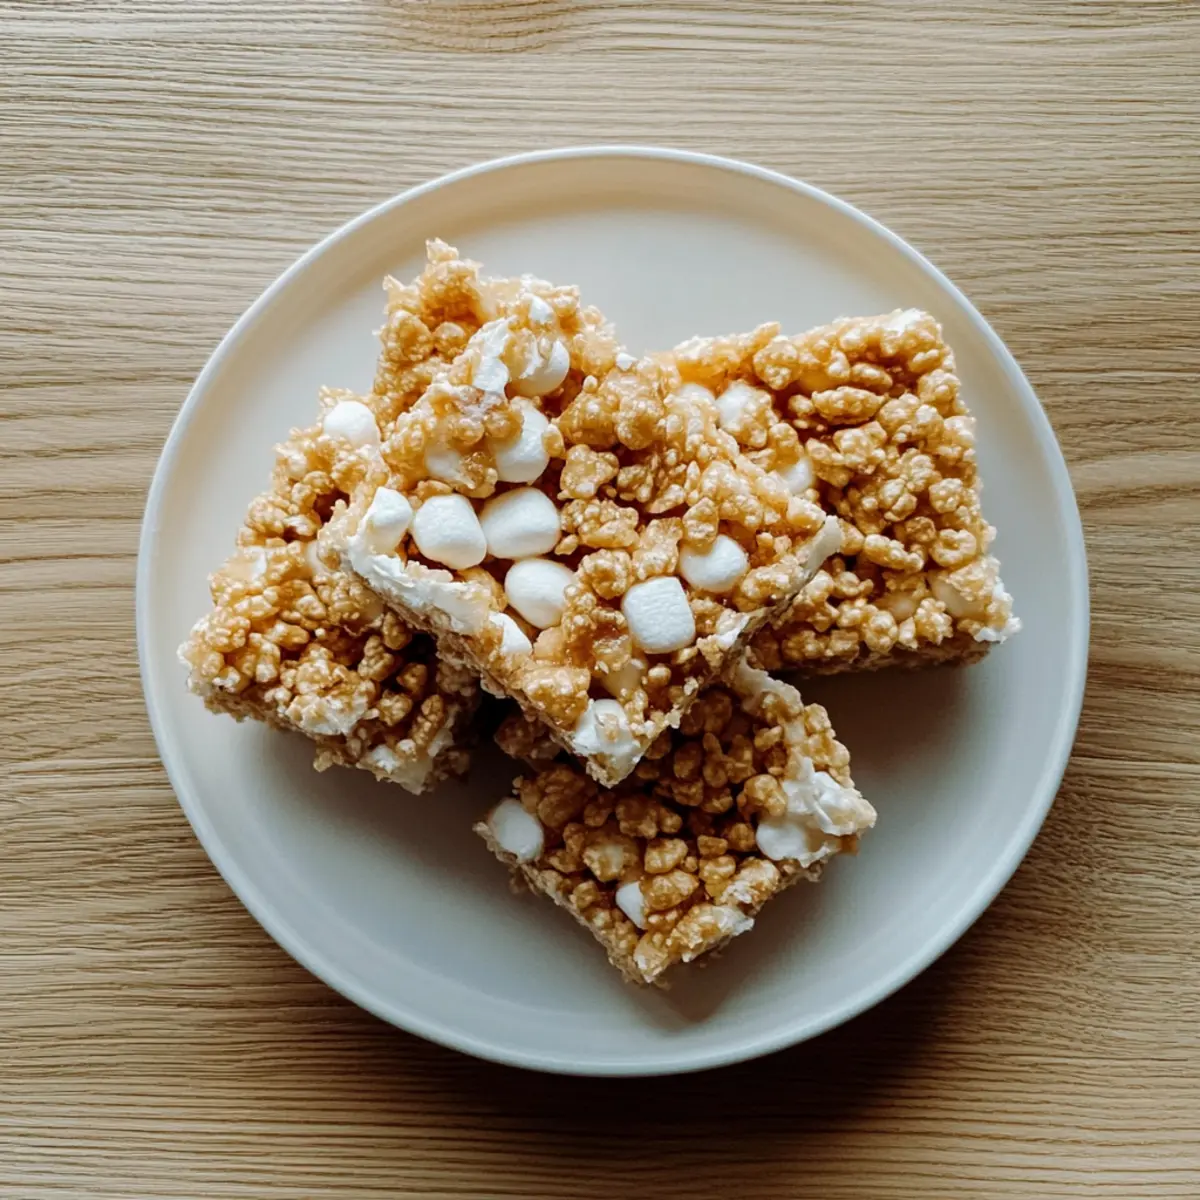
Salted Brown Butter Crispy Treats for Sweet-Salty Bliss
Ingredients
Equipment
Method
- In a medium saucepan over medium heat, melt 4 tablespoons of unsalted butter until golden brown, about 5-7 minutes.
- Add 24 ounces of mini or standard marshmallows to the browned butter and stir over low heat until fully melted, about 3-4 minutes.
- In a large mixing bowl, mix together 4 cups of rice crisp cereal and 2 cups of cornflakes, then drizzle the warm marshmallow mixture over the cereal blend, mixing until coated.
- Prepare a 9x13 inch baking pan, then transfer the crispy mixture into the pan, pressing down firmly and evenly.
- While warm, sprinkle a pinch of flaky sea salt over the top and let sit for about 10-15 minutes to cool slightly.
- Allow to cool completely in the pan for about 30 minutes, then cut into squares or rectangles for serving.