")
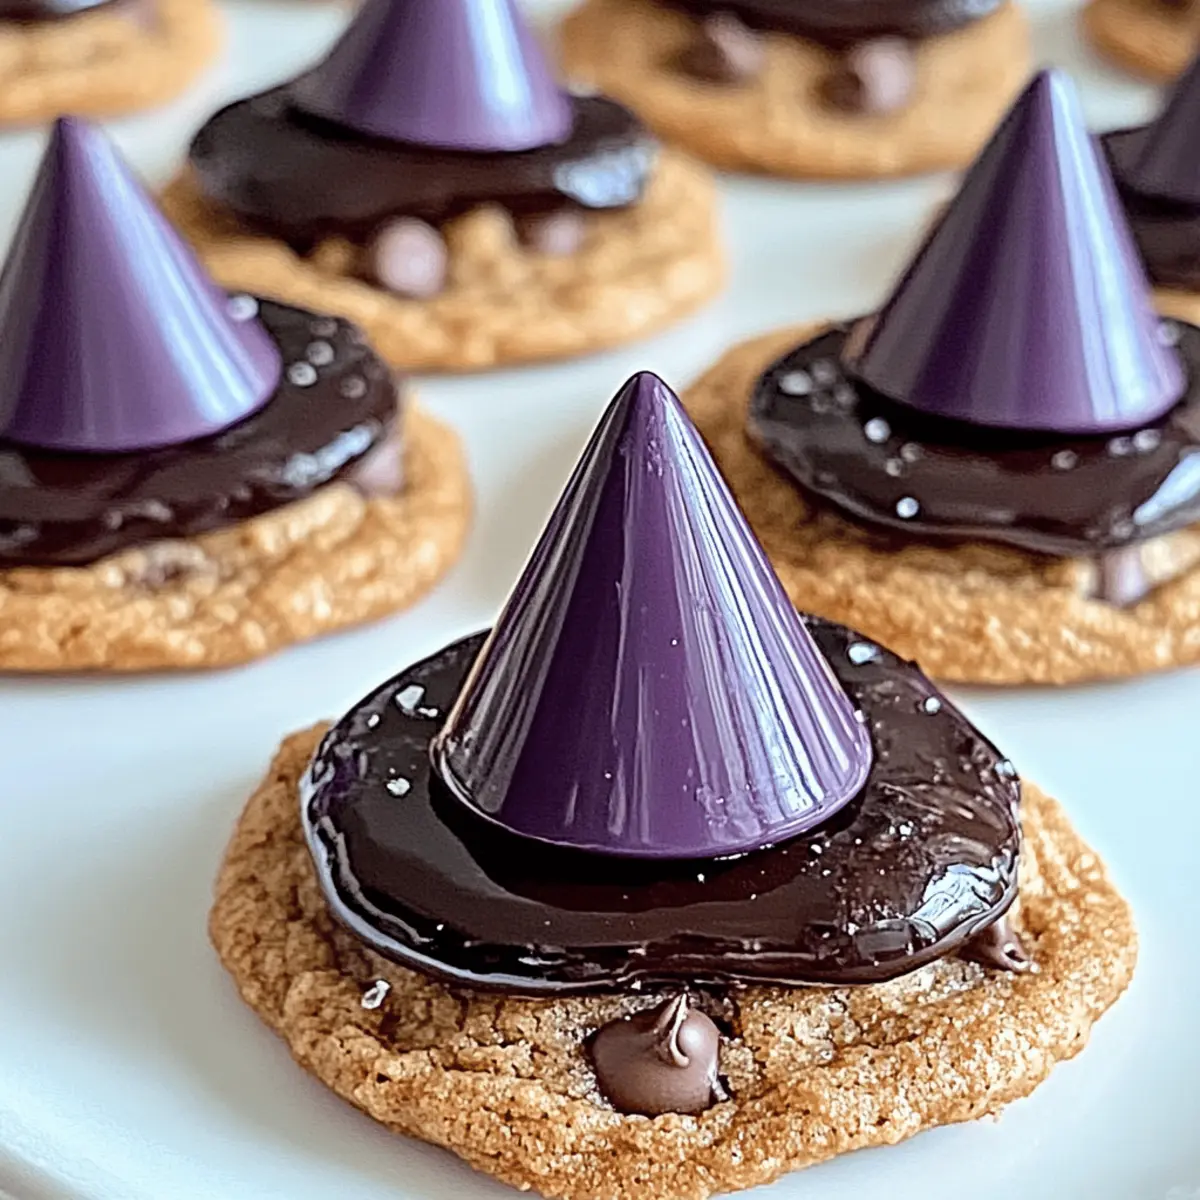
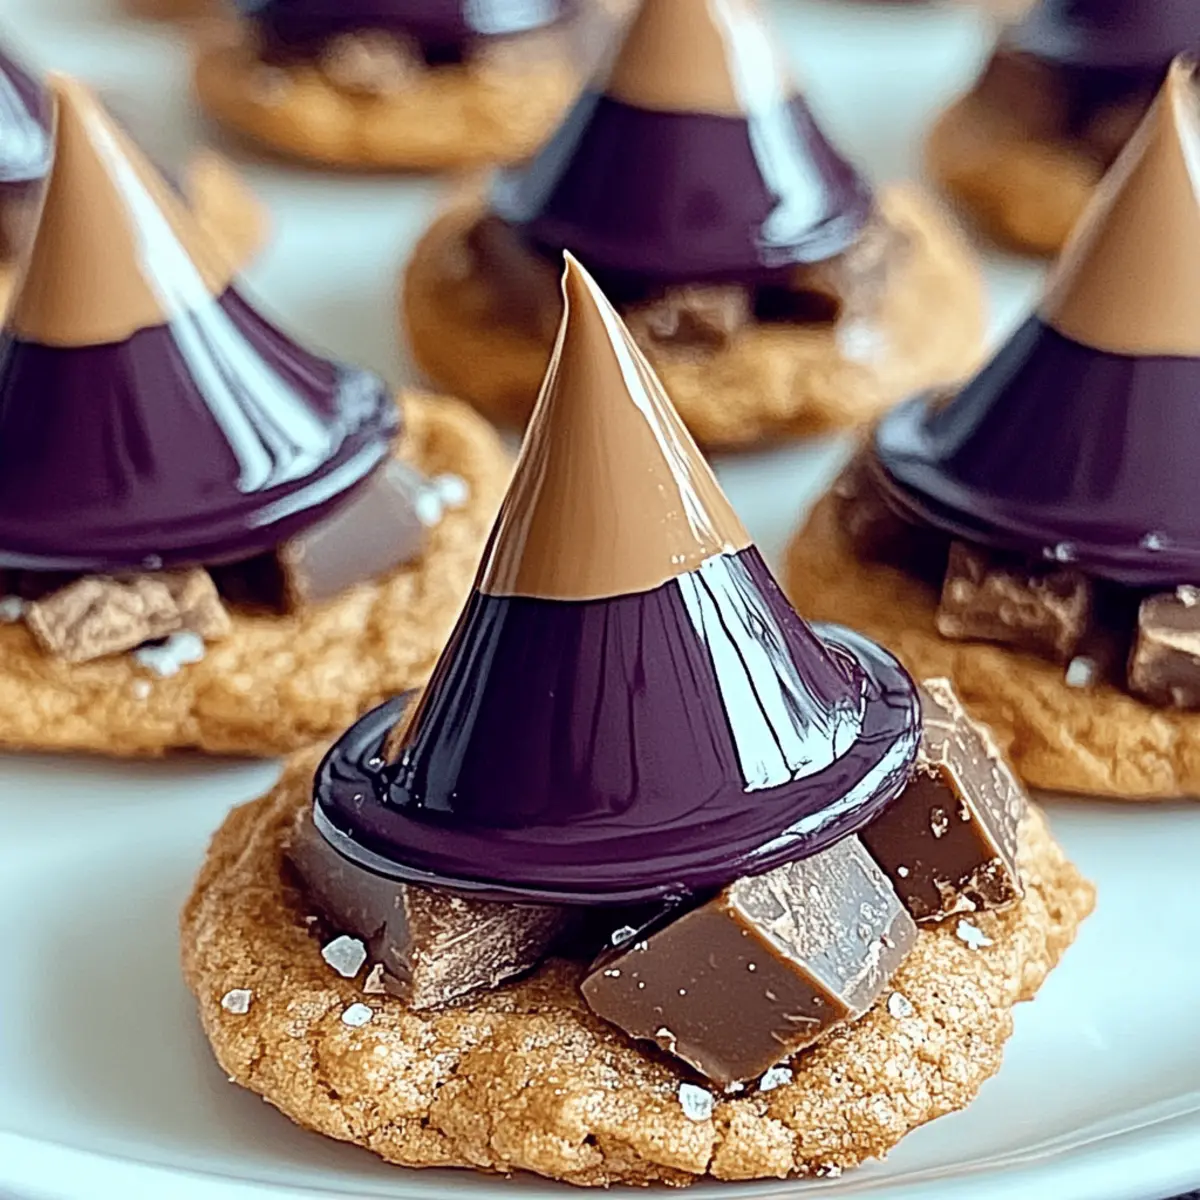
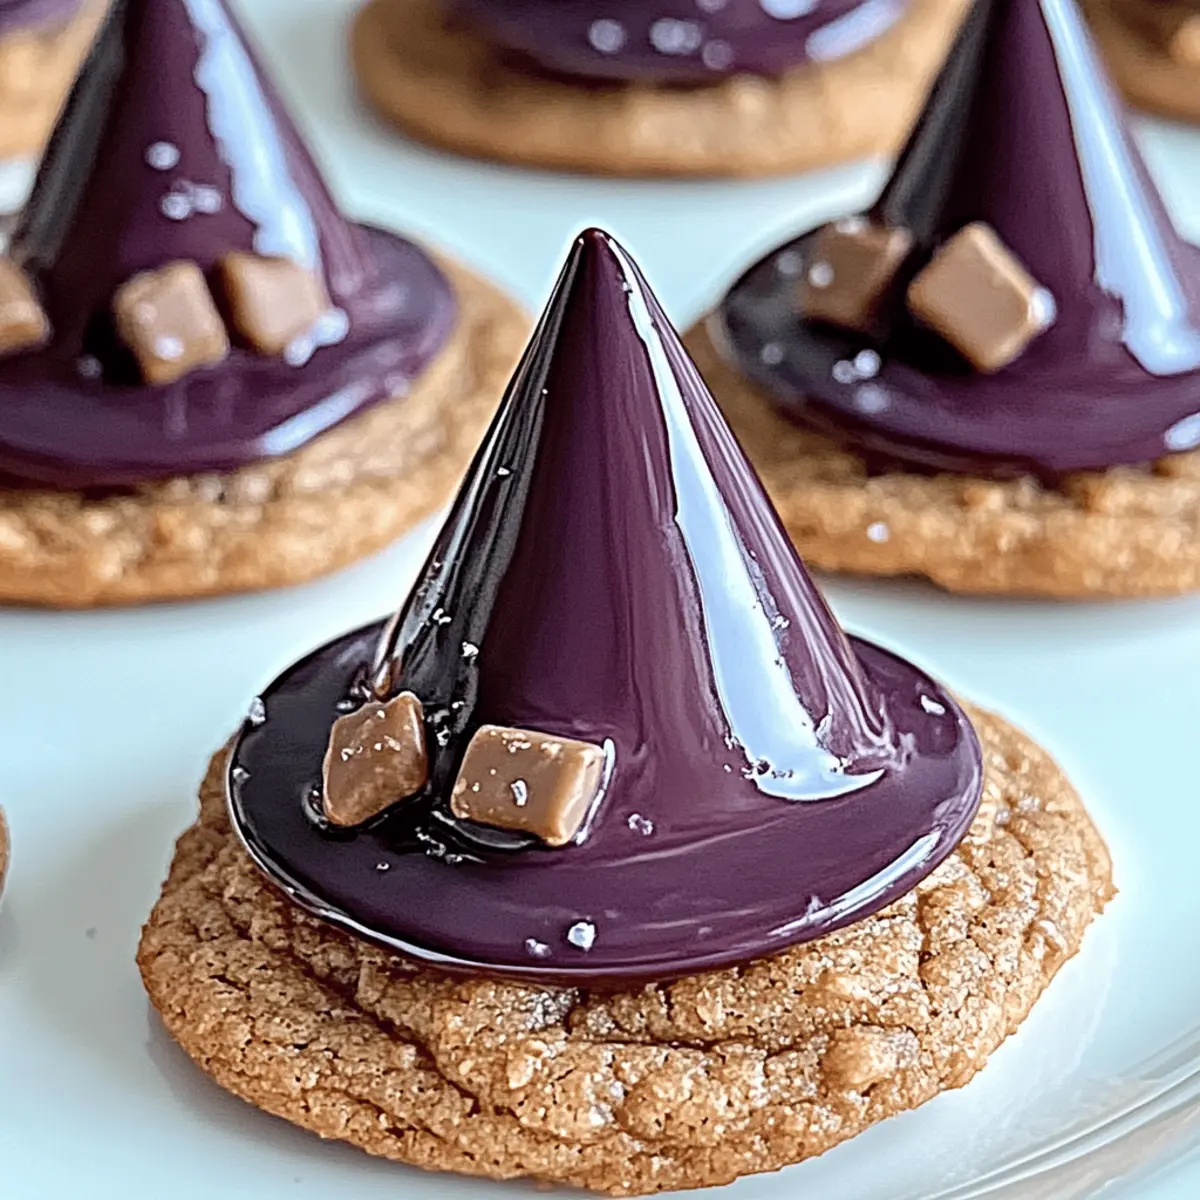
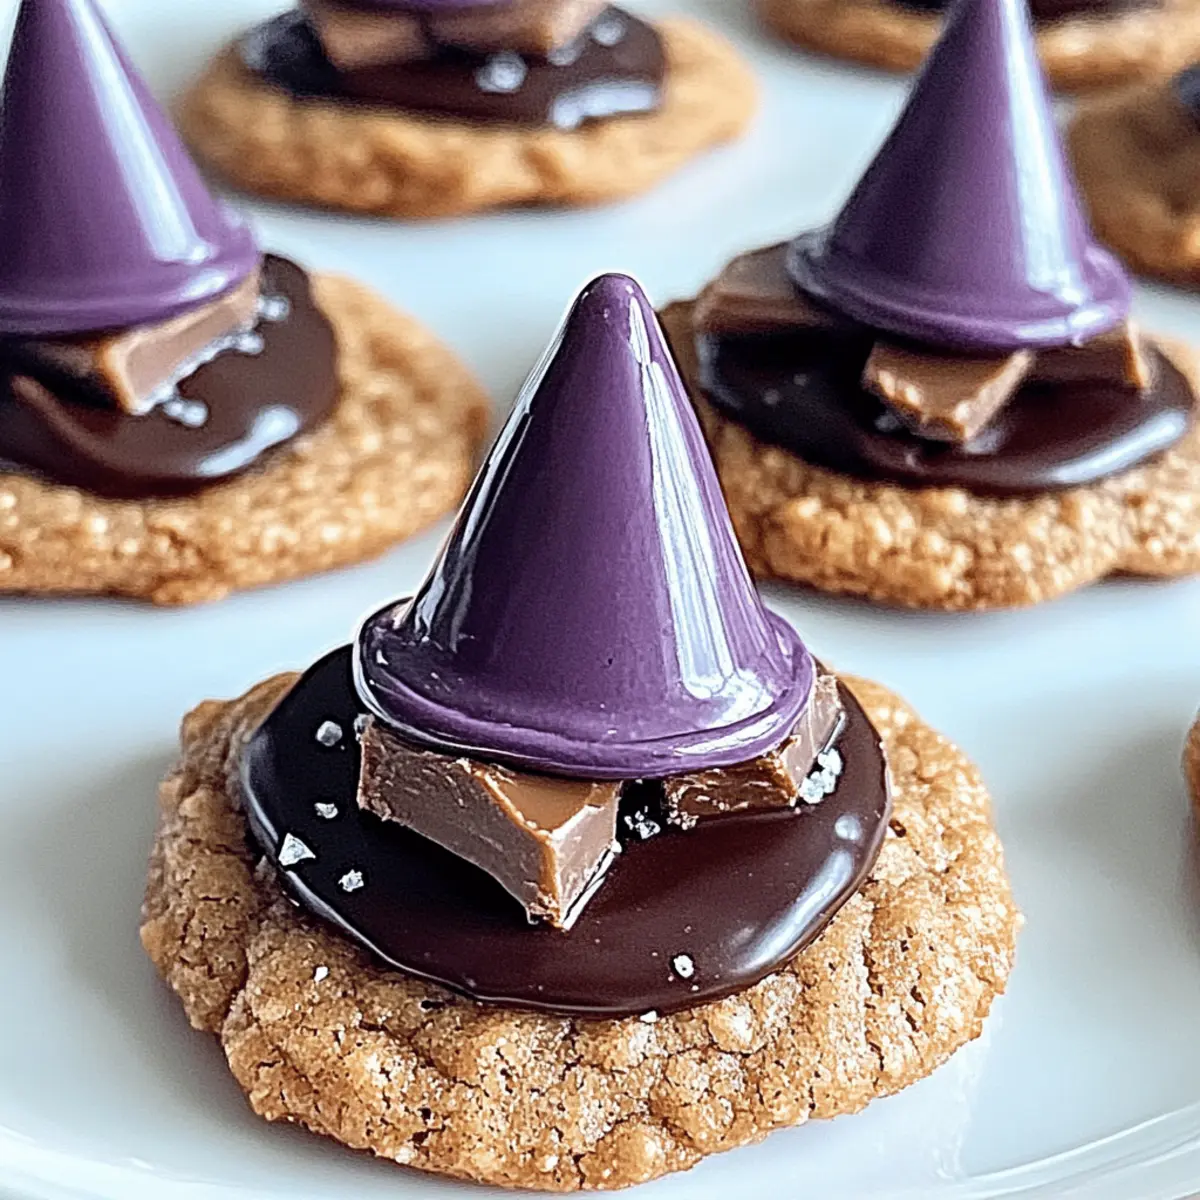
The aroma wafting through the kitchen felt almost magical, transporting me straight to a cozy, candlelit Halloween gathering. The moment I began preparing these Spellbinding Witchy Cookies, I knew I was onto something special. These delightful, soft, and gooey treats are not just perfect for the spooky season; they also cater to the sweet tooth of every family member, making them an irresistible crowd-pleaser. With rich chocolate flavors balanced by a hint of sea salt, they deliver a comforting taste that feels like home. Plus, the best part is their customizable nature—get creative with mix-ins or spooky decorations to make each batch truly unique. Ready to conjure up a little magic in your kitchen? Let’s dive into this enchanting recipe together!
What Makes These Cookies Spellbinding?
Irresistible Flavor: These cookies blend rich chocolate with a hint of sea salt for a taste that delights.
Customizable Fun: Add your favorite mix-ins, like dried fruits or nuts, to create unique flavors.
Perfect for All Ages: A family-friendly treat that even the pickiest of eaters will love.
Easy to Make: With simple ingredients and straightforward steps, they’re approachable for bakers of any level.
Ideal for Halloween: Their whimsical appearance and delicious flavor make them the perfect festive cookie! Want to make more seasonal treats? Check out my Grinch Cupcakes for another fun idea!
Spellbinding Witchy Cookies Ingredients
For the Cookie Base
• All-purpose flour – Provides structure and holds the cookies together; substitute with gluten-free flour for a gluten-free version.
• Baking soda – Acts as a leavening agent to give the cookies a soft texture.
• Sea salt – Enhances flavor and balances sweetness, making your Witchy Cookies even more delicious.
• Unsalted butter – Adds richness and a creamy texture; ensure it’s at room temperature for optimal creaming.
• Granulated sugar – Sweetens the cookies; no substitutions, but coconut sugar can offer a lower glycemic index alternative.
• Brown sugar – Adds moisture and a slight chewiness; opt for dark brown sugar for a richer flavor.
• Eggs – Provide moisture and help bind the ingredients; flax eggs can be used for a vegan adaptation.
• Vanilla extract – Adds aromatic sweetness; utilize pure vanilla for the best flavor.
For the Chocolatey Goodness
• Chocolate chips (semi-sweet or dark) – Provide chunks of chocolatey delight; you can replace them with white chocolate or butterscotch chips for a different flavor profile.
Now that you have all the ingredients ready, it’s time to unleash your creativity and conjure up these Spellbinding Witchy Cookies!
Step‑by‑Step Instructions for Spellbinding Witchy Cookies: A Magical Treat Recipe
Step 1: Preheat the Oven
Begin by preheating your oven to 350°F (175°C). This temperature is crucial for achieving the perfect chewy texture in your Spellbinding Witchy Cookies. Allow about 10 minutes for the oven to fully heat while you prepare your dough, ensuring that your delicious cookies will bake evenly and develop that irresistible golden edge.
Step 2: Mix the Dry Ingredients
In a medium mixing bowl, whisk together 2 cups of all-purpose flour, 1 teaspoon of baking soda, and 1/2 teaspoon of sea salt until well combined. This step creates a well-blended base for your Spellbinding Witchy Cookies, allowing the leavening agent to disperse evenly throughout the mixture. Set your bowl aside and prepare for the next step.
Step 3: Cream the Butter and Sugars
In a large bowl, use an electric mixer to beat 3/4 cup of room temperature unsalted butter with 1/2 cup of granulated sugar and 3/4 cup of brown sugar for about 3 minutes. The mixture should become light and fluffy, creating that delightful creamy texture essential for your Witchy Cookies. Remember, the key is to achieve a smooth consistency!
Step 4: Incorporate Eggs and Vanilla
Add 2 large eggs to the creamed butter mixture, one at a time, mixing well after each addition. Then, pour in 1 teaspoon of pure vanilla extract. Continue mixing until everything is fully combined and the batter looks smooth and well-blended, ensuring the magical flavors are infused throughout your Spellbinding Witchy Cookies.
Step 5: Combine the Mixtures
Gradually add the dry ingredient mixture to the wet ingredients, mixing at low speed until just combined. Be cautious not to overmix, as this can affect the texture of your Witchy Cookies. The dough should be crumbly yet cohesive, where you can see the flour mostly incorporated but not fully mixed.
Step 6: Fold in Chocolate Chips
With a spatula, gently fold in 1 to 2 cups of chocolate chips (semi-sweet or dark), making sure they are evenly distributed throughout the dough. This step is where the chocolatey goodness becomes part of your Spellbinding Witchy Cookies! The dough may be a bit thick, but that’s just what you want for that gooey center.
Step 7: Scoop the Dough
Using a tablespoon or cookie scoop, drop spoonfuls of dough onto a lined baking sheet, spacing them about 2 inches apart. This spacing allows the Spellbinding Witchy Cookies to spread beautifully while baking. Each cookie should be around the same size for even cooking and a uniform appearance when they come out of the oven.
Step 8: Bake
Place the baking sheet in the preheated oven and bake for 10–12 minutes. Keep an eye on the cookies; they’re done when the edges are golden and the centers still appear slightly soft. This is crucial for the chewy texture that makes these Witchy Cookies truly magical!
Step 9: Cool the Cookies
Once baked, remove the cookies from the oven and let them cool on the baking sheet for about 5 minutes. This allows them to set perfectly before transferring to wire racks. After that, let the Spellbinding Witchy Cookies cool completely to enjoy their divine texture and rich flavors.
Spellbinding Witchy Cookies: Customize Your Treats
Feel free to sprinkle your own magic into these cookies, making them uniquely yours with these delightful variations!
-
Gluten-Free: Substitute all-purpose flour with a gluten-free blend, ensuring everyone can enjoy these tasty treats.
-
Nutty Delight: Stir in chopped nuts, such as walnuts or pecans, for a delightful crunch that complements the creamy chocolate.
-
Fruity Twist: Swap chocolate chips for dried cranberries or cherries. Their tartness brings a surprising yet delightful flavor contrast!
-
Spicy Kick: Add a pinch of cayenne pepper or cinnamon to the batter for a warm, festive twist that excites the palate.
-
Vegan Option: Replace eggs with flax eggs and use coconut oil instead of butter for a completely plant-based version that still tastes divine.
-
Colorful Icing: Make a simple icing with powdered sugar and milk to drizzle over cooled cookies, or use vibrant Halloween-themed sprinkles for a festive touch.
-
Chewy Caramel: Incorporate chopped caramel candies into the dough for a gooey center that pairs beautifully with chocolate chips.
Looking for more inspiration? Don’t forget to check out my Chocolate Chips Cookies for another family favorite!
Storage Tips for Spellbinding Witchy Cookies
Room Temperature: Store cookies in an airtight container at room temperature for up to 5 days to maintain their soft, chewy texture.
Fridge: If you prefer a chilled treat, you can store them in the fridge for up to a week, but be sure to let them come back to room temperature before enjoying.
Freezer: For longer storage, freeze the cookies for up to 3 months. Place them in a freezer-safe container, separating layers with parchment paper to prevent sticking.
Reheating: If thawing frozen cookies, allow them to sit at room temperature for 30 minutes before baking them at 300°F (150°C) for about 5-7 minutes to refresh their warmth and gooeyness.
Expert Tips for Spellbinding Witchy Cookies
-
Room Temperature Butter: Ensure your butter is at room temperature. This helps to create that smooth, creamy texture crucial for your Witchy Cookies.
-
Don’t Overmix: Once you add the dry ingredients, mix just until combined. Overmixing can lead to tough cookies instead of the soft, chewy magic you want.
-
Chill the Dough: For thicker cookies, chill your dough for about 30 minutes before baking. This helps them maintain their shape and adds to the chewiness.
-
Watch the Bake Time: Keep an eye on the cookies as they bake. Remove them when the edges are golden and the center is still soft to achieve the perfect texture.
-
Use Parchment Paper: Line your baking sheets with parchment paper for easy removal and to prevent sticking, making cleanup a breeze!
What to Serve with Spellbinding Witchy Cookies?
Indulge your senses and elevate your cookie experience with these delightful pairings, perfect for a magical Halloween gathering.
- Warm Milk: A classic complement, warm milk adds a soothing touch that enhances the rich chocolate flavors of the cookies.
- Pumpkin Spice Latte: The seasonal favorite brings cozy, spiced notes that harmonize beautifully with the sweet taste of your Witchy Cookies.
- Vanilla Ice Cream: Creamy vanilla ice cream serves as a lovely contrast, melting into the soft cookie for a blissful dessert experience.
- Spooky Milkshakes: Fun and festive, blend chocolate or pumpkin milkshakes for a playful drink that ties into the Halloween spirit.
- Chocolate Fondue: Rich chocolate fondue invites cookie dunking, providing an interactive dessert that’s sure to be a hit at your gathering.
- Apple Cider: The warm spices in apple cider complement the cookies’ sweetness, creating a comforting drink perfect for crisp fall evenings.
- Fruit Platter: A refreshing fruit platter with berries or oranges adds a bright and zesty contrast, balancing out the cookie’s sweetness.
- Coffee: A nice cup of freshly brewed coffee offers a caffeine kick that beautifully pairs with the decadent chocolate flavors.
- Gingerbread Treats: Enhance the seasonal vibe by adding gingerbread cookies, creating a delightful mix of flavors that guests will adore!
Make Ahead Options
Witchy Cookies are fantastic for meal prep, allowing you to enjoy homemade treats with minimal fuss! You can prepare the dough and refrigerate it for up to 3 days; simply wrap the dough tightly in plastic wrap to maintain freshness and prevent any drying out. When you’re ready to bake, scoop the chilled dough onto a lined baking sheet and bake as directed. Alternatively, you can also freeze the unbaked cookie dough for up to 3 months. Just scoop out the desired amount and place them in a freezer bag. When craving a warm cookie, bake them straight from the freezer, adding a minute or two to the baking time. This way, your Spellbinding Witchy Cookies will be just as magical and delicious, saving you precious time!
Spellbinding Witchy Cookies Recipe FAQs
How do I select the best chocolate chips for Witchy Cookies?
Absolutely! When choosing chocolate chips, look for high-quality semi-sweet or dark chocolate chips for a rich flavor. Brands like Ghirardelli or Guittard are excellent choices since they melt beautifully and provide that luscious chocolatey goodness. You can also use a mix of different types, such as adding some white chocolate for a colorful twist!
What’s the best way to store leftover Witchy Cookies?
To keep your Spellbinding Witchy Cookies fresh, store them in an airtight container at room temperature for up to 5 days. If you prefer them chilled, putting them in the fridge works too, but for optimal flavor, allow them to come back to room temperature before enjoying.
Can I freeze Witchy Cookies for later use?
Very! You can freeze your cookies for up to 3 months. To do this, first, allow the baked cookies to cool completely. Then, stack them in a freezer-safe container, separating each layer with parchment paper to prevent sticking. When you’re ready to enjoy, simply let them thaw at room temperature for about 30 minutes.
What should I do if my cookie dough is too dry?
If your dough appears too dry after mixing, don’t worry! You can simply add a tablespoon of milk or water at a time, mixing gently until the dough becomes cohesive. This will ensure your Witchy Cookies remain delightfully soft and chewy!
Can I make these cookies vegan?
Definitely! To create a vegan version of Spellbinding Witchy Cookies, substitute the eggs with flax eggs (1 tablespoon of ground flaxseed mixed with 2.5 tablespoons of water per egg) and use dairy-free butter and chocolate chips. This way, all family members can enjoy these magical treats!
How long should I cool the cookies before transferring them?
After baking, let your Witchy Cookies cool on the baking sheet for about 5 minutes. This cooling time allows the cookies to set and makes it easier to transfer them to a wire rack later without falling apart. Enjoy their enchanting aroma while they cool!
Spellbinding Witchy Cookies: Enchant Your Halloween Treats
Ingredients
Equipment
Method
- Preheat the oven to 350°F (175°C).
- In a medium mixing bowl, whisk together the flour, baking soda, and sea salt.
- In a large bowl, cream the butter and sugars until light and fluffy.
- Add eggs one at a time and mix in the vanilla extract.
- Gradually add the dry ingredients to the wet mixture until just combined.
- Fold in the chocolate chips until evenly distributed.
- Scoop spoonfuls of dough onto a lined baking sheet spaced about 2 inches apart.
- Bake for 10–12 minutes until the edges are golden and the centers are soft.
- Cool on the baking sheet for 5 minutes before transferring to wire racks.
")


