")
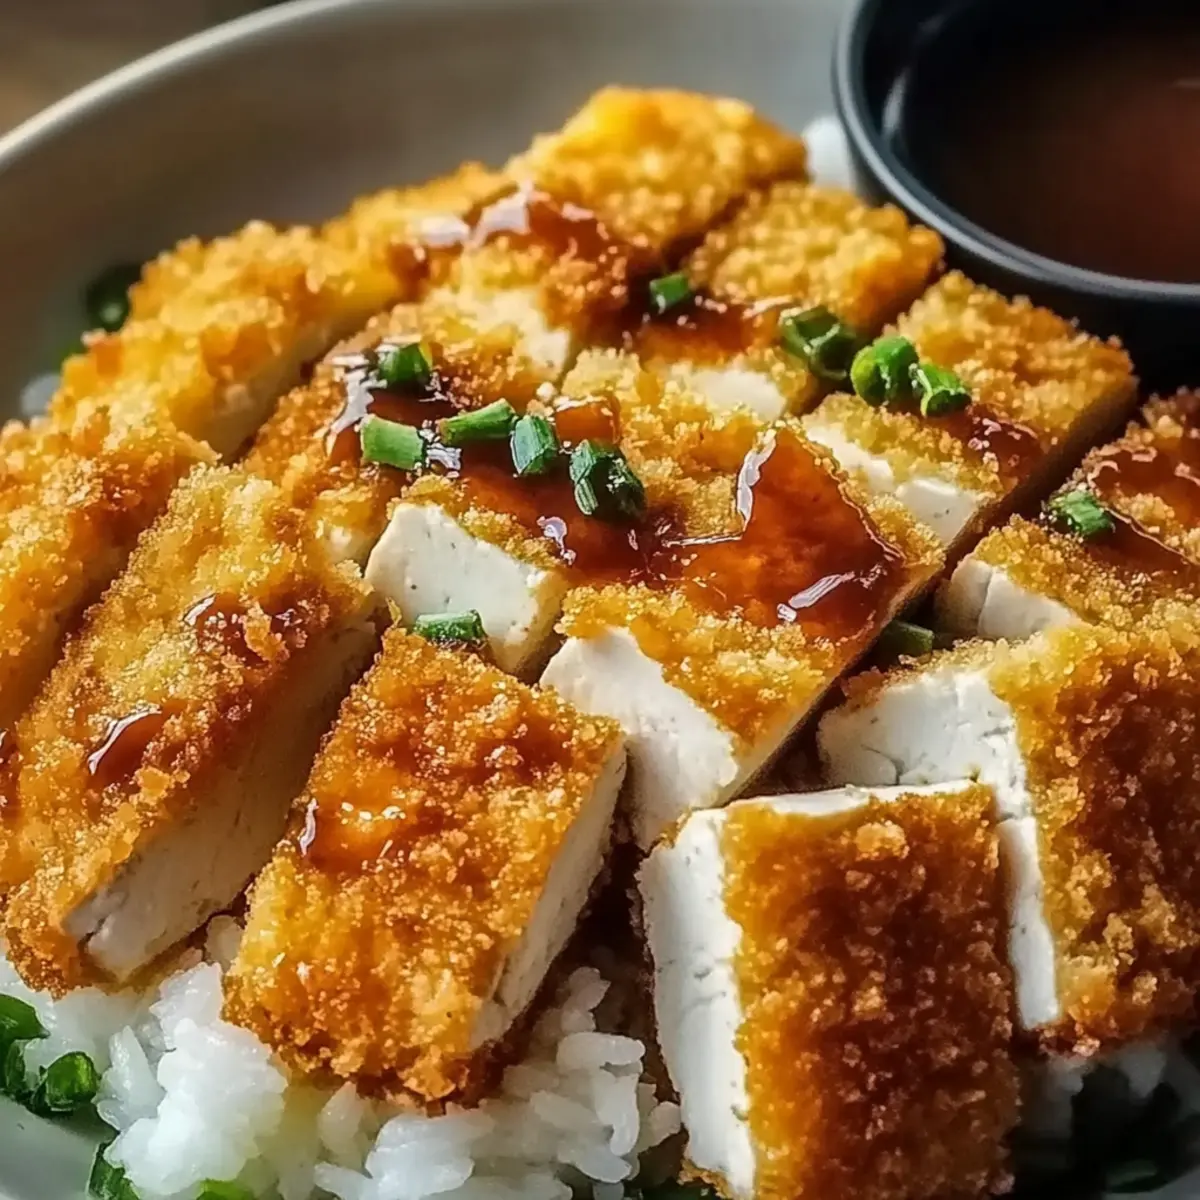
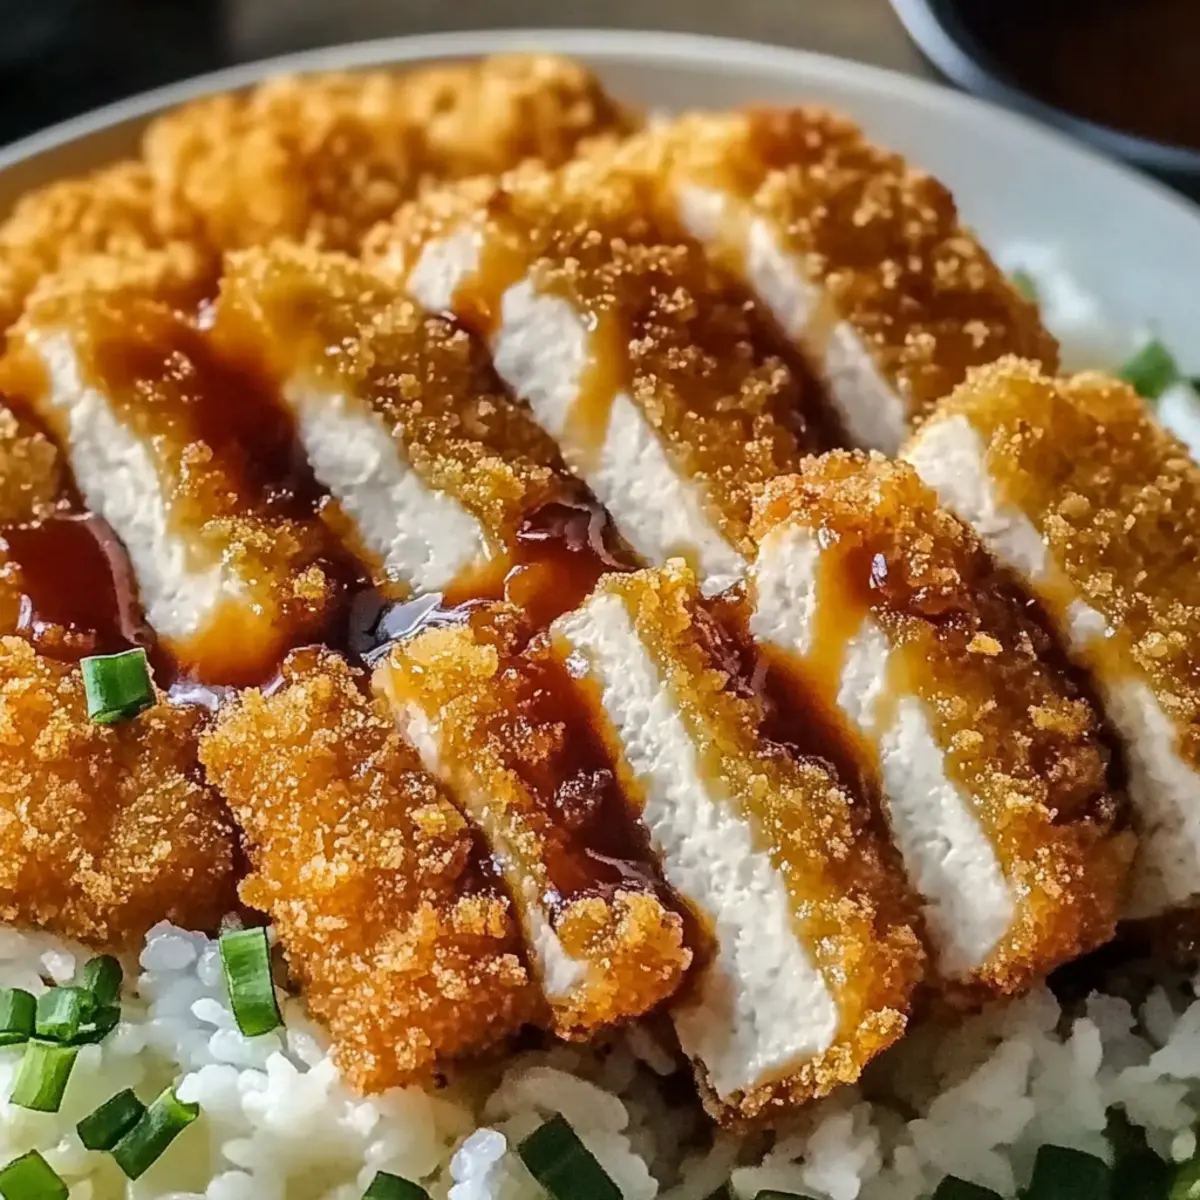
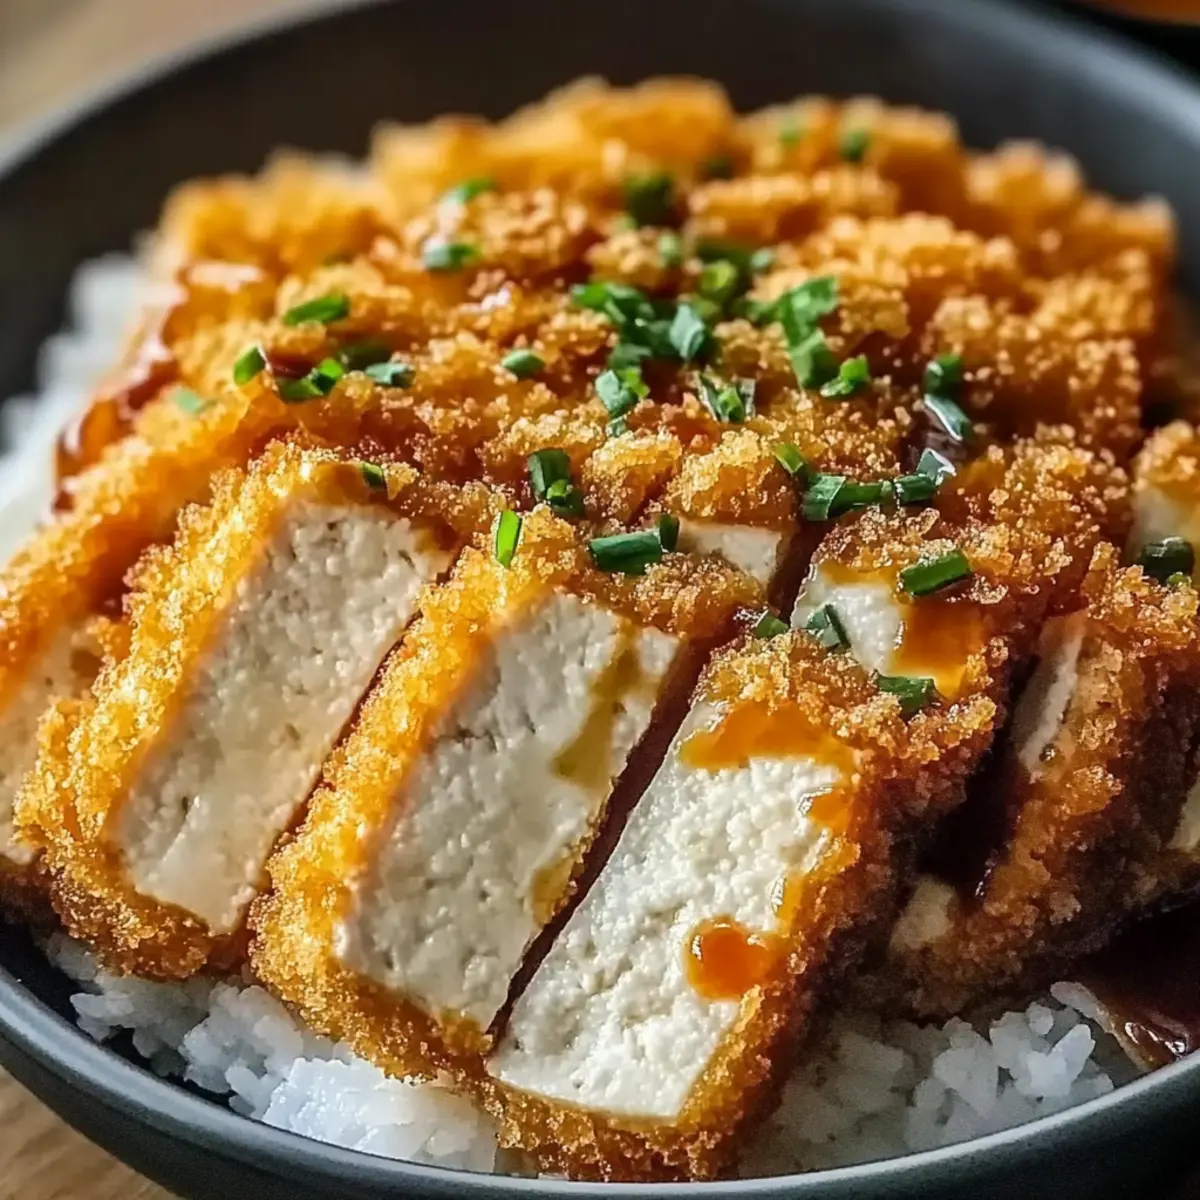
As I crunched down on my first bite of Tofu Katsu, I was transported back to that cozy Japanese restaurant where I first savored this delightful dish. It’s remarkable how a simple plant-based recipe can capture such a mosaic of flavors and textures. This Crunchy Tofu Katsu not only delivers that satisfying golden crisp on the outside and a tender, flavorful interior, but it’s also a breeze to whip up in under 30 minutes. Whether you’re embracing a plant-based lifestyle or simply looking to incorporate healthier meals into your rotation, this dish is the perfect crowd-pleaser. Plus, it’s versatile enough to pair with a variety of dipping sauces! Ready to see how easy it is to bring this restaurant favorite home? Let’s dive into the crispy goodness!
Why is Tofu Katsu a must-try?
Crispiness: The golden, crispy exterior of this Tofu Katsu is simply irresistible, delivering a satisfying crunch with every bite.
Quick Preparation: In under 30 minutes, you can whip up a delicious meal that doesn’t skimp on flavor—perfect for busy weeknights!
Healthier Comfort Food: This dish is a lighter, plant-based alternative that offers a savory taste without the heaviness of traditional fried items.
Versatile Sauces: Pair it with your choice of sauces like sweet chili or homemade tonkatsu sauce for a burst of flavor with each dip.
Protein-Packed: Tofu is an excellent source of plant-based protein, making this dish both satisfying and nutritious for everyone at the table.
Whether you’re a seasoned chef or just exploring plant-based options, this recipe will surely become a new favorite!
Tofu Katsu Ingredients
For the Tofu
• Firm Tofu – Essential for optimal crispiness; drain and press well to remove excess moisture.
For the Breading
• Panko Breadcrumbs – These give a superior crunch compared to regular breadcrumbs; perfect for achieving that delightful crust.
• All-Purpose Flour – This helps the batter stick; can be swapped with gluten-free flour for a gluten-free version.
• Salt & Pepper – Simple seasonings to enhance flavor; adjust to your preference for the best Tofu Katsu experience.
For Frying
• Oil (for frying) – Necessary for that golden, crispy texture; use vegetable or canola oil for ideal frying results.
Step‑by‑Step Instructions for Tofu Katsu
Step 1: Preparation
Start by draining and pressing your firm tofu to remove excess moisture, allowing it to firm up for optimal crispiness. Slice the tofu into desired shapes, ideally about half an inch thick. This will help ensure even cooking and a delightful texture in your Tofu Katsu.
Step 2: Breading Setup
Set up your breading station by arranging three shallow bowls in a row. Fill the first bowl with all-purpose flour seasoned with salt and pepper. In the second bowl, whisk eggs or your chosen egg substitute. The third bowl should be filled with panko breadcrumbs, which will give your Tofu Katsu its signature crunch.
Step 3: Coating
To coat the tofu, begin by dredging each slice in the flour, making sure it’s evenly coated. Next, dip the floured tofu into the egg wash, allowing any excess to drip off. Finally, roll the tofu in the panko breadcrumbs, pressing gently to help the crumbs adhere, ensuring your Tofu Katsu will be crispy all around once fried.
Step 4: Frying
In a large skillet, heat enough oil over medium heat to cover the bottom, about ¼ inch deep. Once the oil is hot (you can test by dropping in a breadcrumb—if it sizzles, it’s ready), gently place the coated tofu slices in the skillet. Fry each piece for 3-4 minutes on each side or until golden brown and crispy, turning carefully with tongs.
Step 5: Draining
Once beautifully golden, remove the fried Tofu Katsu from the skillet and place it on a plate lined with paper towels. This will absorb any excess oil and keep your Katsu crispy. Let it sit for a minute to cool slightly before serving, enhancing the crunch factor and preparing you for that first delicious bite.

How to Store and Freeze Tofu Katsu
Fridge: Keep leftover Tofu Katsu in an airtight container in the fridge for up to 3 days. This helps maintain its delicious flavor and texture.
Freezer: For longer storage, freeze Tofu Katsu wrapped in plastic wrap and aluminum foil for up to 2 months. This prevents freezer burn and keeps it fresh.
Reheating: To reheat, bake the tofu at 350°F (175°C) for about 10-15 minutes until crispy again. Avoid microwaving, as it can make the coating soggy.
Cooling Before Storing: Allow the Tofu Katsu to cool completely before storing. This prevents condensation and helps keep the breading crispy.
Make Ahead Options
These Tofu Katsu are perfect for meal prep enthusiasts! You can slice and bread the tofu up to 24 hours in advance, storing the coated pieces in an airtight container in the refrigerator to maintain their crunchiness. To ensure the panko stays crispy, avoid pre-frying until you’re ready to serve. When you’re set to enjoy your meal, simply heat oil in a skillet and fry the tofu slices until golden brown, about 3-4 minutes per side. This way, you can enjoy homemade Tofu Katsu with just a little effort, making it a fantastic option for busy weeknights. Just as delicious as when freshly made, you’ll savor every crispy bite!
Expert Tips for Tofu Katsu
• Choose Firm Tofu: Use firm tofu to avoid sogginess and to ensure maximum crispiness. Avoid soft or silken tofu for this recipe.
• Preheat Your Oil: Make sure your oil is adequately heated before frying. If it’s too cool, the coating will absorb oil and become greasy.
• Don’t Overcrowd the Pan: Fry the tofu in batches to maintain the oil temperature. Overcrowding can lower the heat and lead to uneven cooking.
• Press Tofu Well: Remove as much moisture as possible by pressing the tofu before slicing. This step enhances the flavor and texture of your Tofu Katsu.
• Experiment with Coatings: Feel free to add spices or herbs to your panko breadcrumbs for a unique flavor twist. It can elevate your Tofu Katsu experience!
• Storing Leftovers: Store any leftover Tofu Katsu in the fridge for up to three days. Reheat in the oven to keep the breading crispy.
What to Serve with Tofu Katsu?
To create a delightful meal around your crispy Tofu Katsu, consider pairing it with these delicious sides and complements that enhance every bite.
-
Steamed Jasmine Rice: Provides a fluffy base that soaks up flavors, grounding the meal and balancing textures beautifully.
-
Crispy Asian Slaw: A fresh and crunchy mix of cabbage, carrots, and sesame dressing adds a burst of color and zest to the table.
-
Miso Soup: Warm and savory, this comforting soup complements the crispy Tofu Katsu while adding a soothing element to your meal.
-
Roasted Seaweed Snacks: Light and salty, these snacks offer a delightful crunch that mirrors the texture of the katsu, enhancing the umami experience.
-
Sesame Broccoli: Tender, vibrant green broccoli drizzled with a sesame sauce brings an earthy sweetness and a splash of color to your plate.
-
House-made Dipping Sauces: Whip up a rich tonkatsu sauce or sweet chili sauce for a flavorful dip that brings a new layer of flavor to the Tofu Katsu.
-
Pickled Vegetables: A bite of tangy pickled cucumbers or daikon adds a refreshing crunch, cutting through the richness of the fried tofu.
-
Lychee Iced Tea: This refreshing drink’s subtle sweetness complements the savory katsu perfectly, making every mouthful an experience to savor.
Pairing these delightful choices with Tofu Katsu sets the stage for a memorable meal everyone will love!
Tofu Katsu: Delicious Customization Ideas
Feel free to get creative with your Tofu Katsu—delighting your taste buds with unique twists that suit your cravings!
- Gluten-Free: Swap out all-purpose flour for gluten-free flour and ensure your panko is gluten-free for a special dietary option.
- Spicy Twist: Add cayenne pepper or chili flakes to the flour mixture for a spicy flavor kick that dances on your palate!
- Herb-Infused: Mix dried herbs like oregano or basil into the panko for an aromatic twist that complements the tofu beautifully.
- Nutty Crunch: Blend ground nuts such as almonds or peanuts into the panko for an extra crunch and rich flavor.
- Flavorful Sauces: Elevate your dish with side sauces like a tangy sweet chili sauce, giving each bite a zesty punch.
- Veggie Boost: Layer in thin slices of eggplant or zucchini before breading, adding unique flavors and a satisfying veggie crunch.
- Baked Alternative: For a lighter option, bake instead of fry for a healthier take that’s still completely delicious.
- Saucy Dip: Try serving it with homemade tonkatsu sauce for that traditional taste, or whip up a fresh tahini sauce for something different.
Exploring these variations not only transforms the dish, but allows you to make it your own. Your culinary adventure awaits!
Tofu Katsu Recipe FAQs
How do I choose the best tofu for Tofu Katsu?
Absolutely! For the best Tofu Katsu, it’s crucial to select firm tofu. This type holds its shape well during cooking and ensures a crispy exterior. Look for blocks labeled “firm” or “extra-firm,” and avoid soft or silken tofu as they won’t provide the desired texture.
What’s the best way to store leftover Tofu Katsu?
Very good question! Store any leftover Tofu Katsu in an airtight container in the refrigerator for up to 3 days. Ensure it’s completely cooled before storing to prevent condensation, which can make the breading soggy.
Can I freeze Tofu Katsu for later?
Absolutely! For longer storage, you can freeze Tofu Katsu. Wrap each piece tightly in plastic wrap and then in aluminum foil to prevent freezer burn. It can be stored in the freezer for up to 2 months. When you’re ready to enjoy, just bake them straight from the freezer!
How should I reheat Tofu Katsu to maintain its crispiness?
Great inquiry! To maintain that delicious crispy texture after refrigerating or freezing, preheat your oven to 350°F (175°C). Place the Tofu Katsu on a baking sheet lined with parchment paper and heat them for about 10-15 minutes until they’re golden and crispy again. Avoid using the microwave as it tends to make the breading soggy.
Can I alter the recipe to accommodate dietary restrictions?
Yes, indeed! If you’re looking to make Tofu Katsu gluten-free, simply substitute regular all-purpose flour and panko breadcrumbs with their gluten-free counterparts. Additionally, if you’re vegan, opt for an egg substitute in the breading process, such as a mixture of flaxseed meal and water or a store-bought egg replacer. Just be sure to check labels for any potential allergens!
What should I do if my Tofu Katsu isn’t crispy enough?
No worries! If your Tofu Katsu turns out less crispy than expected, ensure the oil is at the right temperature (hot enough to sizzle breadcrumbs) before frying. If it cools down too much, the breading can absorb excessive oil and become soggy. Fry in smaller batches to maintain oil heat, and make sure the tofu is well-pressed to remove moisture beforehand!
Crispy Tofu Katsu: Your New Favorite Plant-Based Comfort Food
Ingredients
Equipment
Method
- Drain and press the tofu to remove excess moisture, then slice into half-inch thick pieces.
- Set up using three shallow bowls: one with flour seasoned with salt and pepper, one with eggs or an egg substitute, and one with panko breadcrumbs.
- Dredge each tofu slice in flour, dip in egg wash, then roll in panko breadcrumbs to coat.
- Heat oil in a skillet over medium heat and fry tofu slices for 3-4 minutes on each side until golden brow.
- Remove from skillet, place on paper towels to absorb excess oil, then let sit for a minute before serving.
")