")
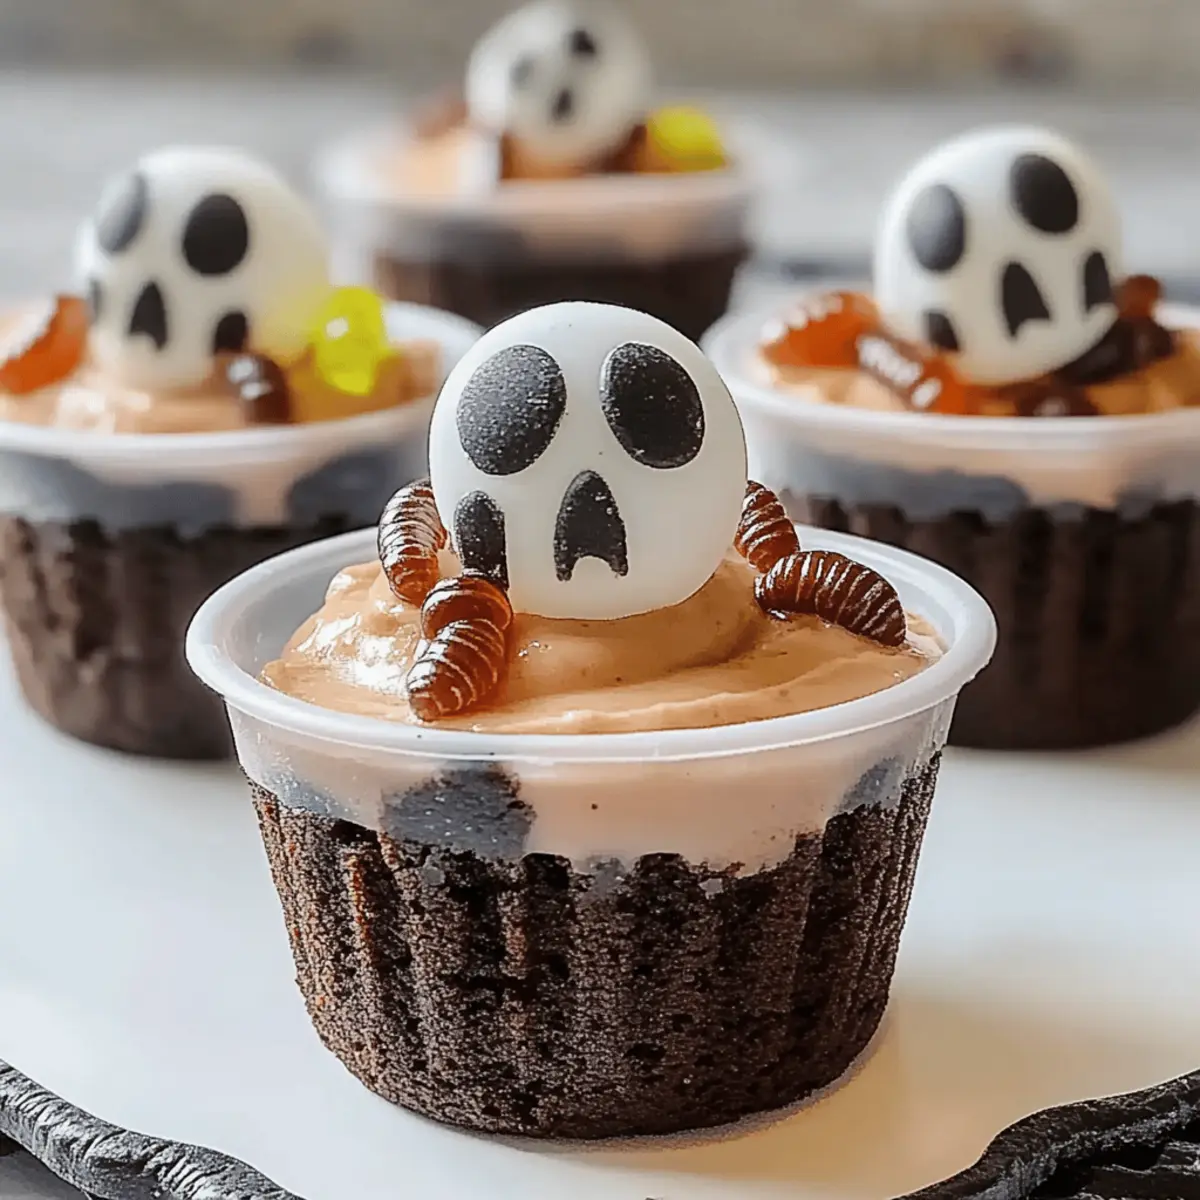
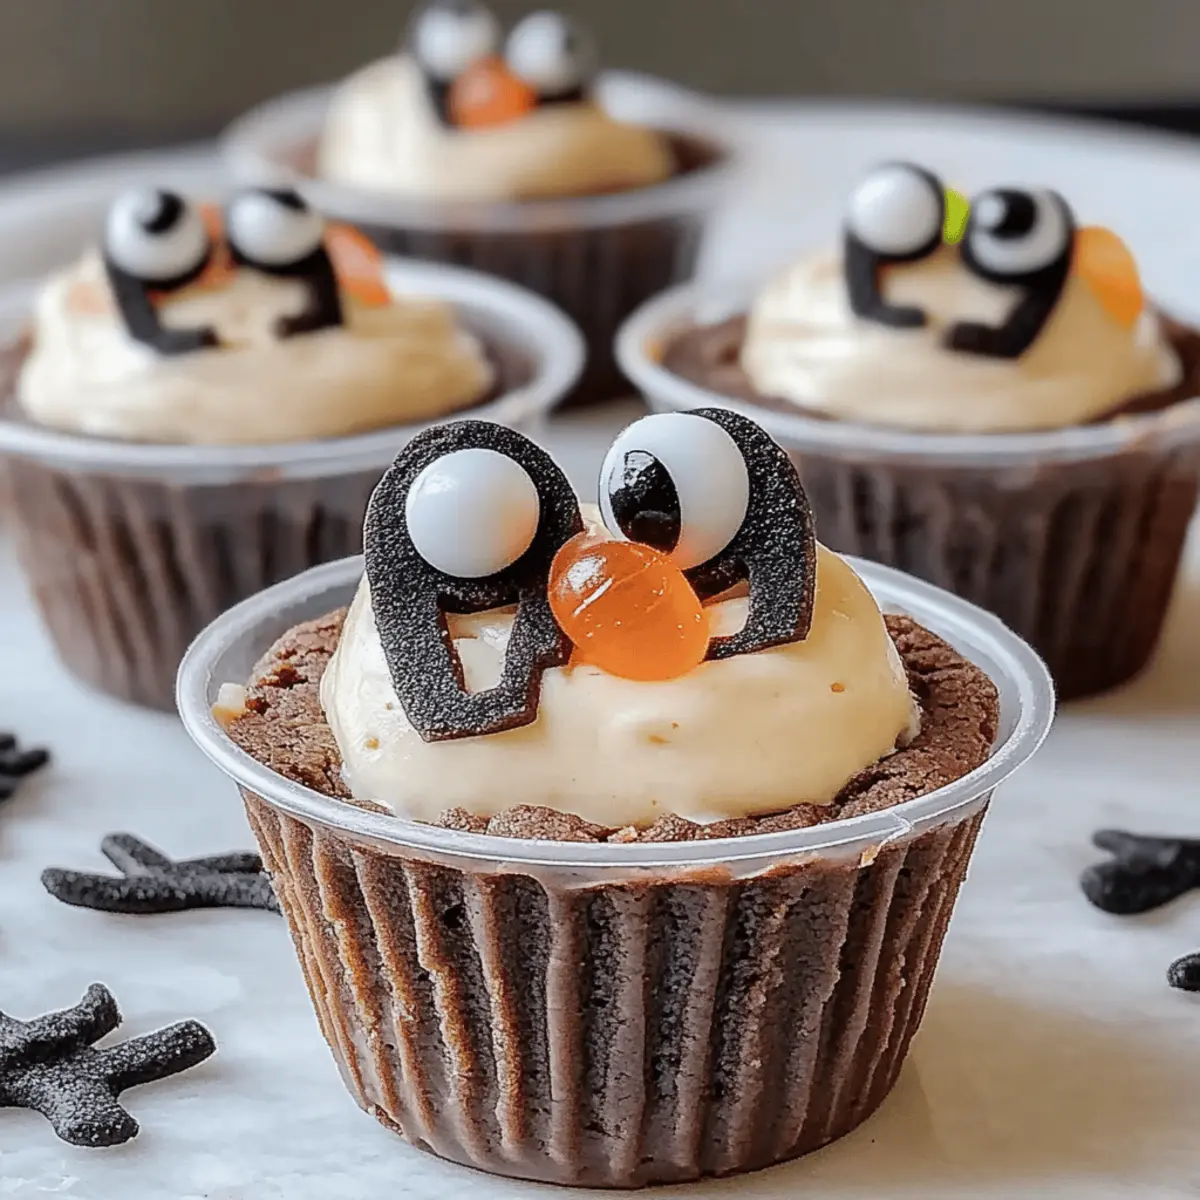
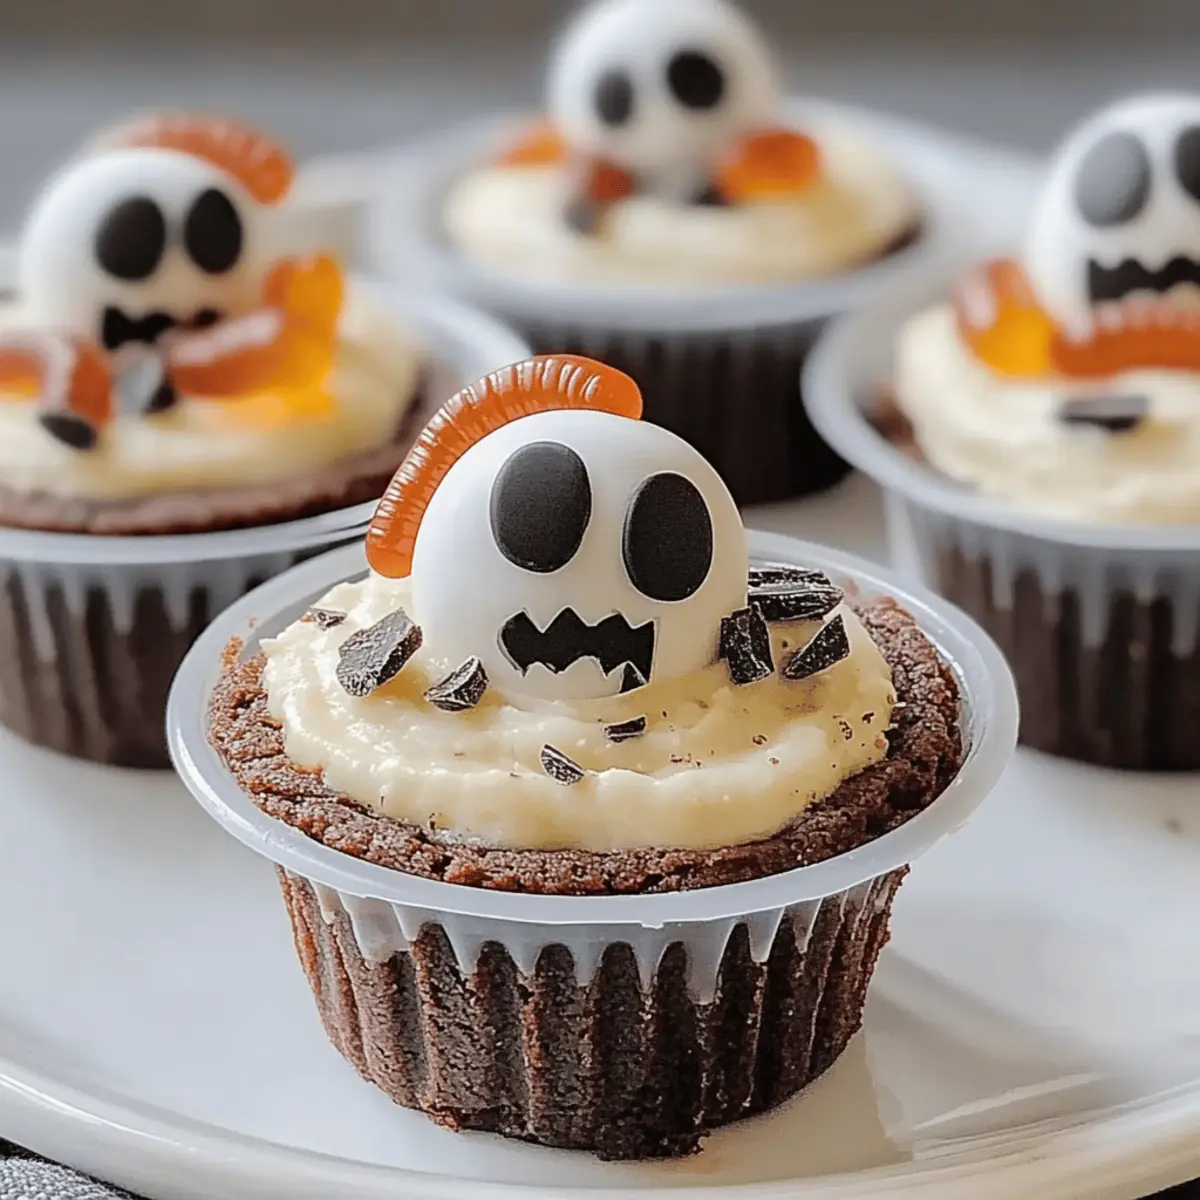
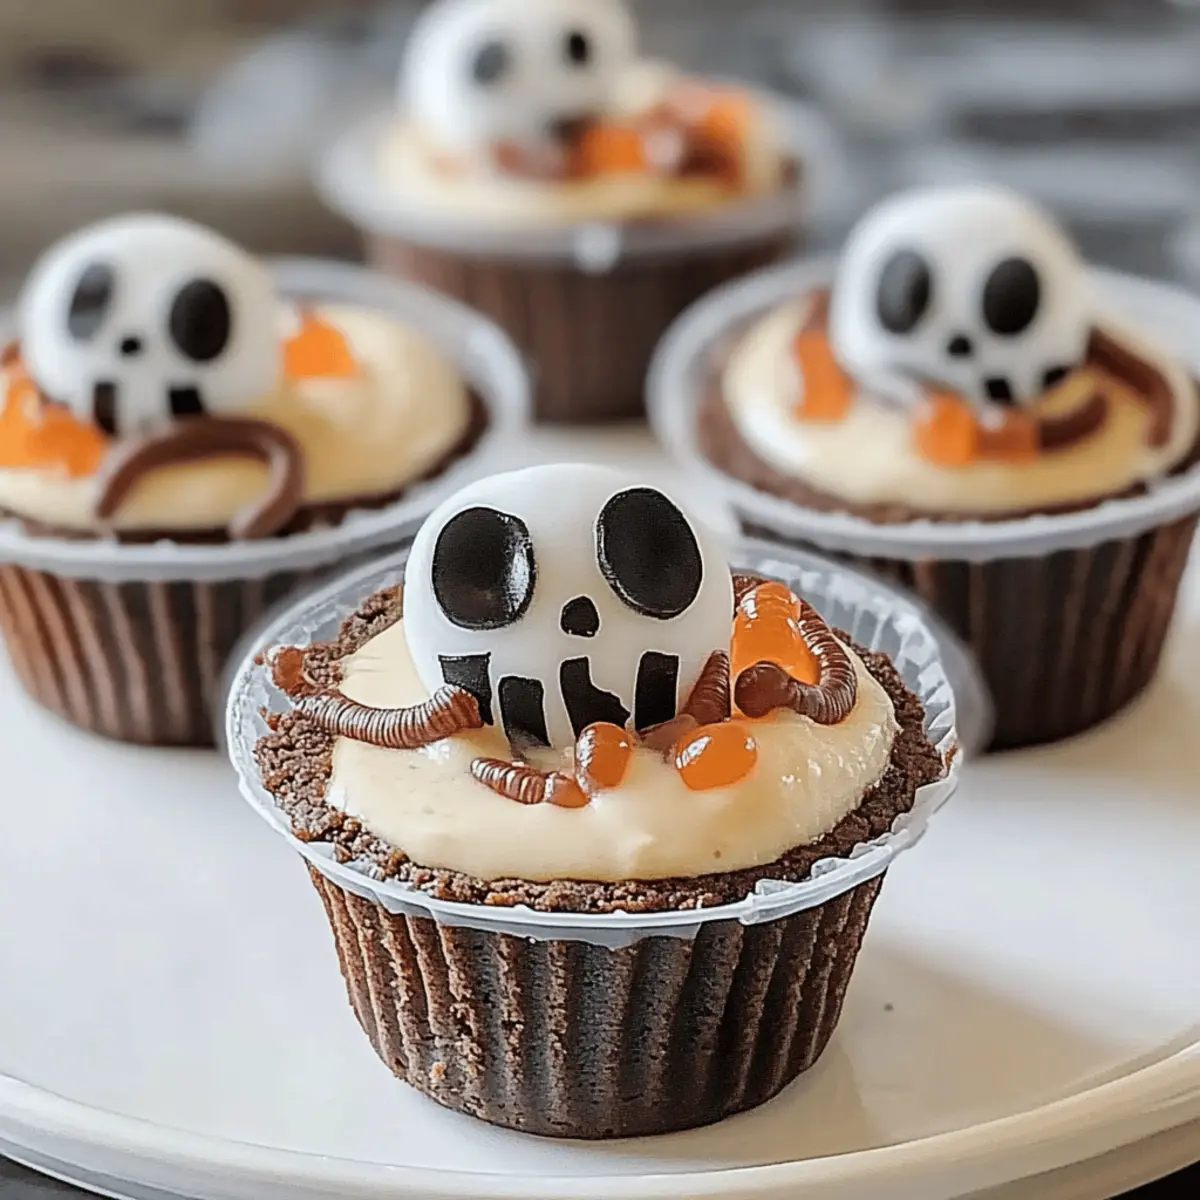
As the leaves change and the spooky season draws near, it’s time to summon your inner creature of the night with these delightful Spooky Graveyard Pudding Cookie Cups! This Halloween dessert not only dazzles the eyes with its playful decorations but also offers the creamy comfort of vanilla pudding nestled in soft chocolate cookie cups. With a few simple steps, you’ll whip up a treat that’s both easy to customize and bound to be a hit at any party. Picture the smiles on your family’s faces as they dig into these whimsical delights, adorned with gummy worms and candy eyeballs. Perfect for gatherings or a fun family night, these cookie cups let your creativity shine while keeping the prep quick and stress-free. Are you ready to conjure up some delicious Halloween magic? Let’s get started!
Why Are These Cookie Cups So Fun?
Delightful Presentation: The spooky decorations, including gummy worms and candy eyeballs, create an eye-catching dessert that screams Halloween fun.
Customizable Flavors: Experiment with different pudding flavors like chocolate or butterscotch to create your own unique twist.
Kid-Friendly Fun: Easy to prepare and decorate, making it a perfect activity to get the whole family involved.
Quick and Easy: Simple steps ensure you can whip these up in no time, leaving you ample room for other Halloween festivities.
Crowd-Pleasing Treat: Ideal for parties and gatherings, these cookie cups are sure to impress both kids and adults alike.
1. Ingredients
Spooky Graveyard Pudding Cookie Cups Ingredients
For the Cookie Cups
- Chocolate Chip Cookie Dough – Use store-bought for convenience or whip up your favorite homemade batch for that personal touch.
For the Pudding Filling
- Vanilla Pudding Mix – Offers a classic creaminess; feel free to swap it with chocolate or butterscotch pudding for a fun twist.
- Whole Milk – Essential for preparing the pudding; almond milk can be a creamy, lactose-free alternative.
For the Toppings
- Gummy Worms – Perfect for a playful Halloween flair; get creative with spider or eyeball gummies for extra fun!
- Candy Eyeballs – Adds a spooky decoration that makes these treats come alive; choose other Halloween-themed candies based on what you love.
This Spooky Graveyard Pudding Cookie Cups Recipe for Halloween not only tantalizes your taste buds but also showcases your creativity in the kitchen!
Step‑by‑Step Instructions for Spooky Graveyard Pudding Cookie Cups Recipe for Halloween
Step 1: Preheat Your Oven
Begin by preheating your oven to 350°F (175°C). While the oven warms up, prepare your muffin tins by lining them with parchment paper to prevent sticking. This will ensure that your Spooky Graveyard Pudding Cookie Cups come out perfectly shaped and easy to remove after baking.
Step 2: Shape the Cookie Cups
Take tablespoon-sized portions of chocolate chip cookie dough and press them firmly into the muffin tins, ensuring each portion creates a well in the center to hold the pudding later. Press down evenly to achieve a consistent thickness and shape. This will help your cookie cups bake evenly and maintain their form.
Step 3: Bake the Cookie Cups
Place the muffin tin in the preheated oven and bake the cookie cups for 10-12 minutes, or until they are golden brown around the edges. Keep an eye on them; they should look soft in the center but set enough to hold their form. Once done, remove them from the oven and allow them to cool completely in the tin.
Step 4: Prepare the Pudding Filling
While the cookie cups cool, whisk together the vanilla pudding mix with whole milk in a large mixing bowl. Follow the package instructions, typically blending for about 2-3 minutes until the mixture thickens and is smooth. This creamy filling will enhance the flavor of your Spooky Graveyard Pudding Cookie Cups and keep them delightfully moist.
Step 5: Fill the Cookie Cups
Once the cookie cups are completely cool, carefully fill each cup with the prepared vanilla pudding. Use a spoon or a piping bag to make this process easier and ensure each cookie cup is generously filled. This step is where your spooky dessert begins to take shape, promising sweetness and fun.
Step 6: Decorate for Spookiness
Finally, unleash your creativity by decorating each pudding-filled cookie cup with gummy worms and candy eyeballs. Arrange them playfully on top, making sure to create a fun and spooky effect. Your Spooky Graveyard Pudding Cookie Cups are now ready to bring smiles to faces at your Halloween gathering!
What to Serve with Spooky Graveyard Pudding Cookie Cups Recipe
Elevate your Halloween gatherings by pairing these delightful cookie cups with complementary treats and beverages that enhance their festive spirit!
-
Witch’s Brew Punch: This fruity and fizzy drink adds a bewitching flair, keeping the Halloween theme alive in every sip.
-
Spooky Fruit Skewers: Colorful, delicious fruit skewers provide a refreshing contrast, balancing the sweetness of the cookie cups. A mix of grape eyeballs and melon ghosts will delight the kids.
-
Mummy Dogs: These fun, wrapped hot dogs bring an exciting savory option to the table, making your dessert stand out even more.
-
Ghostly Popcorn: Drizzle white chocolate over popcorn and add ghostly decorations for a crunchy snack that complements the soft texture of the cookie cups.
-
S’Mores Dip: Set up a gooey s’mores dip by melting chocolate and marshmallows for a fun twist; it’s perfect for guests to dip into after their cookie cups.
-
Pumpkin Spice Latte: This cozy, spiced beverage will warm up your gathering and enhances the festive atmosphere while nicely contrasting the cool pudding.
These ideas will not only round out your spooky dessert but also engage your guests’ senses, ensuring a memorable Halloween celebration!
Make Ahead Options
These Spooky Graveyard Pudding Cookie Cups are perfect for busy home cooks wanting to prepare ahead! You can bake the cookie cups up to 24 hours in advance and store them in an airtight container at room temperature. Also, prepare the pudding filling in advance and refrigerate it for up to 3 days. To maintain freshness, fill the cooled cookie cups with the pudding just before serving, and top with gummy worms and candy eyeballs right at the last moment to keep their playful spirit intact. This prep-ahead approach saves you time and ensures your Halloween dessert is just as delicious and exciting for everyone!
Spooky Graveyard Pudding Cookie Cups Variations
Get creative with your Spooky Graveyard Pudding Cookie Cups and discover delightful new twists!
-
Flavor Twist: Swap vanilla pudding for chocolate, butterscotch, or pistachio pudding to surprise your taste buds. Each flavor offers a unique taste adventure!
-
Texture Fun: Replace gummy worms with crushed cookies to mimic “dirt” or use sprinkles for a colorful crunch. It adds a whimsical touch that kids will love.
-
Whipped Cream Finish: For a lighter topping, consider using whipped cream or flavored whipped toppings. It makes each cup look airy and inviting!
-
Chocolate Drizzle: Elevate your presentation with a drizzle of melted chocolate on top of the pudding. The extra chocolate richness is absolutely divine!
-
Fruit Infusion: Add a surprise twist by incorporating fresh fruit like raspberries or blueberries. These juicy pops offer a refreshing contrast to the sweet cookies.
-
Sugar Cookie Alternative: Switch the cookie cups entirely with sugar cookie dough for a sweeter base. The result is a soft, delicate cup that’s bursting with flavor!
-
Festive Sprinkles: Instead of gummy worms, top with Halloween-themed sprinkles. This adds a festive flair and visual delight that’s perfect for the season.
-
Layered Delight: Make each cup extra special by layering different pudding flavors. A colorful, swirled effect not only looks stunning but tastes incredible, too!
Experimenting with these variations will keep your Spooky Graveyard Pudding Cookie Cups exciting, and don’t forget to check out Mastering Nestle Cookie for more cookie inspirations or explore Starbucks Sugar Cookie for different dessert ideas. Happy Halloween baking!
How to Store and Freeze Spooky Graveyard Pudding Cookie Cups
Airtight Container: Store unfilled cookie cups in an airtight container at room temperature for up to 3 days to maintain their freshness and texture.
Filled Cups: If you have leftover filled cookie cups, keep them in the fridge for up to 2 days. However, for best results, fill cookie cups just before serving to avoid sogginess.
Freezer Storage: You can freeze unfilled cookie cups for up to 2 months. Just ensure they are completely cooled and placed in a freezer-safe container.
Reheating Tip: To refresh baked cookie cups, pop them in a preheated oven at 350°F (175°C) for about 5 minutes. This helps return their warmth and chewiness.
Expert Tips for Spooky Graveyard Pudding Cookie Cups
-
Cooling Time: Allow cookie cups to cool completely before filling to prevent the pudding from melting or spilling. Otherwise, you may end up with a messy treat!
-
Pudding Variations: Don’t hesitate to experiment with different pudding flavors like chocolate or butterscotch for unique twists. Layering flavors can create an eye-catching effect!
-
Topping Timing: For the best visual effect, add gummy worms and candy eyeballs just before serving. This keeps your Spooky Graveyard Pudding Cookie Cups looking fresh and inviting.
-
Storage Tips: Store unfilled cookie cups in an airtight container in the fridge for up to three days. Fill them just before you need them for the best texture.
-
Get Creative: Consider using crushed cookies or sprinkles instead of gummy worms for an alternative topping. Surprise your guests with different spooky designs!
Spooky Graveyard Pudding Cookie Cups Recipe FAQs
What type of chocolate chip cookie dough should I use?
Absolutely! You can use either store-bought chocolate chip cookie dough for convenience or whip up your favorite homemade version for that extra personal touch. If you’re feeling adventurous, consider utilizing cookie dough with different flavor profiles, like peanut butter.
How should I store the cookie cups once they’re filled?
For the best results, store your filled Spooky Graveyard Pudding Cookie Cups in the refrigerator in an airtight container for up to 2 days. This keeps the pudding creamy and the cookie cups intact. However, for optimal freshness, it’s best to fill the cookie cups just before serving to prevent them from getting too soft.
Can I freeze the unfilled cookie cups? How do I do that?
Very good question! Yes, you can freeze the unfilled cookie cups for up to 2 months. To do this, ensure they are completely cooled first, then place them in a freezer-safe container or zip-lock bag, sealing it tightly to prevent freezer burn. When you’re ready to use them, simply let them thaw in the refrigerator overnight or bake them briefly at 350°F (175°C) for 5 minutes to regain their delightful texture.
What if my cookie cups break or crumble while baking?
Don’t fret! If your cookie cups happen to break or crumble, it could be due to overbaking or not enough moisture in the dough. To troubleshoot, ensure you follow the baking time closely and check them a minute or two before the end of the baking period. If you’re facing crumbling, adding a touch more egg or butter to the cookie dough can help maintain moisture and structure.
Are there any dietary considerations for pets regarding these cookie cups?
It’s always important to keep your furry friends in mind! While the Spooky Graveyard Pudding Cookie Cups are a fun, delicious treat for humans, they aren’t suitable for dogs or cats due to the chocolate and sugar. Instead, make a separate pet-friendly treat for them! Always consult with your veterinarian if you’re unsure about incorporating any human food into your pet’s diet.
Can I use alternative milk in the pudding?
Absolutely! You can swap whole milk with almond milk for a lactose-free option, or oat milk for a nut-free alternative. Just be sure to choose an unsweetened variety to keep the flavor profile consistent. The pudding will still turn out creamy and delicious!
Spooky Graveyard Pudding Cookie Cups Recipe to Wow Kids
Ingredients
Equipment
Method
- Preheat your oven to 350°F (175°C) and line muffin tins with parchment paper.
- Shape tablespoon portions of cookie dough into muffin tins, pressing firmly to create a well.
- Bake for 10-12 minutes until golden brown. Allow to cool completely in the tin.
- Whisk together pudding mix and milk until thick and smooth, about 2-3 minutes.
- Fill cooled cookie cups with prepared pudding using a spoon or piping bag.
- Decorate with gummy worms and candy eyeballs for a fun spooky look.
")