")
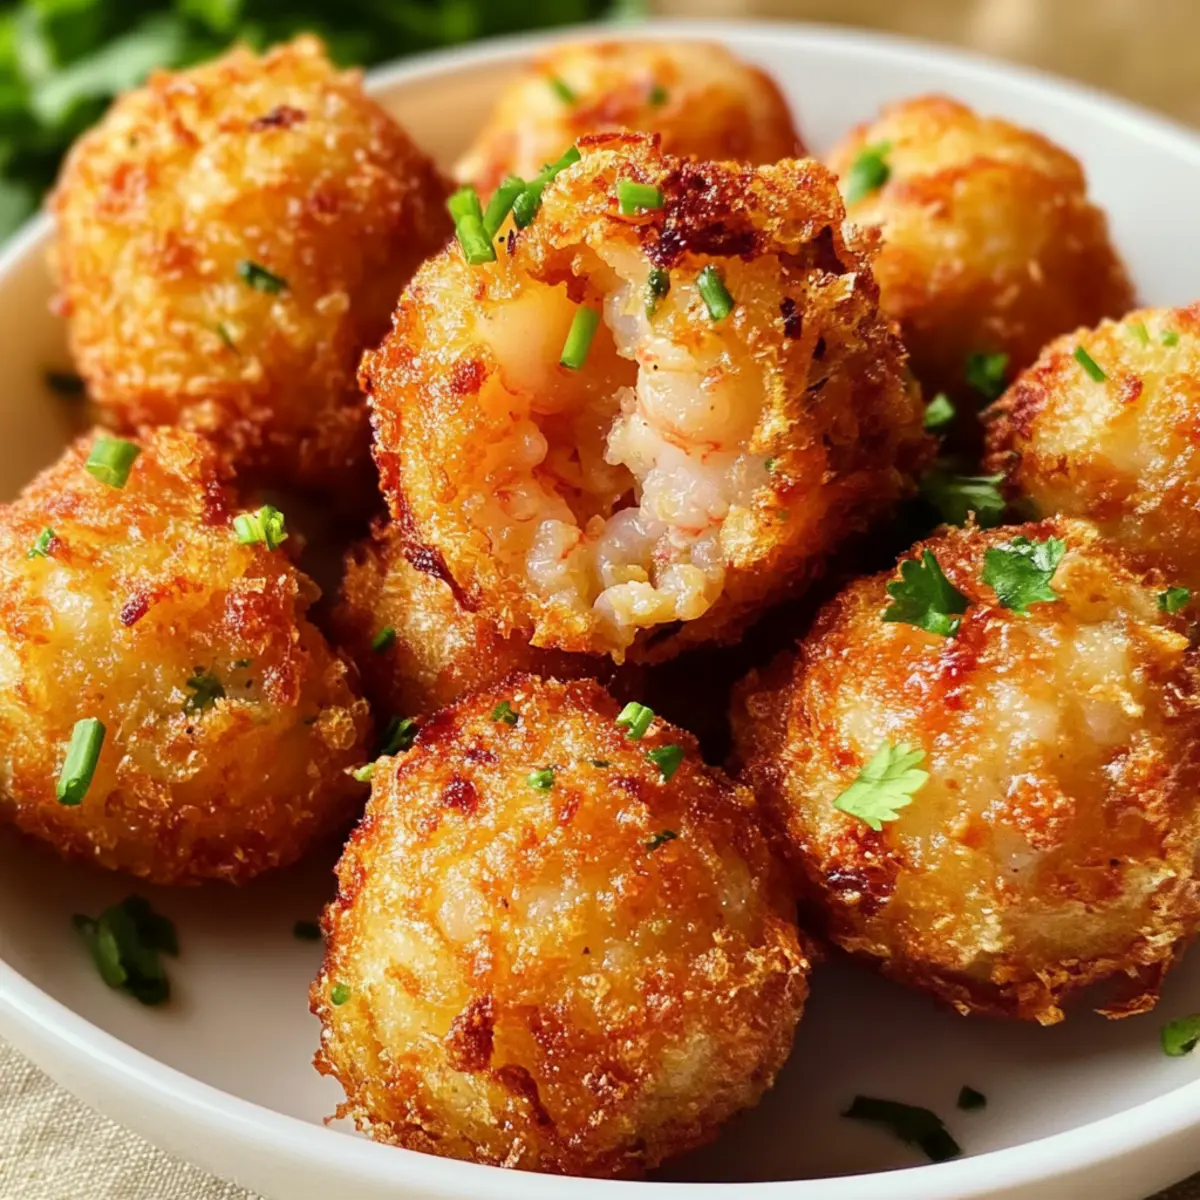
As the scent of garlic and ginger wafts through my kitchen, I can’t help but feel excitement bubbling inside. Today, I want to share my Crispy Shrimp Balls Recipe—a quick and easy dish perfect for any weeknight or casual gathering. These shrimp balls combine the delicate sweetness of shrimp with a punch of flavor, making them a crowd-pleaser for both friends and family. What I love most about this recipe is its versatility; you can customize it with your favorite herbs or spices, and it’s packed with protein, offering a healthy alternative to fast food. They’re not just a tasty treat; they promise to elevate your cooking game effortlessly! Curious about how to make these irresistible shrimp balls? Let’s dive in!
Why Are These Shrimp Balls Irresistible?
Simplicity: This recipe features an easy, straightforward process that even beginners can master, making it a stress-free addition to your weeknight meals.
Flavor Explosion: The delightful combination of ginger, garlic, and shrimp creates a vibrant taste that leaves your taste buds dancing.
Customizable Fun: Feel free to add your favorite spices or herbs, just like you might do with my Baby Shower Meatballs, for a unique twist!
Healthy Snack: Packed with protein, these shrimp balls provide a nutritious alternative to fast food that you can feel good about serving.
Quick Cooking: With a prep and cooking time that totals just around 30 minutes, they’re perfect for any last-minute gathering or weeknight meal.
Perfectly Crispy: Achieve that golden-brown crunch on the outside while keeping the inside tender and juicy—you’ll impress everyone at the table!
Whether paired with a tangy dipping sauce or enjoyed on their own, these shrimp balls are bound to become a favorite in your home.
Shrimp Balls Recipe Ingredients
For the Shrimp Mixture
- Shrimp – The star of the dish; use fresh or thawed frozen shrimp for the best flavor.
- Egg – Binds the mixture together; for a vegan option, substitute with flaxseed meal mixed with water.
- Green Onions – Adds a fresh, mild onion flavor; or swap with chives if you don’t have any.
- Garlic – Infuses aromatic notes; garlic powder can be a substitute, just reduce the amount.
- Ginger – Enhances the flavor profile; fresh ginger is ideal for that extra zing.
- Cilantro – Optional for fresh herb notes; feel free to omit if it’s not your thing.
For the Binders and Enhancers
- Breadcrumbs – Provides structure; using panko gives a delightful crunch.
- Soy Sauce – Brings umami and saltiness to the mix; for a gluten-free option, try coconut aminos.
- Sesame Oil – Adds a rich nuttiness; can be replaced with olive oil for a lighter flavor.
- Black Pepper – Just a pinch adds a subtle kick.
- Cornstarch (optional) – Helps firm up the mixture; especially handy for achieving that perfect texture.
Whether you’re hosting a gathering or just seeking a quick meal, this Shrimp Balls Recipe is guaranteed to elevate your dinner experience!
Step‑by‑Step Instructions for Crispy Shrimp Balls Recipe
Step 1: Prepare the Shrimp
Start by peeling and deveining 1 pound of shrimp if needed. Then, chop the shrimp finely using a food processor until it resembles a chunky paste—this should take about 30 seconds. The key is to maintain some texture, so avoid over-processing. Transfer the chopped shrimp to a large mixing bowl as you proceed to the next step.
Step 2: Mix Ingredients
In the bowl with the chopped shrimp, add 1 cup of breadcrumbs, 1 beaten egg, ¼ cup of thinly sliced green onions, 2 cloves of minced garlic, and 1 tablespoon of finely grated fresh ginger. Pour in 1 tablespoon of soy sauce and 1 teaspoon of sesame oil. Season with salt and black pepper to taste. Mix everything together thoroughly until all the ingredients are well combined and form a consistent mixture.
Step 3: Shape the Shrimp Balls
With clean hands, take small portions of the shrimp mixture and form it into compact, bite-sized balls, about the size of a golf ball. Ensure they are tightly packed to prevent them from falling apart while cooking. Place the formed shrimp balls on a tray lined with parchment paper to keep them organized as you prepare to fry.
Step 4: Heat the Oil
In a large frying pan or deep fryer, pour enough vegetable oil to cover the bottom about ½ inch deep. Heat the oil over medium-high heat until it reaches approximately 350°F (175°C). A good test is to drop a small piece of the shrimp mixture into the oil; it should sizzle upon contact, indicating that the oil is ready for frying.
Step 5: Fry the Shrimp Balls
Carefully add the shrimp balls to the hot oil in batches, making sure not to overcrowd the pan. Fry each batch for about 3-4 minutes on one side, or until they achieve a beautiful golden brown color. Gently turn the shrimp balls to fry the other side for an additional 3-4 minutes until fully cooked through.
Step 6: Drain and Serve
Once the shrimp balls are golden brown and crispy on all sides, remove them using a slotted spoon and drain them on a plate lined with paper towels to absorb excess oil. Serve the shrimp balls warm alongside your favorite dipping sauce, such as sweet chili sauce or garlic aioli, for an irresistible treat that everyone will enjoy!
Shrimp Balls Recipe Variations
Feel free to explore exciting twists and substitutions to make this shrimp balls recipe your own!
-
Spice it Up: Add red pepper flakes or diced jalapeños for a spicy kick that will tantalize your taste buds. A touch of heat can elevate the flavor profile, making your appetizer even more memorable!
-
Herbaceous Delight: Mix in fresh herbs like basil or parsley for a burst of freshness. You might find that switching up the herbs creates new flavor dimensions reminiscent of my Alice Springs Chicken.
-
Cheesy Goodness: Incorporate a bit of cheese such as cream cheese or shredded cheddar for a richer, creamier texture. This adds an unexpected twist, making the shrimp balls even more indulgent.
-
Crunchy Variation: Swap traditional breadcrumbs for panko for a firmer, crunchier bite. This simple change can take your shrimp balls from delightful to absolutely addictive!
-
Soy-Free Option: For a soy-free version, use coconut aminos instead of soy sauce. This will offer the same umami elements without gluten, catering to those with dietary restrictions.
-
Citrusy Zest: Add a teaspoon of lemon or lime zest to the mixture. This bright touch can lighten the flavor and offer a refreshing twist, perfect for summertime gatherings.
-
Baked Alternative: Consider baking instead of frying to make them even healthier. Shape the shrimp balls, place them on a baking sheet, and bake at 375°F (190°C) for around 15 minutes, turning halfway through.
-
Bring the Heat: If bold flavors are your thing, mix in some Sriracha or wasabi for an adventurous twist, giving each bite an electrifying surprise!
Customize your shrimp balls to suit your tastes just like you could with my Comforting All Ages or any of my other favorites. Get creative and enjoy your culinary adventure!
What to Serve with Crispy Shrimp Balls with Ginger and Garlic
Create a delightful dining experience by pairing these crunchy shrimp balls with captivating flavors and textures.
-
Sweet Chili Sauce: This sticky, sweet, and mildly spicy dip enhances the shrimp balls’ savory notes beautifully. A perfect match that brings out the flavors!
-
Garlic Aioli: Rich and creamy, this aioli adds a smooth layer of flavor, making every bite of shrimp ball feel luxurious. The garlic complements the shrimp perfectly.
-
Fresh Salad: A crisp cucumber and mint salad delivers a refreshing contrast to the crunchy shrimp balls. The coolness of the salad balances the warm appetizer splendidly.
-
Coconut Rice: Flavorful coconut rice provides a subtly sweet base for the shrimp balls, offering a fragrant dish that envelops every bite in tropical goodness.
-
Hoisin Dipping Sauce: This tangy sauce, with hints of sweetness and spices, amplifies the flavors of the shrimp while creating a delightful umami experience.
-
Crunchy Vegetable Spring Rolls: Serve with fresh vegetable spring rolls for added texture and a delightful bite. The light crunch makes it a summer-inspired feast, perfect for a gathering.
-
Sparkling Water with Lime: A refreshing, fizzy drink that cleanses the palate, sparkling water enhances the dining experience without overpowering the shrimp balls.
-
Fruit Sorbet: For dessert, consider a light fruit sorbet to cleanse the palate. The refreshing sweetness wraps up the meal on a high note, leaving everyone satisfied.
Make Ahead Options
These delicious shrimp balls are perfect for meal prep enthusiasts! You can prepare the shrimp mixture and form the balls up to 24 hours ahead of time; just refrigerate them in an airtight container to maintain their freshness. When you’re ready to enjoy your shrimp balls, simply heat oil for frying, and cook them in batches for about 3-4 minutes on each side until golden and crispy. Alternatively, if you prefer to freeze them, uncooked shrimp balls can last for up to 2 months in the freezer—just thaw them overnight in the fridge before frying. With these prep options, you’ll save time on busy weeknights while still enjoying that restaurant-quality experience right at home!
How to Store and Freeze Shrimp Balls
Fridge: Store cooked shrimp balls in an airtight container for up to 3 days to maintain their crispiness and flavor.
Freezer: For longer storage, freeze uncooked shrimp balls for up to 2 months. Make sure they are arranged in a single layer on a baking sheet before transferring to a freezer bag.
Reheating: To reheat, bake at 375°F (190°C) for about 15 minutes or heat in a skillet over medium heat until warmed through. This keeps them crispy and delicious!
Room Temperature: If left out for serving, refrigerate any leftovers after 2 hours to ensure food safety.
Expert Tips for Shrimp Balls Recipe
-
Chop Carefully: Ensure shrimp is finely chopped but not pureed; maintaining some texture makes your shrimp balls delightful to bite into.
-
Don’t Overcrowd: Fry in batches to avoid steaming instead of frying, which can prevent achieving that crunchy exterior.
-
Temperature Check: Always check oil temperature before frying with a small test ball; it should sizzle immediately upon contact for best results.
-
Healthy Twist: Consider baking at 375°F (190°C) for a healthier shrimp balls recipe. Just adjust the cooking time to ensure they are cooked through.
-
Customize Freely: Feel free to add unique spices, herbs, or even cheese to your mixture for a personal touch—adapt the shrimp balls to your taste!

Crispy Shrimp Balls with Ginger and Garlic Recipe FAQs
How do I select the best shrimp for this recipe?
Absolutely! For the best flavor and texture, choose fresh or thawed frozen shrimp. Look for shrimp that are firm, pink, and have a mild ocean scent. Avoid shrimp that have dark spots or an off smell, as these can indicate spoilage.
What’s the best way to store leftover shrimp balls?
After enjoying your shrimp balls, store any leftovers in an airtight container in the fridge for up to 3 days. To maintain their crispiness, it’s a good idea to reheat them in the oven or skillet rather than the microwave.
Can I freeze uncooked shrimp balls? How do I do that?
Yes, you can definitely freeze uncooked shrimp balls for up to 2 months! To freeze, arrange the shaped shrimp balls in a single layer on a parchment-lined baking sheet. Once frozen solid, transfer them to a freezer bag. Be sure to label the bag with the date and use them straight from the freezer—just fry them for a couple of extra minutes.
What if my shrimp balls fall apart while frying?
Very! If your shrimp balls are falling apart, they might not have enough binder. Ensure you’re using enough breadcrumbs and egg to hold them together. If you’re using too much moisture, consider adding a bit more cornstarch to the mix for a firmer texture. Adjust the mixture as necessary, and remember to pack them tightly when forming the balls.
Are these shrimp balls suitable for people with allergies?
While these shrimp balls are a delightful dish, they do contain shrimp, eggs, and soy sauce. For gluten-free options, use coconut aminos instead of soy sauce. If you’re preparing for someone with shellfish allergies, I recommend trying a similar recipe using chicken or plant-based proteins as a substitute. Always remember to double-check ingredient labels for allergens!
Can I bake these shrimp balls instead of frying them?
Absolutely! For a healthier version, preheat your oven to 375°F (190°C), then place the formed shrimp balls on a parchment-lined baking sheet. Bake for about 15-20 minutes, flipping halfway through to ensure even crisping. You’ll lose some of the frying benefits, but they will still be deliciously golden and crispy!
Irresistible Shrimp Balls Recipe for Quick, Flavorful Fun
Ingredients
Equipment
Method
- Prepare the shrimp by peeling and deveining if necessary, then chop finely in a food processor until chunky.
- In a large mixing bowl, combine chopped shrimp, breadcrumbs, egg, green onions, garlic, ginger, soy sauce, sesame oil, and season with salt and pepper. Mix thoroughly.
- Form small portions of the mixture into compact balls about the size of a golf ball and place them on a tray lined with parchment paper.
- Heat the oil in a frying pan over medium-high heat until it reaches 350°F. Test with a small shrimp ball; it should sizzle upon contact.
- Fry the shrimp balls in batches for 3-4 minutes on each side until golden brown. Turn gently to ensure even cooking.
- Remove the fried shrimp balls with a slotted spoon and drain on paper towels. Serve warm with your favorite dipping sauce.
")


