")
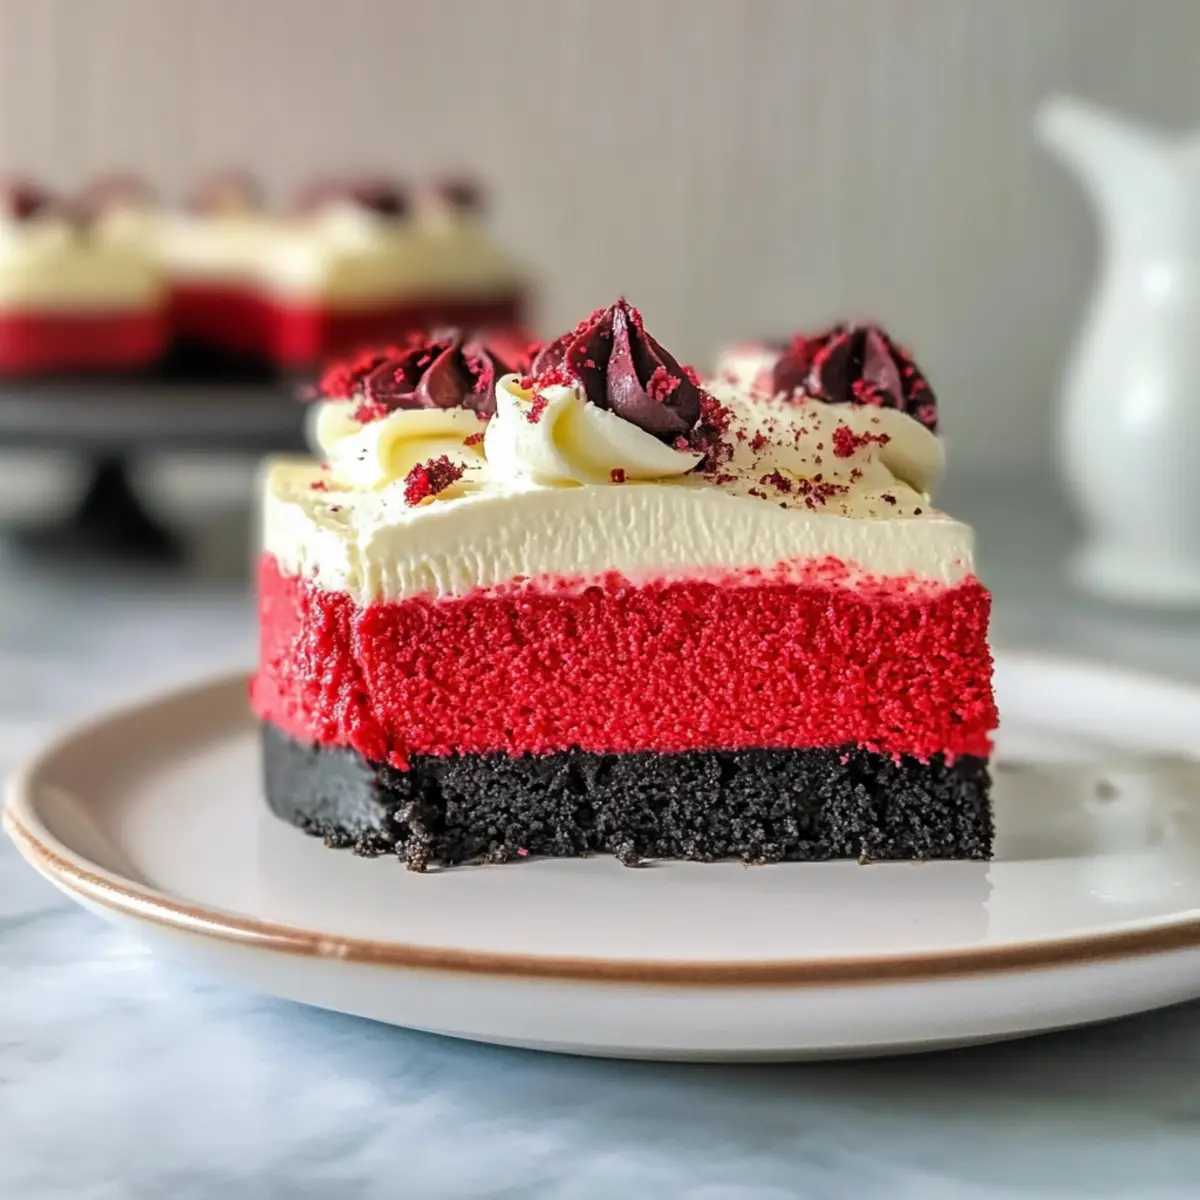
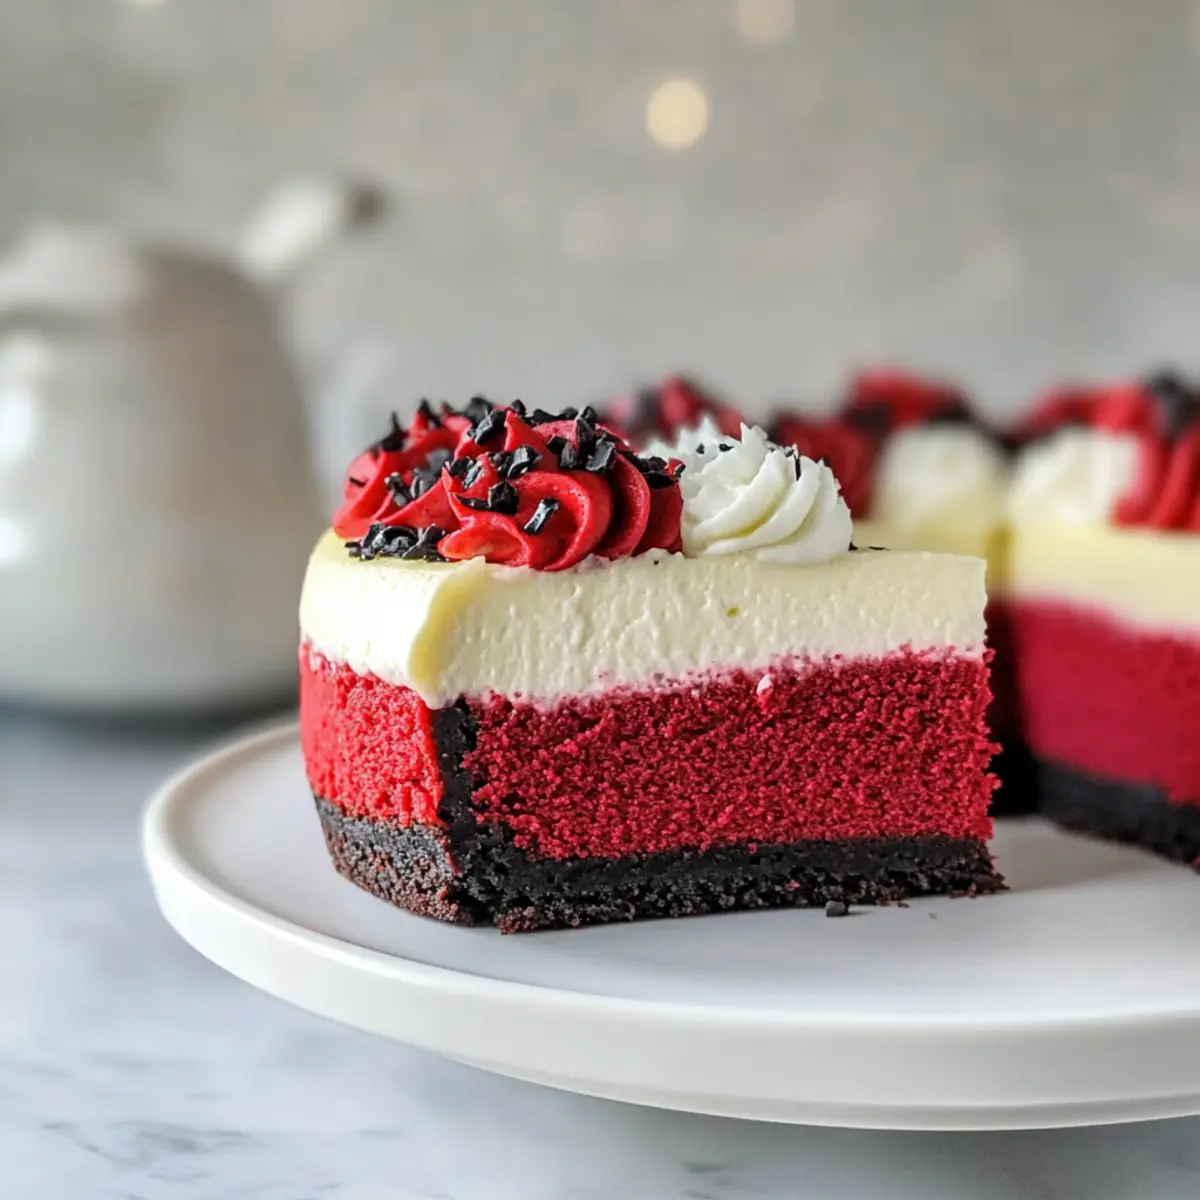
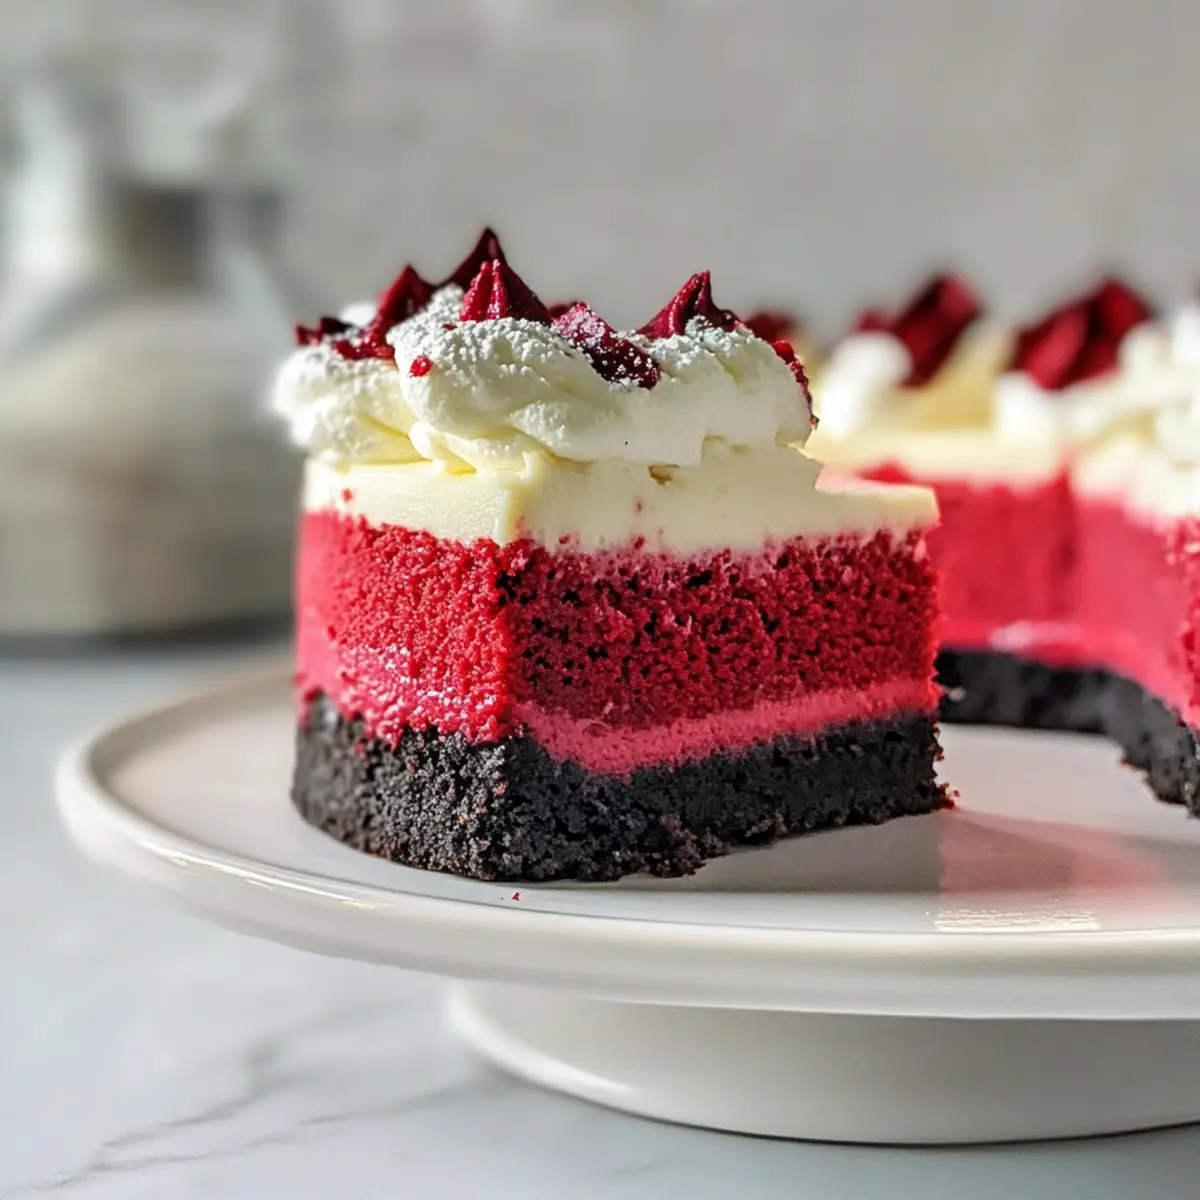
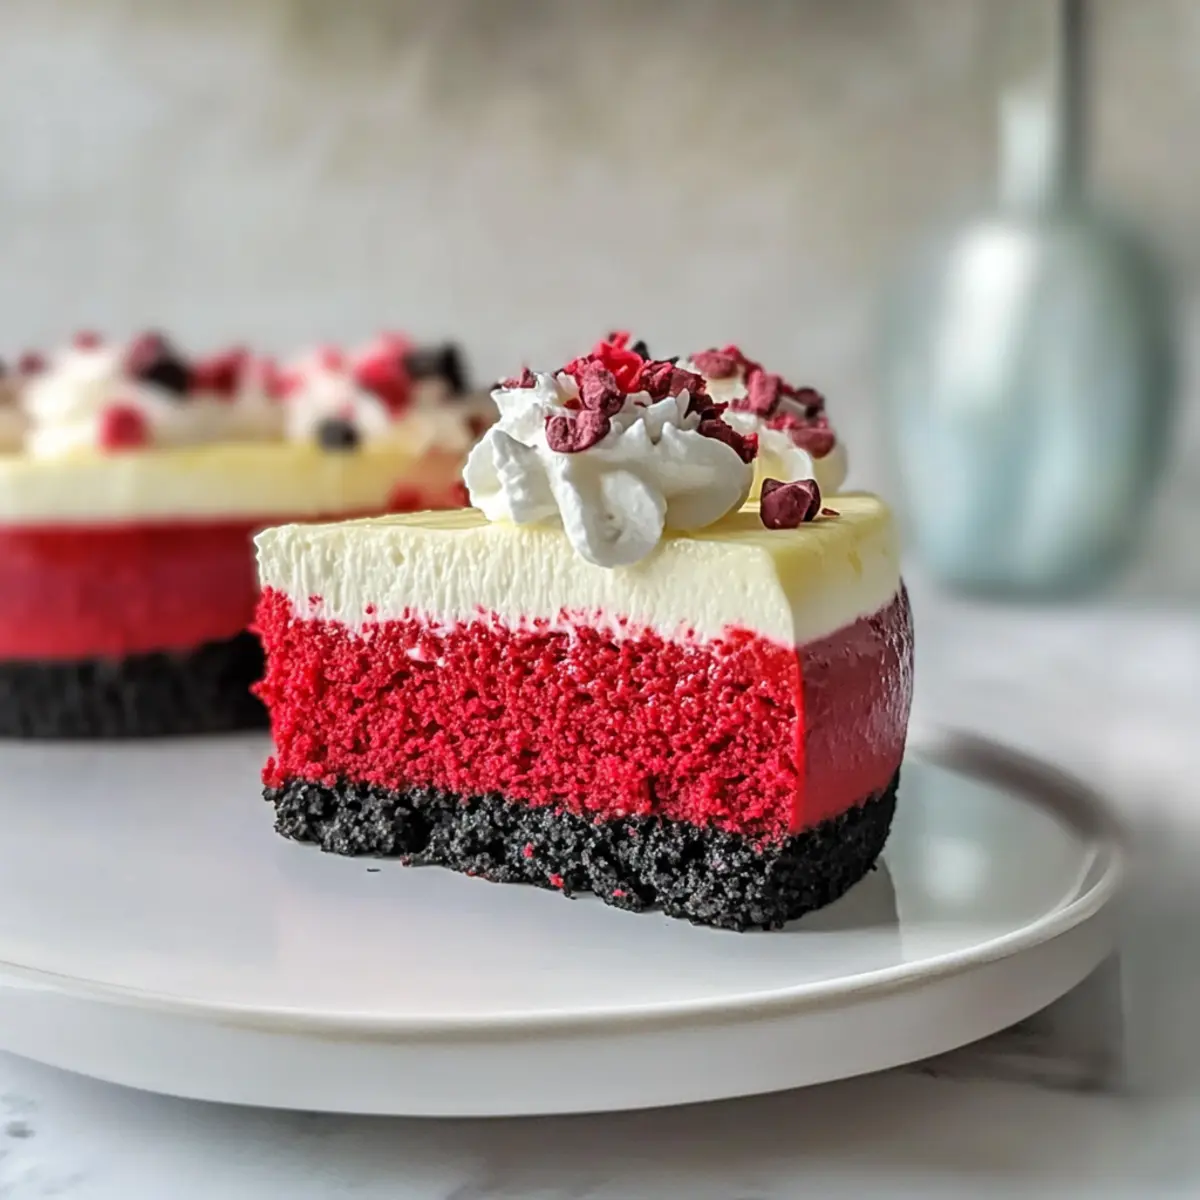
As I stood in my kitchen, the aroma of rich cocoa and creamy cheese wafted through the air, igniting a wave of nostalgia for the classic red velvet cake of my childhood. This Red Velvet Cheesecake combines the lusciousness of smooth cheesecake with the beloved flavors of red velvet, creating a dessert that’s not just a feast for the eyes but a treat for the taste buds too. With a buttery Oreo crust and a light cream cheese frosting, this cheesecake is a delightful companion for Valentine’s Day or any celebration where love and indulgence are on the menu. Plus, it comes together quickly, making it a perfect crowd-pleaser for those of us who want to impress without spending all day in the kitchen. Are you ready to dive into a slice of this heavenly creation?
Why Is This Cheesecake So Irresistible?
Decadent Layers: This Red Velvet Cheesecake features a silky, smooth filling that perfectly balances the rich cocoa and tangy cream cheese flavors, making each bite a blissful experience.
Eye-Catching Color: The stunning deep red hue not only delights the eye but makes it an impressive centerpiece for any gathering, especially on occasions like Valentine’s Day.
Quick to Prepare: With simple steps and readily available ingredients, you’ll have this cheesecake ready in no time, allowing more moments to enjoy with loved ones.
Adaptable for Everyone: Whether you’re sticking to gluten-free diets or simply looking for a twist, you can easily swap in gluten-free cookies for the crust.
Crowd Favorite: Its unique flair and classic appeal guarantee that it will disappear off the dessert table—just like our favorite Sara Lee Cheesecake delights your friends and family.
Red Velvet Cheesecake Ingredients
• Here’s everything you’ll need to create this delightful Red Velvet Cheesecake!
For the Crust
- Oreo Cookies – A tasty base for our cheesecake; gluten-free chocolate sandwich cookies can be used for gluten sensitivities.
- Unsalted Butter – Binds the crust together, adding richness and flavor.
For the Cheesecake Filling
- Cream Cheese – The star ingredient that provides creaminess; make sure it’s at room temperature for easy mixing.
- Granulated Sugar – Sweetens the cheesecake, enhancing the delicious flavors.
- Natural Unsweetened Cocoa Powder – Adds subtle chocolate flavor, integral to the traditional red velvet taste.
- Sour Cream – Introduces a tangy depth, mimicking buttermilk’s role in classic red velvet cakes.
- White Vinegar – Enhances the tanginess without affecting flavor, contributing to the smooth texture.
- Vanilla Extract – Adds aromatic depth that elevates the overall flavor profile.
- Salt – Balances sweetness and enhances the overall taste.
- Liquid Red Food Coloring – Gives the cheesecake its signature deep red color, though optional if you prefer a natural hue.
- Eggs – Essential for structure and stability; using room temperature eggs ensures better incorporation.
For the Cream Cheese Frosting
- Additional Cream Cheese & Butter – Ensure a light, fluffy frosting that adds a rich finish.
- Confectioners’ Sugar – Sweetens and thickens the frosting for that creamy consistency.
Now that you have the ingredient list at your fingertips, get ready to impress with this delicious Red Velvet Cheesecake!
Step‑by‑Step Instructions for Red Velvet Cheesecake
Step 1: Preheat the Oven & Make the Crust
Begin by preheating your oven to 350°F (175°C). While the oven heats, crush the Oreo cookies until they resemble fine crumbs, then mix them with melted unsalted butter until well combined. Press this mixture firmly into the bottom of a 9-inch springform pan to form the crust. Bake for 10 minutes before reducing the temperature to 325°F (163°C) to prepare for the cheesecake filling.
Step 2: Prepare the Cheesecake Filling
In a large mixing bowl, beat the room temperature cream cheese and granulated sugar with an electric mixer until smooth and creamy. Gradually add in the natural unsweetened cocoa powder, sour cream, white vinegar, vanilla extract, and salt. Mix until combined, then add the liquid red food coloring, blending until evenly dispersed. Incorporate the eggs one at a time, mixing gently on low speed to avoid unnecessary air bubbles.
Step 3: Set Up Water Bath
Wrap the bottom of the springform pan tightly with aluminum foil to prevent water seeping in, or use a pan-in-pan method. This water bath ensures even baking and prevents cracks. Pour the creamy cheesecake filling over the cooled crust, spreading it out evenly. This layer of decadent Red Velvet Cheesecake is essential for a luscious texture.
Step 4: Bake the Cheesecake
Place the wrapped springform pan into a larger roasting pan, then fill the outer pan with hot water until it reaches halfway up the sides of the springform pan. Bake at 325°F (163°C) for 60-70 minutes, or until the edges are set and the center has a slight jiggle—this visual cue indicates it’s perfectly cooked.
Step 5: Cool Gradually
After baking, turn off the oven and let the cheesecake cool with the oven door slightly ajar for 30 minutes. This gradual cooling helps to prevent cracks on the surface. Once cooled, carefully remove the cheesecake from the oven and allow it to cool to room temperature before refrigerating it for at least 4 hours or overnight. This chilling time is crucial for the best flavor and texture.
Step 6: Make the Cream Cheese Frosting
As the cheesecake cools, prepare the cream cheese frosting. In a mixing bowl, beat the additional cream cheese and unsalted butter together until fluffy. Gradually add the confectioners’ sugar, mixing until smooth, and then stir in a splash of vanilla extract for flavor. This frosting will complement the rich cheesecake perfectly.
Step 7: Serve
Once chilled, carefully unmold the cheesecake from the springform pan. Spread a generous layer of cream cheese frosting on top for that luscious finish. Feel free to pipe additional decorative frosting around the edges for an elegant touch, and add fresh berries or chocolate shavings if desired. Your stunning Red Velvet Cheesecake is now ready to impress!
How to Store and Freeze Red Velvet Cheesecake
Fridge: Store your Red Velvet Cheesecake in an airtight container in the refrigerator for up to 5 days. This helps maintain its creamy texture and rich flavor.
Freezer: For longer storage, wrap the cheesecake tightly in plastic wrap, then foil, and freeze for up to 3 months. This safeguard prevents freezer burn and preserves its delicious taste.
Thawing: To enjoy your cheesecake after freezing, transfer it to the fridge to thaw overnight. This slow defrosting helps retain its texture and flavor.
Reheating: If you prefer it warm, slice and warm individual pieces in the microwave for about 15-20 seconds, ensuring it’s still deliciously creamy without overheating.
Make Ahead Options
These Red Velvet Cheesecake make-ahead tips will save you valuable time during busy celebrations! You can prepare the crust and filling up to 24 hours in advance. Simply crush the Oreo cookies and combine them with melted butter to create the crust, then store it covered in the refrigerator. For the filling, mix all the ingredients (ensuring they’re at room temperature), pour it over the crust, and bake as directed. Once cooled, refrigerate the cheesecake for additional flavor enhancement; it can stay good in the fridge for up to three days. When ready to serve, simply make the frosting, spread it over the chilled cheesecake, and enjoy your delicious, time-efficient dessert!
What to Serve with Decadent Red Velvet Cheesecake?
Indulging in a slice of this delightful cheesecake opens the door to a world of perfect pairings that elevate your dessert experience.
-
Fresh Berries: The tartness of strawberries or raspberries complements the sweetness of the cheesecake beautifully, adding a vibrant, juicy contrast.
-
Vanilla Ice Cream: A scoop of creamy vanilla ice cream adds extra richness, creating a delightful temperature contrast against the chilled cheesecake.
-
Coffee: A warm, freshly brewed cup of coffee enhances the rich flavors of the cheesecake, making it the ideal companion for dessert lovers.
-
Chocolate Ganache: Pouring a glossy chocolate ganache over your slice brings a luxurious touch, deepening the chocolate notes and enhancing indulgence.
-
Mint Garnish: Sprigs of fresh mint not only add a pop of color for presentation but also provide a refreshing flavor that cuts through the richness.
-
Sparkling Wine: A light, bubbly prosecco is a lovely pairing, its effervescence balancing the creamy texture, making it a romantic dessert option.
Let the combination of these delectable treats steal the show alongside your Red Velvet Cheesecake, making every bite a sensory delight!
Red Velvet Cheesecake Variations
Feel free to explore and customize this delicious cheesecake according to your personal taste and dietary needs!
- Whipped Cream Frosting: Replace cream cheese frosting with whipped cream for a lighter, airy topping. It complements the rich cheesecake beautifully.
- Gluten-Free Option: Use gluten-free chocolate sandwich cookies for the crust to cater to gluten sensitivities. Everyone can enjoy a slice at the table!
- Berry Bliss: Top with fresh berries like strawberries or raspberries for a vibrant pop of color and a delightful tartness against the sweet cheesecake.
- Chocolate Delight: Drizzle melted chocolate over the cream cheese frosting for an extra layer of indulgence—an irresistibly rich combination.
- Nutty Crunch: Add chopped pecans or walnuts to the crust for added texture and a nutty flavor that enhances the overall experience.
- Coconut Twist: Incorporate shredded coconut into the cheesecake filling for a tropical touch that beautifully complements the red velvet flavor.
- Pink Velvet: Instead of red food coloring, use a combination of beet juice and cocoa to create a natural pink hue while keeping the taste stellar.
- Zesty Citrus: Add a teaspoon of lemon or orange zest into the cheesecake mixture for a refreshing citrus twist that brightens up each bite.
With these variations, your Red Velvet Cheesecake can be uniquely yours! If you’re in the mood for other delightful desserts, don’t forget to check out our tempting Red Velvet Brownies or learn how to whip up a crowd-pleasing Cheesecake Dip!
Expert Tips for Red Velvet Cheesecake
-
Room Temperature Ingredients: Ensure all ingredients, especially cream cheese and eggs, are at room temperature. This helps achieve a smooth and creamy filling without lumps.
-
Mix Gently: When incorporating eggs into the batter, mix on low speed and gently, avoiding excessive air. This will minimize cracks for your Red Velvet Cheesecake.
-
Proper Cooling: Let the cheesecake cool gradually in the oven with the door slightly ajar. This prevents sudden temperature changes, which can lead to cracks.
-
Check for Doneness: The cheesecake should jiggle slightly in the center when finished baking. An internal temperature of 145°F indicates it’s perfectly set.
-
Chill Overnight: For the best flavor and texture, chill the cheesecake for at least 4 hours or overnight before serving. This helps the flavors meld beautifully.
-
Use a Water Bath: Baking the cheesecake in a water bath ensures even cooking and prevents dryness, giving you that rich, creamy texture.
Red Velvet Cheesecake Recipe FAQs
What type of Oreo cookies should I use for the crust?
You can use regular Oreo cookies, but if you’re looking for a gluten-free option, gluten-free chocolate sandwich cookies work wonderfully as a substitute! Just be sure to check the packaging to confirm they are certified gluten-free.
How long can I store the Red Velvet Cheesecake in the fridge?
Your Red Velvet Cheesecake can be stored in an airtight container in the refrigerator for up to 5 days. Just make sure it’s properly sealed to keep its creamy texture and rich flavor intact.
Can I freeze the Red Velvet Cheesecake, and if so, how?
Absolutely! To freeze, wrap the cheesecake tightly in plastic wrap and then in aluminum foil to prevent freezer burn. It can be stored in the freezer for up to 3 months. To thaw, place it in the refrigerator overnight for the best texture retention.
What if my cheesecake cracks while baking?
Cracking can happen, but don’t worry! To minimize this, ensure that your eggs are mixed in at low speed and that you’re using a water bath during baking. If it does crack, you can cover it with your cream cheese frosting to hide any imperfections—every bite will still taste divine!
How can I make this recipe suitable for someone with dairy allergies?
For a dairy-free version of the Red Velvet Cheesecake, you can use dairy-free cream cheese and vegan butter for the frosting. Additionally, you might want to substitute the eggs with flax eggs (1 tablespoon of ground flaxseed mixed with 2.5 tablespoons of water per egg) to maintain the texture, although this may alter the flavor slightly.
What is the best way to serve the cheesecake?
Serve chilled slices adorned with fresh berries or additional cream cheese frosting for a delightful presentation. I often like to add chocolate shavings or a sprinkle of cocoa powder on top for an extra touch of elegance!
Irresistible Red Velvet Cheesecake for Your Next Celebration
Ingredients
Equipment
Method
- Preheat the oven to 350°F (175°C). Crush Oreo cookies and mix with melted butter. Press into a 9-inch springform pan. Bake for 10 minutes, then reduce temperature to 325°F (163°C).
- In a bowl, beat cream cheese and sugar until smooth. Add cocoa powder, sour cream, vinegar, vanilla, and salt, mixing until combined. Then add food coloring and eggs, mixing gently.
- Wrap the bottom of the springform pan in aluminum foil. Pour cheesecake filling over cooled crust.
- Place the pan in a larger roasting pan, fill with hot water halfway up the sides. Bake at 325°F (163°C) for 60-70 minutes until edges are set.
- Turn off the oven, leave cheesecake to cool with door ajar for 30 minutes, then cool completely and refrigerate for at least 4 hours.
- Beat additional cream cheese and butter until fluffy. Add confectioners' sugar and a splash of vanilla, mixing until smooth.
- Unmold the cheesecake and frost the top. Optionally pipe decorative frosting and add berries or chocolate shavings.
")