")
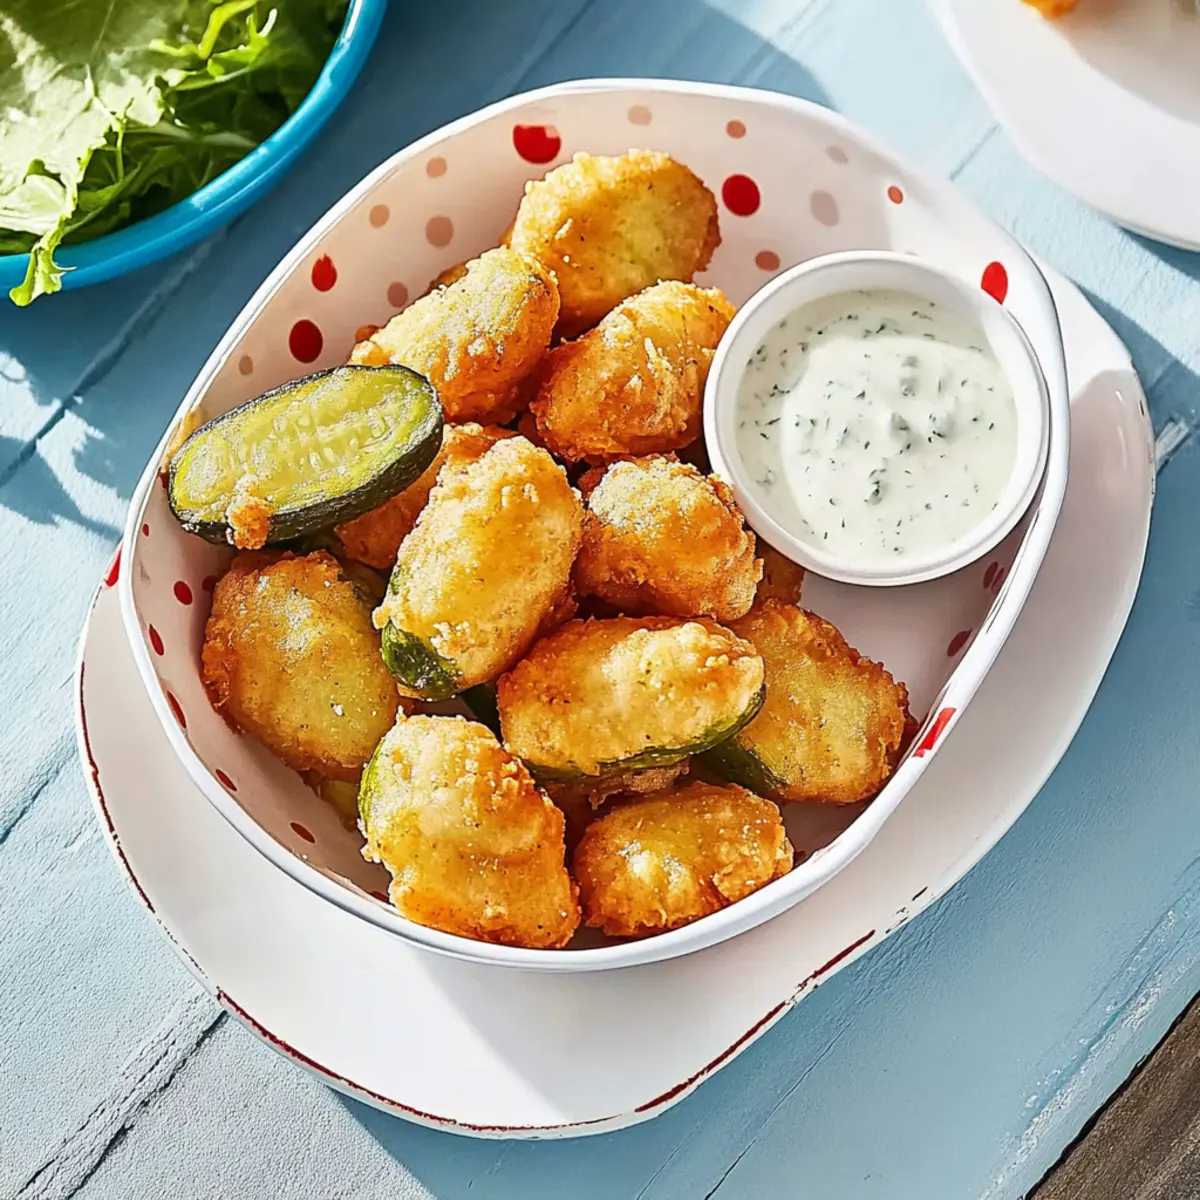
The tantalizing sound of sizzling oil fills the kitchen as I dip the first pickle into a golden bath, and I can hardly wait to devour these crispy fried pickles with buttermilk ranch. This recipe is everything you crave in a snack: simple to whip up and packing a crunch that satisfies your deepest cravings. Perfect for gatherings or simply as a personal treat, these fried delights take only about 45 minutes to create. Each bite unveils juicy pickles cloaked in a perfectly golden-crisp coating that pairs beautifully with creamy buttermilk ranch for dipping. Whether served warm or at room temperature, these little bites of joy make for a fun twist on classic party snacks. Ready to impress your friends and family with this crowd-pleaser? Let’s dive into the crispy magic of fried pickles!
Why Are Fried Pickles So Irresistible?
Crispy Crunch: The wonderfully golden-brown exterior creates an instant crunch that you just can’t resist!
Flavor Fusion: Each bite delivers a delightful contrast of tangy pickles and rich buttermilk ranch, making it a flavor bomb of satisfaction.
Quick Recipe: You can whip these up in just 45 minutes, making them an easy choice for last-minute gatherings or cozy nights in.
Versatile Snack: Whether you enjoy them as a party app, alongside burgers, or as a solo indulgence, they’re perfect anytime!
Crowd Favorite: Everyone—from kids to adults—will love these fried delights, which are a fantastic alternative to traditional snacks.
Upgrade your snack game and satisfy your cravings with these crispy fried pickles! For more delicious dipping ideas, check out how to make Marry Chicken Fall or explore sweet options like Starts Sweet Exploration to complement your feast!
Fried Pickles Ingredients
For the Pickles
• Dill pickles – Classic choice for crunch and tang; bread-and-butter pickles add a sweet twist.
For the Coating
• Cornmeal – Ensures a crispy coating; swap with breadcrumbs for a different texture.
• Flour – Acts as a binder for the coating; use gluten-free flour if necessary.
• Spices (paprika, garlic powder) – Add depth of flavor; feel free to adjust or omit based on preference.
For the Wet Mix
• Buttermilk – Infuses moisture and tanginess; substitute with a milk and vinegar mix for a non-dairy option.
For Frying
• Oil – Use vegetable or peanut oil with a high smoke point; ensure ample oil for deep frying to achieve perfect fried pickles with buttermilk ranch.
Step‑by‑Step Instructions for Fried Pickles with Buttermilk Ranch
Step 1: Prepare the Pickles
Begin by draining the dill pickles and patting them dry with paper towels, removing excess moisture. This crucial step ensures a crispy coating when frying. Place the dried pickles on a clean plate while you prepare the coating, so they’re ready to go as soon as it’s mixed.
Step 2: Mix the Coating
In a medium bowl, combine the cornmeal, flour, and your chosen spices, such as paprika and garlic powder, to create a flavorful batter. Whisk the mixture until evenly blended, making sure there are no lumps. This seasoned mix will form the crispy coating for your fried pickles.
Step 3: Dip and Coat
Pour the buttermilk into a shallow dish, then take each pickle, dipping it into the buttermilk to coat evenly. Allow excess buttermilk to drip off before dredging the pickle in the cornmeal mixture, ensuring it’s well-coated on all sides. Place the coated pickles on a plate as you prepare to fry.
Step 4: Heat the Oil
In a deep skillet or heavy-bottomed pot, pour enough vegetable or peanut oil to cover the bottom at least 1 inch deep, allowing for even frying. Heat the oil over medium-high heat until it reaches about 375°F (190°C). Use an instant-read thermometer for accuracy, as the right temperature is key for crispy fried pickles with buttermilk ranch.
Step 5: Fry the Pickles
Once the oil is hot, gently add a batch of coated pickles, taking care not to overcrowd the pan. Fry them for about 2-3 minutes on each side, or until they become golden brown and crispy. Use a slotted spoon to remove the fried pickles and transfer them to a plate lined with paper towels to drain excess oil.
Step 6: Serve
Present the crispy fried pickles warm, accompanied by creamy buttermilk ranch for dipping. They can also be enjoyed at room temperature, making them a versatile snack for any occasion. Delight in the incredible crunch and tang as you savor these delicious fried pickles with buttermilk ranch!
What to Serve with Crispy Fried Pickles with Buttermilk Ranch
Create a delightful spread that elevates your fried pickles into a full meal experience.
-
Juicy Burgers: A classic pairing that amplifies flavors; the savory richness of a burger complements the crunchy, tangy pickles beautifully.
-
Classic Potato Wedges: Crispy outside yet fluffy inside, these wedges offer a charming contrast to the pickles’ texture while soaking up your favorite dipping sauces.
-
Fresh Coleslaw: The creaminess and slight sweetness of coleslaw add a refreshing balance, cutting through the richness of the fried coating.
-
Zesty Buffalo Cauliflower: For a spicy kick, these crispy cauliflower bites mirror the crunch of your fried pickles and pair perfectly with ranch dressing.
-
Chilled Beer: A light lager or crisp pale ale will refresh your palate, making each bite of fried pickles feel like a celebratory moment.
-
Sweet and Tangy BBQ Sauce: Drizzling this over your pickles before dipping adds an unexpected, delightful explosion of flavors that will leave everyone wanting more.
-
Cooling Cucumber Salad: Light and refreshing, this salad provides a crunchy contrast, offering a delicious palette cleanser between bites of your crispy snacks.
-
Lightly Dusted Zucchini Fries: Another fried favorite, these zucchini fries provide a satisfying crunch that matches the allure of fried pickles with buttermilk ranch.
Elevate your gathering with these fantastic pairings, and watch as the fried pickles quickly become the star of your table!
Expert Tips for Fried Pickles with Buttermilk Ranch
• Heat Matters: Ensure your oil reaches 375°F (190°C) before frying; this achieves the perfect, crispy fried pickles texture.
• Don’t Overcrowd: Fry in small batches to maintain oil temperature, which prevents sogginess and guarantees even cooking.
• Pat Dry: Always drain and pat your pickles dry thoroughly to avoid excess moisture that can lead to a less crispy coating.
• Season Smart: Customize your spice blend to suit your taste; a little cayenne pepper can add a fantastic kick to your fried pickles with buttermilk ranch.
• Storage Tips: Enjoy fried pickles fresh; if you have leftovers, store in an airtight container and reheat in the oven to regain their crunch.
How to Store and Freeze Fried Pickles with Buttermilk Ranch
Room Temperature: Fried pickles are best consumed fresh. If necessary, they can sit out for up to 2 hours before they need to be refrigerated.
Fridge: Store leftovers in an airtight container for up to 3 days. This keeps the fried pickles with buttermilk ranch fresher and helps maintain some crunch.
Freezer: To freeze, place cooled fried pickles on a baking sheet in a single layer. Once frozen solid, transfer them to a freezer bag for up to 2 months.
Reheating: For optimal crispiness, reheat in the oven at 350°F (175°C) for about 10-15 minutes. Avoid microwaving, as it may cause sogginess.
Make Ahead Options
These crispy fried pickles with buttermilk ranch are perfect for meal prep, making your busy days a little easier! You can prepare the coated pickles up to 24 hours in advance. Simply follow the first three steps: drain and dry the pickles, mix the coating, and coat the pickles before placing them in a single layer on a parchment-lined baking sheet. Cover the baking sheet with plastic wrap and refrigerate until ready to fry. When you’re ready to enjoy them, heat the oil and fry the pickles as instructed; they’ll turn out just as delicious and crispy! Preparing ahead means you can savor these fried delights with minimal effort on hectic days.
Fried Pickles with Buttermilk Ranch Variations
Take your tastebuds on a flavorful adventure by customizing these fried pickles to suit your cravings!
- Cheesy Delight: Add grated Parmesan to your coating for an irresistible cheesy flavor that elevates every bite.
- Batter Up: Try a tempura-style batter for an airy, crispy texture that contrasts beautifully with the tangy pickles.
- Gluten-Free: Swap regular flour for almond flour or a gluten-free blend to cater to gluten-sensitive friends without sacrificing taste.
- Flavor Infusion: Use garlic-infused oil or coconut oil for frying, adding depth and aroma to your yummy pickles.
- Spicy Kick: Toss in some cayenne pepper or a drizzle of hot sauce into the coating for an extra punch that spice lovers will adore.
- Herb Twist: Mix in dried herbs like dill or oregano into your coating mix for a fragrant, garden-fresh taste.
- Dipping Duo: Serve with a side of spicy ketchup or homemade garlic aioli for an exciting twist on the classic buttermilk ranch.
- Sweet Surprise: For a unique touch, try bread-and-butter pickles for a sweeter version that pairs wonderfully with your favorite dipping sauce.
These scrumptious tweaks ensure everyone can enjoy the crispy goodness of fried pickles. If you’re interested in more flavor-packed dipping sauces, don’t miss out on our guide to Fish Tacos Expert! They’re sure to impress your family and friends at any gathering.
Fried Pickles with Buttermilk Ranch Recipe FAQs
What pickles are best for frying?
Absolutely! Dill pickles are the classic choice for that tangy flavor and crispy bite. If you prefer a sweeter option, you can substitute with bread-and-butter pickles. Just make sure they’re firm and not overly soft to maintain that satisfying crunch.
How should I store leftover fried pickles?
Once you’ve enjoyed your delicious fried pickles, store any leftovers in an airtight container in the fridge for up to 3 days. This will help keep them fresher and maintain some crunch. When you’re ready to enjoy them again, simply reheat them in the oven at 350°F (175°C) for about 10-15 minutes.
Can I freeze fried pickles?
Yes! To freeze your fried pickles with buttermilk ranch, let them cool completely and arrange them in a single layer on a baking sheet. Freeze them for 2-3 hours until solid, then transfer them to a freezer bag for up to 2 months. When you’re ready to eat them, reheat in the oven for crispiness—this method keeps the texture lovely!
What can I do if the pickles are soggy after frying?
No worries! If your pickles turn out soggy, it might be due to excess moisture before frying. Ensure you drain and pat them dry thoroughly. For an improved texture, you can also try frying in smaller batches and keeping an eye on the oil temperature (375°F) to make sure they get crispy.
Are fried pickles safe for pets?
Fried pickles are not suitable for dogs or cats due to the high fat content and seasoning, which may upset their stomachs and could lead to other health issues. If you’re looking to share a snack with your furry friend, consider plain cucumbers, as they are crunchy and safe for most pets!
Can I make fried pickles gluten-free?
Very! Simply replace the all-purpose flour in the coating with your favorite gluten-free flour. Additionally, make sure the cornmeal you use is labeled gluten-free. This way, you can still enjoy the delightful crunch of fried pickles with buttermilk ranch without any worries!

Crispy Fried Pickles with Buttermilk Ranch You’ll Crave
Ingredients
Equipment
Method
- Begin by draining the dill pickles and patting them dry with paper towels, removing excess moisture.
- In a medium bowl, combine the cornmeal, flour, and your chosen spices to create a flavorful batter.
- Pour the buttermilk into a shallow dish, then take each pickle, dipping it into the buttermilk to coat evenly.
- In a deep skillet, pour enough oil to cover the bottom at least 1 inch deep and heat over medium-high heat until it reaches about 375°F (190°C).
- Once the oil is hot, gently add a batch of coated pickles and fry them for about 2-3 minutes on each side.
- Present the crispy fried pickles warm, accompanied by creamy buttermilk ranch for dipping.
")