")
The scent of warm bread baking fills my kitchen, pulling me into the joyful world of homemade culinary delights. Today, I’m excited to share my favorite Greek Pita recipe, a straightforward but rewarding journey into Mediterranean cooking. These pillowy, soft pitas are perfect for sandwiches, dips, or even as a light snack on their own. Plus, whipping them up is quick and easy, making them a fantastic choice for anyone wanting to escape the fast-food rut. Whether you’re looking to serve something special for a gathering or simply treat yourself to a delightful homemade experience, this recipe will become a staple in your baking repertoire. How about transforming your next meal with the warm, inviting taste of freshly baked pitas?
Why You’ll Love This Greek Pita Recipe
Simplicity at its best: This easy recipe requires no special equipment, making it accessible for both novice and seasoned bakers alike.
Deliciously Versatile: Use these pitas for everything from gyros to dips like hummus or baba ganoush. They’re incredibly adaptable!
Customizable Options: Opt for plant-based milk for a vegan choice, or substitute flour for a gluten-free version to cater to your dietary needs.
Quick Preparation: With just a few simple steps and minimal rise time, you can have these soft pitas ready in no time, ensuring you can enjoy homemade flavor without the wait.
Crowd-Pleasing Appeal: Freshly baked pitas are a great way to impress guests and are perfect for family meals, proving that homemade beats takeout every time. Dive into your culinary journey with this recipe, and soon, you’ll be whipping up pitas as effortlessly as preparing Lipton Onion Soup meatloaf for a family favorite dinner!
Greek Pita Recipe Ingredients
• Ready to dive into the delicious world of homemade Greek pita? Here’s what you’ll need!
For the Dough
- 1 ½ cups all-purpose flour – This flour gives the pita structure; substitute with a gluten-free blend to adapt the Greek pita recipe.
- 1 tablespoon active dry yeast – This leavening agent helps the dough rise; freshness is key for the best results.
- 1 teaspoon kosher salt – Enhances flavor and helps manage yeast activity for a perfect rise.
- ⅓ cup warm milk – Adds moisture; can be swapped for plant-based milk for a vegan version.
- ⅓ cup warm water – Essential for hydrating the flour and activating the yeast.
- 2 tablespoons olive oil – Adds flavor and tenderness; use extra for greasing bowls and cooking.
Optional Toppings
- Garlic-infused butter – Brush on for an aromatic finish; it takes your pitas to the next level!
- Fresh herbs (oregano or thyme) – Add to the dough for a flavor twist that complements Mediterranean dishes beautifully.
Get ready to enjoy the warm, fluffy goodness of fresh Greek pita bread that’s perfect for any meal!
Step‑by‑Step Instructions for Greek Pita recipe
Step 1: Prepare the Dry Ingredients
In a large mixing bowl, combine 1 ½ cups of all-purpose flour, 1 tablespoon of active dry yeast, and 1 teaspoon of kosher salt. Stir these dry ingredients together until they’re evenly mixed, ensuring the yeast is well-distributed. This initial blend is crucial for creating a light, fluffy texture in your Greek Pita.
Step 2: Mix Wet Ingredients
Gradually incorporate ⅓ cup of warm milk and ⅓ cup of warm water into the dry mixture. Use a wooden spoon or spatula to combine until a shaggy dough starts to form, ensuring all flour is moistened. This should take about 2-3 minutes. The warmth of the liquids activates the yeast, setting the stage for a great rise.
Step 3: Knead the Dough
Add 2 tablespoons of olive oil to the mixing bowl, then turn the dough out onto a lightly floured surface. Knead the dough for about 5-7 minutes until it becomes smooth and elastic, forming a soft ball. This step develops the gluten, which gives your Greek Pita recipe its trademark chewiness and structure.
Step 4: Let the Dough Rise
Lightly grease a clean bowl with olive oil and place the kneaded dough inside. Cover the bowl tightly with plastic wrap or a damp towel, then set it in a warm, draft-free area to rise for approximately 1 hour, or until it has doubled in size. You’ll know it’s done when the dough is soft and puffy, filled with air bubbles.
Step 5: Divide the Dough
Once the dough has risen, dust your work surface with flour and gently punch down the dough to release air. Divide it into 8 equal pieces, shaping each into a small ball. Cover the dough balls with a damp cloth to prevent them from drying out while you prepare to shape them into pitas for your Greek Pita recipe.
Step 6: Shape the Pitas
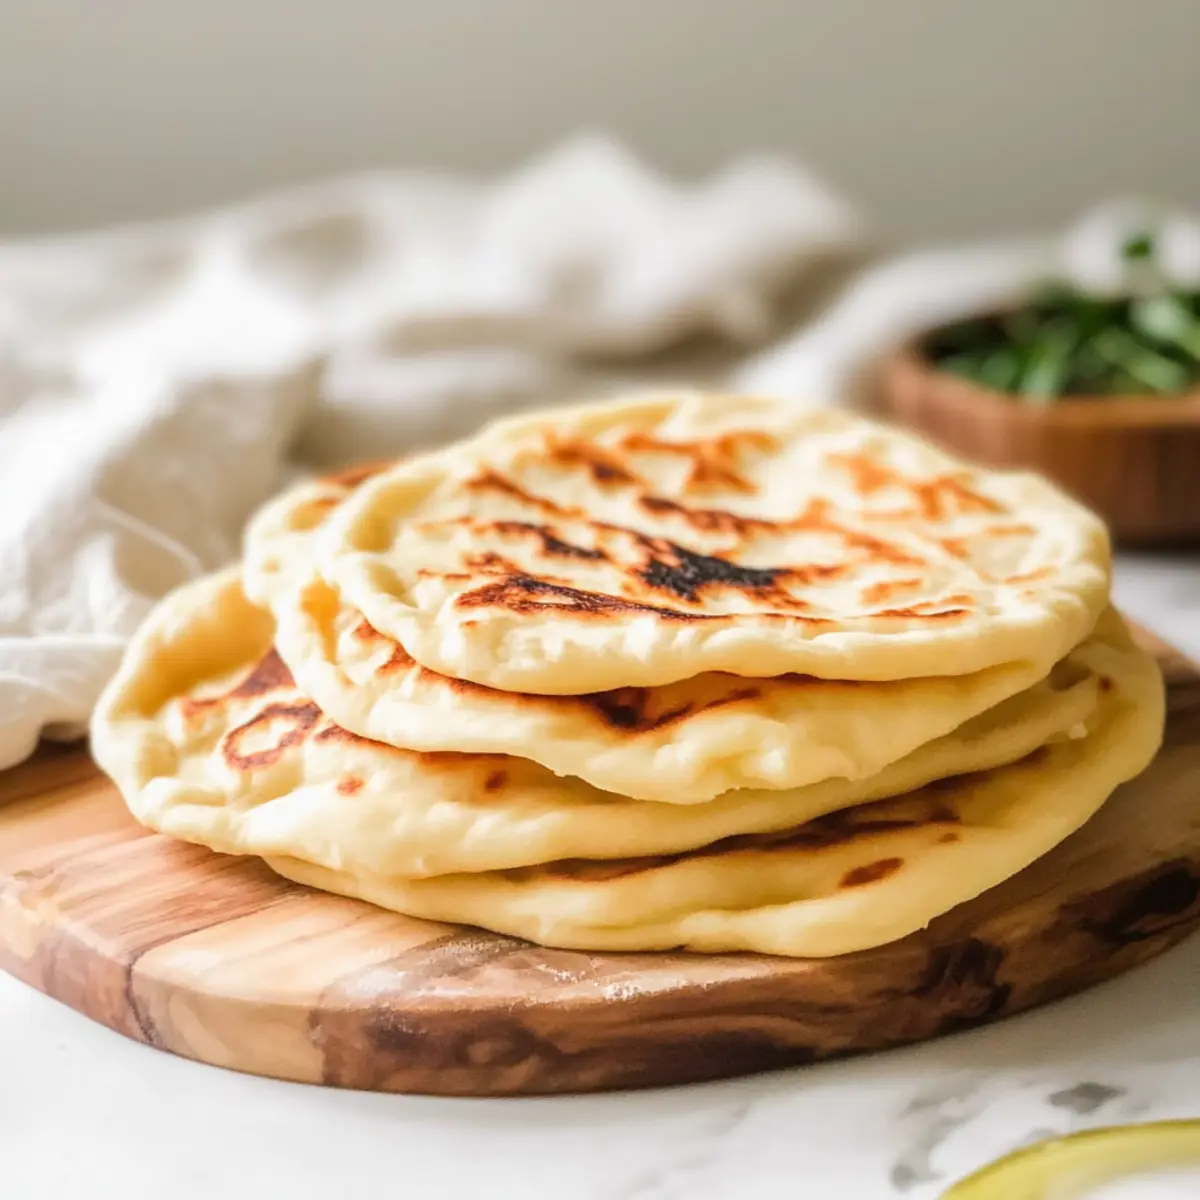
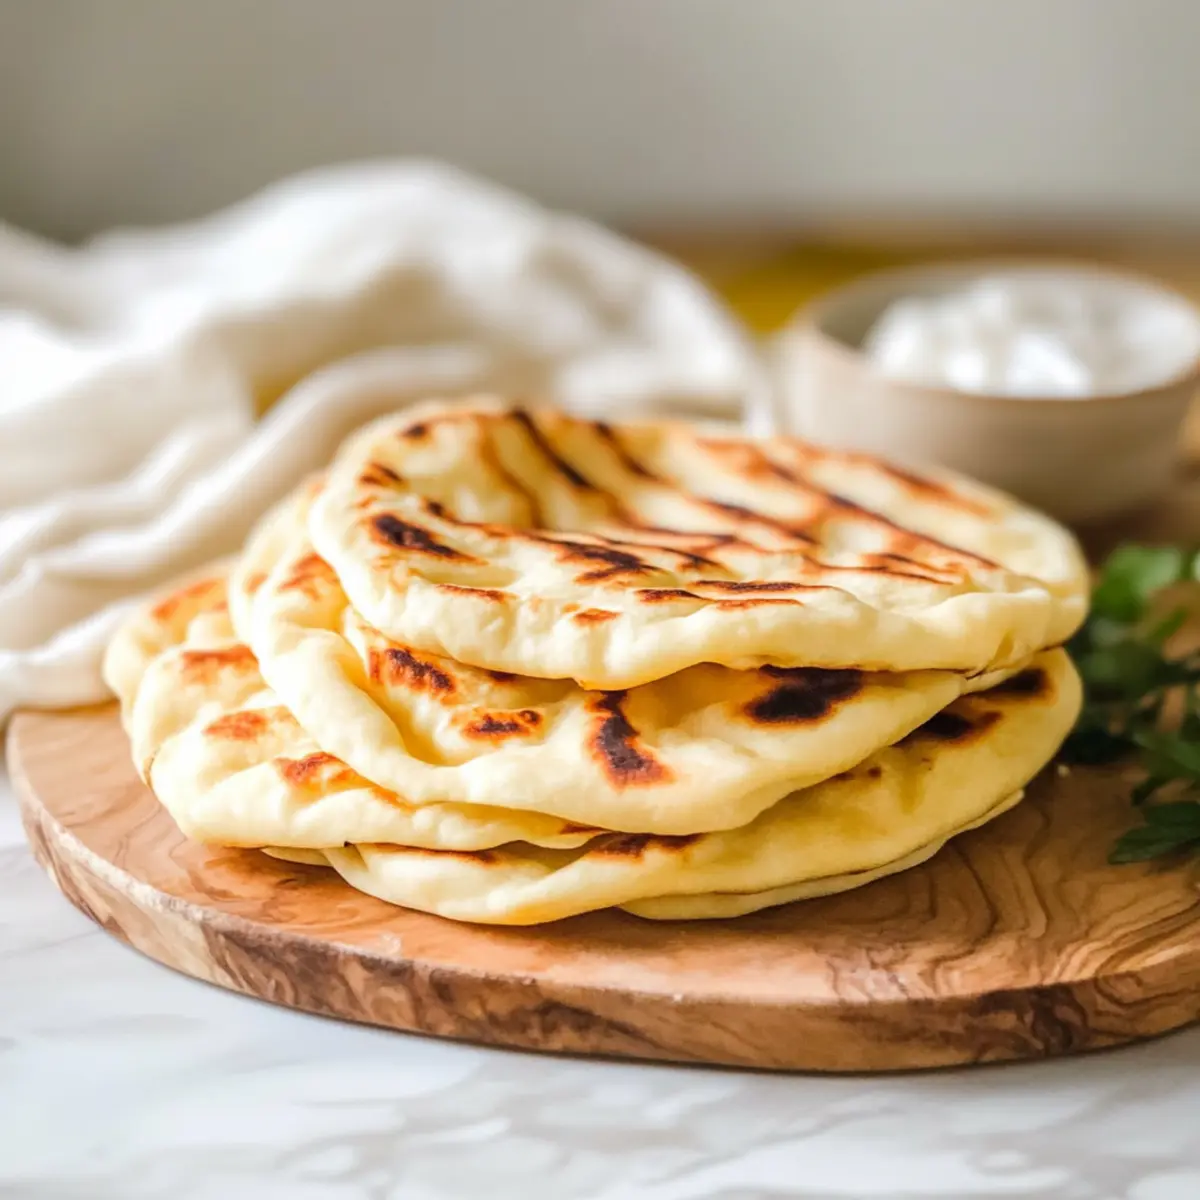
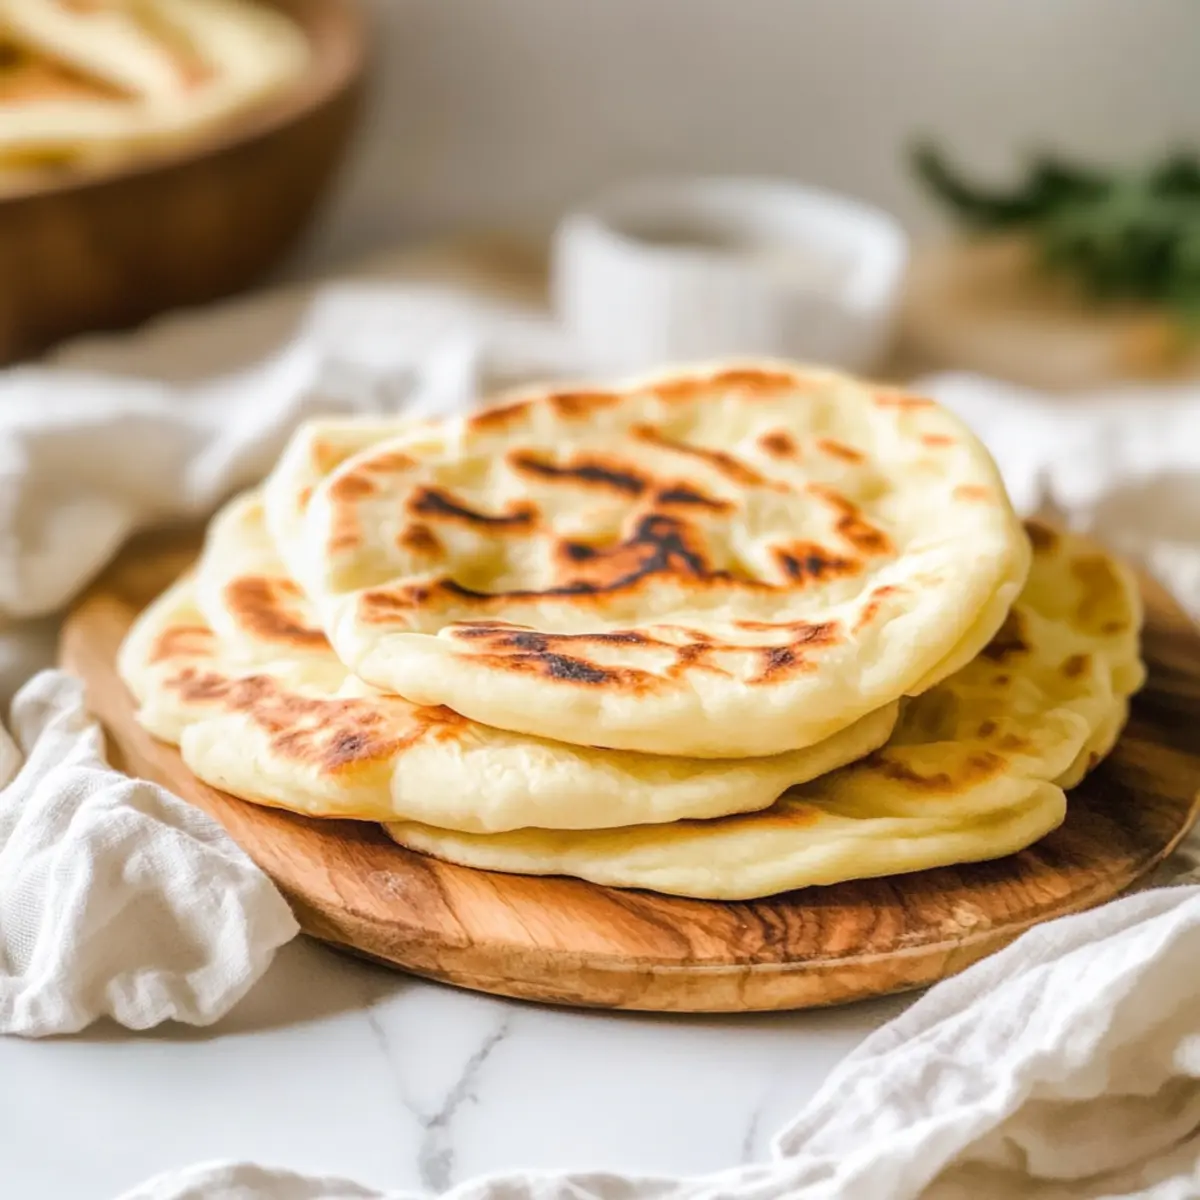
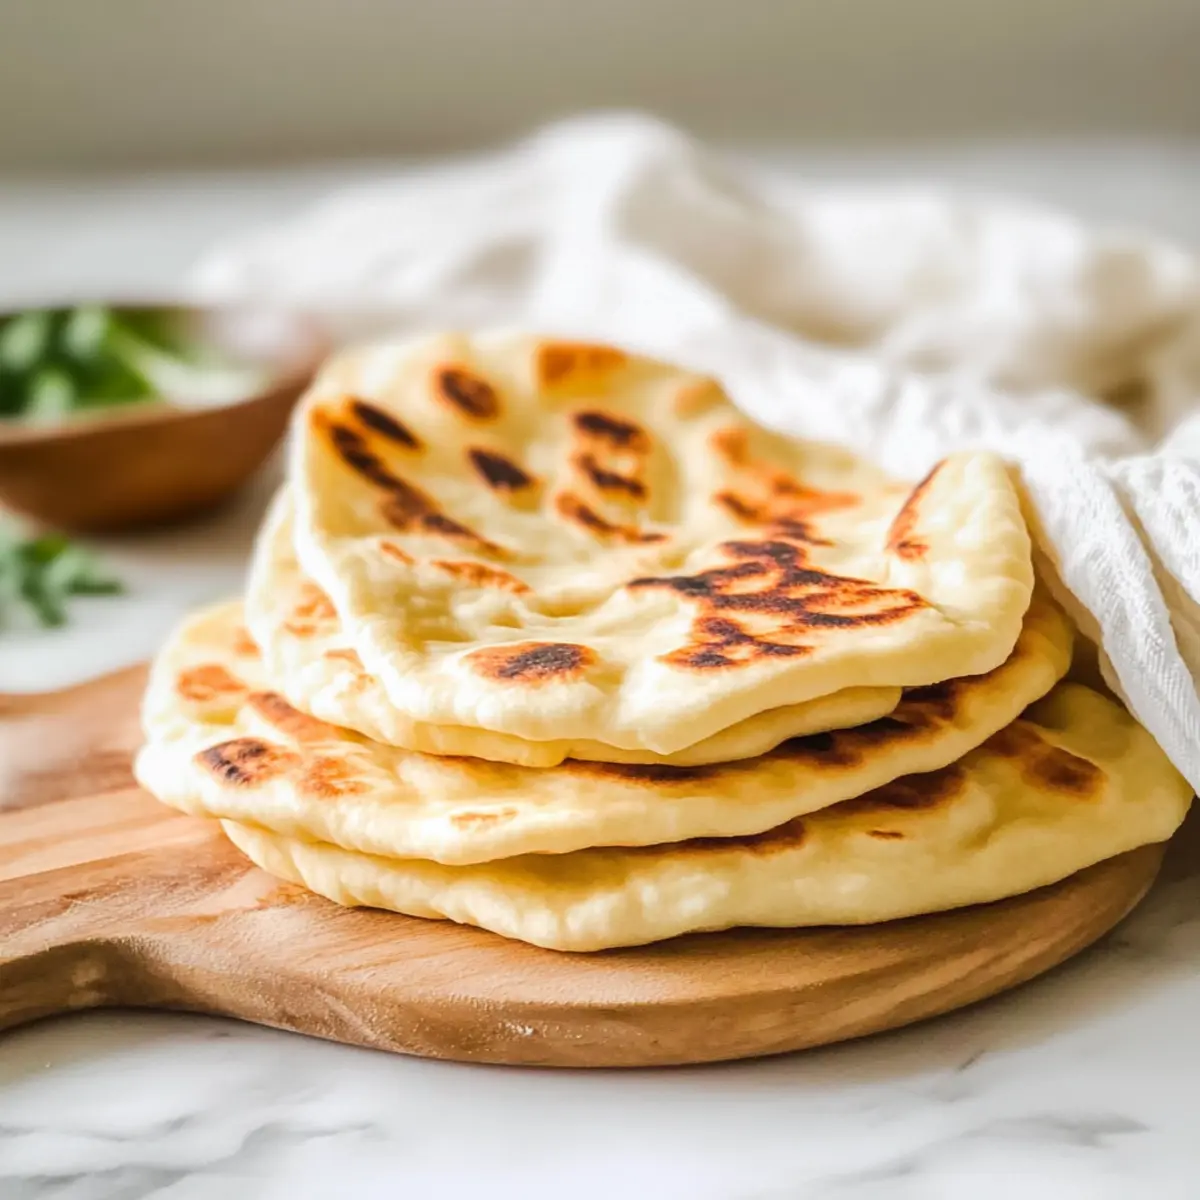
Take each dough ball and flatten it with your hands, then use a rolling pin to roll it out into circles about 7-8 inches wide and ¼ inch thick. Dust with flour as needed to prevent sticking. Aim for uniformity in thickness, as this helps each pita puff equally during cooking, resulting in perfectly airy pitas.
Step 7: Cook the Pitas
Preheat a cast-iron skillet over high heat; it should be very hot. Add a teaspoon of olive oil to the skillet before placing one pita in it. Cook for about 1 minute on each side, or until the pita puffs up and develops light golden-brown char marks. Repeat the cooking process for the remaining pitas, adjusting heat as necessary to avoid burning.
Step 8: Optional Topping and Serving
After cooking, you can brush each warm pita with melted garlic-infused butter or sprinkle fresh herbs for added flavor. Stack the pitas on a plate and cover them with a clean towel to keep them warm. Serve your fluffy Greek Pita bread alongside dips or fillings, enjoying the delightful aroma that fills your kitchen!
Tips for the Best Greek Pita Recipe
-
Fresh Ingredients: Use fresh yeast and high-quality flour for the most flavorful and effective dough, ensuring your Greek pita recipe rises perfectly.
-
Temperature Control: Ensure your liquids are warm but not hot; too much heat can kill the yeast, preventing proper rising and puffy pitas.
-
Avoid Over-Kneading: Knead just until the dough is smooth and elastic. Over-kneading can make the pitas tough rather than soft and fluffy.
-
Skillet Heat: Preheat your skillet well before cooking. A hot skillet is crucial for puffing the pitas; adjust the heat as needed to prevent burning.
-
Storage Tips: Keep leftover pitas in an airtight container for up to 3 days. Reheat gently in an oven or skillet to restore their softness and warmth.
How to Store and Freeze Greek Pita
Room Temperature: Store leftover Greek pitas in a sealed container for up to 3 days. Place a paper towel inside to absorb moisture for best results.
Fridge: If you prefer longer storage, keep the pitas wrapped in foil or plastic wrap in the fridge for up to 5 days, ensuring they remain soft and fresh.
Freezer: For freezing, separate pitas with parchment paper, wrap tightly in plastic wrap, then seal in a freezer bag. They can last up to 1 month without losing quality.
Reheating: To revive frozen Greek pitas, thaw overnight in the fridge. Reheat in the oven at 350°F for 5-10 minutes or on a skillet over medium-low heat until warmed through.
What to Serve with Greek Pita Recipe
Savor the delightful warmth and versatility of homemade bread as you curate the perfect Mediterranean meal.
-
Creamy Hummus: This classic dip provides a velvety texture and rich flavor, complementing the soft pita beautifully. Perfect for a healthy snack!
-
Tzatziki Sauce: A cool, refreshing yogurt-based sauce infused with cucumber and herbs enhances the pita’s warm, fluffy goodness, making it an irresistible combination.
-
Roasted Vegetables: The sweetness and char of roasted seasonal veggies add depth and a satisfying crunch, elevating your meal with vibrant colors and flavors.
-
Grilled Chicken Souvlaki: Juicy, marinated chicken kebabs wrapped in warm pita create a delightful handheld meal, perfect for gatherings or a family dinner.
-
Greek Salad: Fresh tomatoes, cucumbers, olives, and feta offer a bright and crisp contrast to the warm, pillowy pitas. Great for balancing flavors!
-
Stuffed Peppers: Fill with quinoa or rice and spices for a hearty, wholesome dish that pairs well with pita bread, inviting a heartiness to your meal.
-
Spanakopita: Flaky, spinach-filled pastries provide a delightful textural contrast. These savory bites pair wonderfully with the soft pita.
-
Lemonade or Iced Tea: A glass of refreshing lemonade or a chilled iced tea cleanses the palate, offering the perfect sip alongside your Mediterranean feast.
With these pairing ideas, you can transform your Greek Pita recipe into a memorable meal that celebrates warmth, flavor, and culinary creativity!
Greek Pita Recipe Variations
Feel free to explore these scrumptious variations and customize your Greek pita to suit your taste buds!
-
Gluten-Free: Substitute all-purpose flour with a 1:1 gluten-free flour blend for a deliciously accommodating option. Enjoy the same fluffy texture without the gluten!
-
Vegan Delight: Swap warm milk for almond, oat, or any preferred plant-based milk. This simple shift makes your pitas accessible to everyone at the table.
-
Herb-Infused: Add a teaspoon of dried herbs like oregano or thyme directly into the dough. This twist not only elevates the flavor but also fills your kitchen with an inviting aroma.
-
Garlic Lovers: Mix minced garlic into the olive oil that you brush on the pitas before cooking. The result? Irresistibly fragrant pitas that are perfect for dipping.
-
Spice it Up: For those who enjoy a kick, sprinkle in some red pepper flakes into the dough. It’ll add a fun twist that complements dips like hummus or tzatziki beautifully.
-
Sweet Surprise: Incorporate a tablespoon of honey or agave syrup into the wet ingredients for a subtle sweetness. These pitas are then perfect for pairing with jam or sweet spreads.
-
Stuffed Pitas: After baking, fill pitas with your choice of grilled meats, roasted veggies, or even a fresh salad mix. This variation ensures a delightful meal filled with heartiness and flavor.
Explore these ideas, and soon you’ll be delighting in your very own Greek creations, reminiscent of a Mediterranean feast! Did you know you can even enjoy these pitas alongside dips like hummus and baba ganoush? They’re also fantastic paired with dishes such as Alice Springs Chicken for a wonderful culinary experience!
Make Ahead Options
These Greek Pita breads are a fantastic option for meal prep, saving you time during busy weekdays! You can prepare the dough up to 24 hours in advance; simply mix and knead it, then let it rise as usual. Once the dough has risen, you can divide and shape the pitas, then layer them between parchment paper and refrigerate them in an airtight container. This way, they will maintain their quality without drying out. When you’re ready to enjoy your Greek Pita, just cook them straight from the fridge in a hot skillet for 1 minute per side, and you’ll have freshly baked bread that’s just as delicious as on the day it was made!
Greek Pita Recipe FAQs
What type of flour should I use for Greek pita?
I recommend using all-purpose flour for a classic texture. However, if you need a gluten-free option, a 1:1 gluten-free flour blend works beautifully, ensuring you won’t miss out on that delightful puffiness.
How long can I store homemade Greek pita?
For the best flavor and texture, keep leftover pitas in a sealed container at room temperature for up to 3 days. If you want them to last a bit longer, they can be stored in the fridge for up to 5 days. Just remember to place a paper towel inside to absorb excess moisture!
Can I freeze Greek pitas?
Absolutely! To freeze your pitas, first, separate them with parchment paper, then wrap each one tightly in plastic wrap and store them in a freezer bag. They can stay fresh for up to one month. When you’re ready to enjoy, thaw them overnight in the fridge and reheat gently in the oven at 350°F for about 5-10 minutes.
What can I do if my pitas don’t puff up while cooking?
If your pitas don’t puff, there are a couple of things to check. First, ensure your skillet is preheated well – a hot pan creates the steam needed for puffing. Second, check the freshness of your yeast; stale yeast may not allow the dough to rise properly. Adjusting the heat while cooking can also help; just make sure you’re cooking them at a high enough temperature!
Are there any dietary considerations for this recipe?
This Greek pita recipe is easily adaptable! To make it vegan, simply substitute warm milk with plant-based milk. For those with gluten sensitivities, using a gluten-free flour blend can create a similar fluffy texture. Just double-check the ingredients of your flour and any toppings to ensure they meet your dietary needs.
How should I reheat leftover Greek pitas?
To keep them soft and delicious, gently reheat your leftover pitas in the oven at 350°F for about 5 minutes until warm. Alternatively, you can place them on a skillet over medium-low heat for a few minutes. This way, you ensure they regain their fluffy goodness without drying out.
Fluffy Greek Pita Recipe: Easy Homemade Comfort Awaits
Ingredients
Equipment
Method
- In a large mixing bowl, combine the all-purpose flour, active dry yeast, and kosher salt. Stir until evenly mixed.
- Gradually incorporate warm milk and warm water into the dry mixture, mixing until a shaggy dough forms.
- Add olive oil, then knead the dough on a floured surface for about 5-7 minutes until smooth and elastic.
- Grease a clean bowl with olive oil, place the dough inside, cover, and let it rise in a warm place for about 1 hour.
- Punch down the risen dough, divide it into 8 equal pieces, and shape them into balls.
- Flatten each dough ball, then roll it out into circles about 7-8 inches wide and ¼ inch thick.
- Preheat a cast-iron skillet over high heat. Cook each pita for about 1 minute on each side until puffed and browned.
- Optional: Brush warm pitas with garlic-infused butter or sprinkle with fresh herbs before serving.
")