")
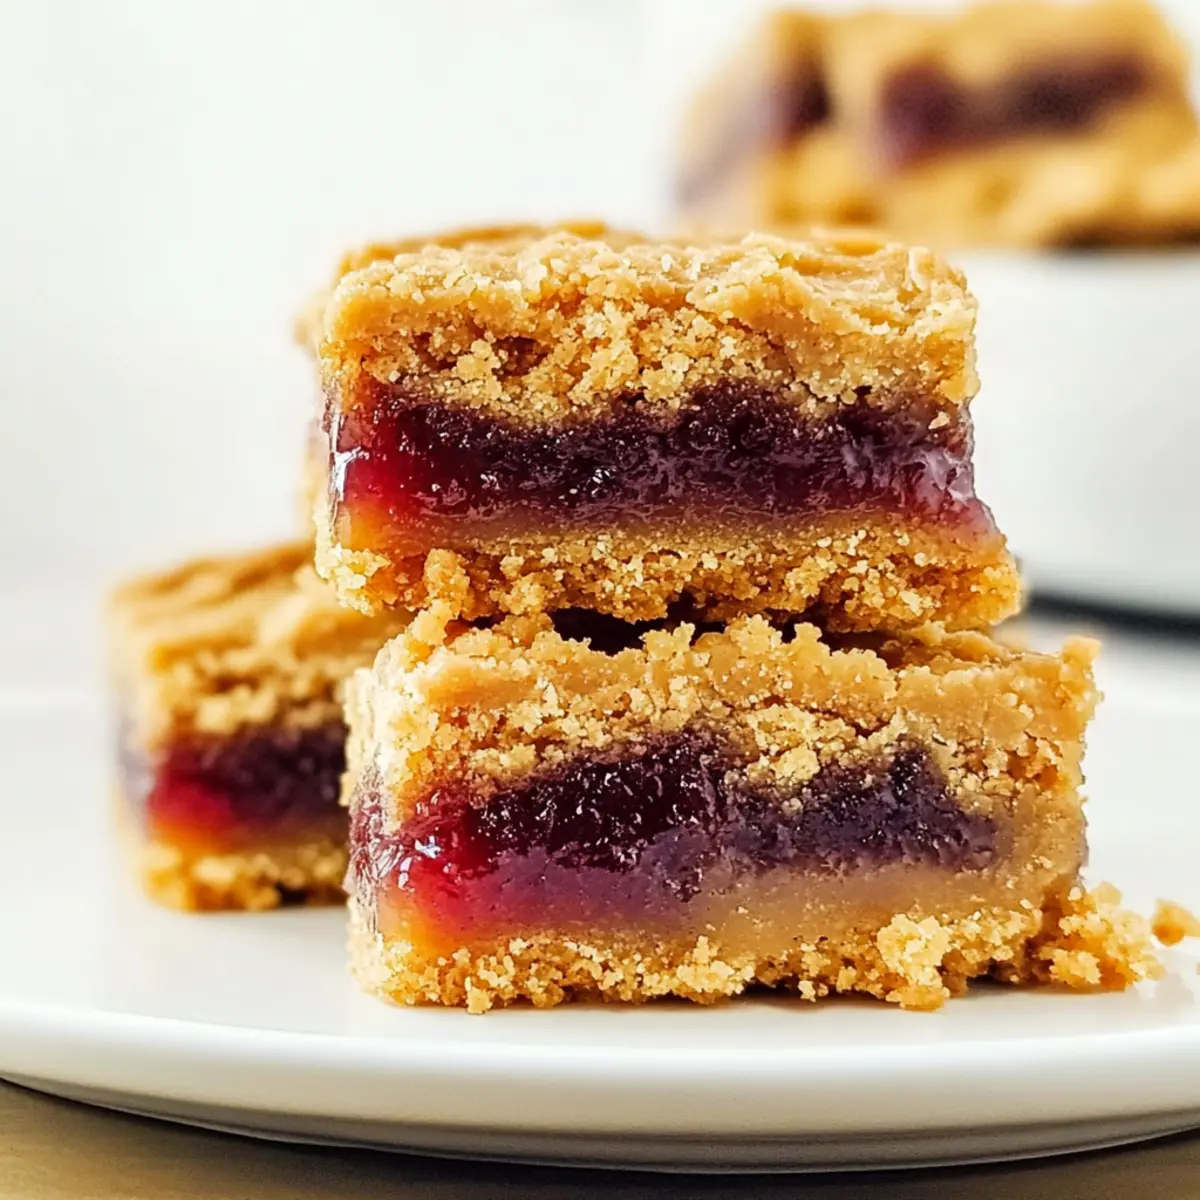
As I stood in my kitchen, the familiar scent of warm peanut butter wafted through the air, instantly whisking me back to my childhood lunches. These Peanut Butter and Jelly Dessert Bars combine the nostalgia of a classic American favorite with the simplicity of home baking. They are not just a quick-to-make treat; their soft, crumbly texture makes them an ideal pick-me-up after a long day or a perfect surprise for gatherings. Plus, these versatile bars can easily accommodate your favorite jellies or jams, turning each batch into a deliciously unique variation. Ready to indulge in a dessert that’s as comforting as it is delightful?
Why Are These Dessert Bars Irresistible?
Nostalgic Flavor: The combination of peanut butter and jelly brings back fond childhood memories, creating a delightful baking experience.
Versatile and Fun: Swap out the jelly for your favorite flavor or even try adding chocolate chips for a twist!
Simple to Make: With just a few pantry staples, you can whip these up in no time—perfect for busy days when cravings strike.
Crowd-Pleasing Treat: Whether for a picnic or a bake sale, these bars are sure to impress and satisfy everyone!
Time-Saving Delight: They bake quickly, allowing you to enjoy homemade goodness without the fuss. If you love easy-to-make classic desserts, check out my recipe for Peanut Butter Crackers for another deliciously simple snack!
Peanut Butter and Jelly Bar Ingredients
Get ready to create a delightful batch of Peanut Butter and Jelly Bars with these pantry-friendly essentials!
For the Batter
• Unsalted Butter – Provides moisture and richness; for a vegan version, try margarine or coconut oil.
• Brown Sugar – Adds depth of flavor and moisture to the bars.
• Granulated Sugar – Sweetens and balances the flavors for a delicious treat.
• Vanilla Extract – Enhances overall flavor; use almond extract for a different twist.
• Eggs (2 whole + 1 yolk) – Binds ingredients and contributes to the lovely texture.
• Self-Rising Flour – Gives structure and helps the bars rise; substitute with all-purpose flour + 1 tsp baking powder + 1/2 tsp salt.
• Creamy Peanut Butter (no sugar added) – The star flavor component, giving creaminess; almond butter works well for a nut-free version.
For the Jelly Layer
• Grape Jelly – Adds sweetness and a fruity layer; substitute with your favorite jam like strawberry or blueberry for varied flavor.
Step‑by‑Step Instructions for Peanut Butter and Jelly Bars
Step 1: Preheat and Prepare
Begin by preheating your oven to 350°F (175°C) and greasing a 9×13-inch baking dish with some butter or cooking spray to prevent sticking. This important step ensures an evenly baked base for your Peanut Butter and Jelly Bars, so pay attention to this initial prep as you get ready to mix the batter!
Step 2: Mix the Butters and Sugars
In a large mixing bowl, cream together the unsalted butter, brown sugar, and granulated sugar using a hand mixer or stand mixer on medium speed until the mixture is light and fluffy, about 1-2 minutes. This creates a rich base for your dessert bars, enhancing their flavor and texture. Make sure all ingredients are well combined for the best results.
Step 3: Incorporate Eggs and Vanilla
Next, add in the eggs and vanilla extract to the creamy mixture and beat until well combined. This should take about 1 minute, and you want the mixture to be smooth and uniform, without any lumps. The eggs serve as a binding agent, making your Peanut Butter and Jelly Bars soft and chewy when baked.
Step 4: Add the Flour
Gradually mix in the self-rising flour at a low speed until just combined, being careful not to overmix. This is crucial as overmixing can lead to denser bars. You should see a thick dough forming—don’t worry if it looks a bit crumbly at this point, it’s supposed to be that way for a soft texture.
Step 5: Spread the Batter
Take about ⅔ of the batter and evenly spread it into the prepared baking dish using a spatula. Aim for a smooth, even layer that covers the entire bottom. This base layer will provide a toasted, nutty foundation for the delightful PB&J flavor that’s coming next.
Step 6: Layer with Jelly
In a separate bowl, whisk the grape jelly until it becomes smooth for easier spreading. Carefully dollop the jelly over the batter and spread it gently to create an even layer, leaving a bit of the cake base exposed around the edges. This tasty layer will add that sweet fruitiness that perfectly complements the peanut butter.
Step 7: Add Remaining Batter
Using spoonfuls of the remaining batter, drop it over the jelly layer. Aim to leave some jelly visible for a visually appealing finish; this creates those signature swirls that make these Peanut Butter and Jelly Bars irresistible. Don’t worry if it’s not perfect; a rustic look is part of the charm!
Step 8: Bake to Perfection
Place your baking dish in the preheated oven and bake for about 40 minutes. Keep an eye on the edges—they should turn golden brown, while the center should be set. To test for doneness, insert a toothpick in the center; if it comes out clean or with a few moist crumbs, you’re ready to go!
Step 9: Cool and Slice
Once baked, remove the dish from the oven and allow the Peanut Butter and Jelly Bars to cool completely in the pan on a wire rack. This cooling time ensures clean cuts when you slice the bars; patience is key here. Once cooled, cut them into squares and prepare to indulge in a delightful treat!
Expert Tips for Peanut Butter and Jelly Bars
-
Avoid Overmixing: Mix the batter just until combined to keep the dessert bars soft and crumbly; overmixing can lead to a dense texture.
-
Jelly Layer Balance: Spread the jelly evenly for consistent sweetness; too much jelly can make the bars soggy or hard to cut.
-
Watch Baking Time: Keep an eye on the bars as they bake; over-baking can cause them to become dry and lose their delightful texture.
-
Cooling is Crucial: Allow the bars to cool completely before slicing; cutting too soon can result in messy, uneven pieces that fall apart.
-
Experiment with Flavors: Don’t hesitate to swap the jelly or peanut butter for your favorites—this versatility makes these Peanut Butter and Jelly Bars a delightful treat every time!
Make Ahead Options
These Peanut Butter and Jelly Dessert Bars are perfect for busy home cooks who want to save time! You can prepare the batter and layer the jelly up to 24 hours in advance. Simply spread the batter into your greased baking dish, add the jelly layer, and cover tightly with plastic wrap before refrigerating. This keeps everything fresh and makes assembly a breeze. When you’re ready to bake, just drop spoonfuls of the remaining batter over the jelly, pop it into the oven, and enjoy these nostalgic bars just as delicious as if they were made fresh! Enjoy the ease of ready-to-bake treats that fit seamlessly into your schedule!
What to Serve with Peanut Butter and Jelly Dessert Bars?
These delightful bars are perfect for creating a memorable meal that tantalizes your taste buds and brings joy to your gathering.
- Vanilla Ice Cream: A scoop of creamy vanilla ice cream enhances the nostalgia, adding a rich contrast to the sweet bars.
- Fresh Seasonal Fruit: Slices of strawberries or bananas provide freshness and balance, brightening the dessert experience.
- Chocolate Drizzle: Drizzling warm chocolate over the bars adds a luxurious twist, turning them into an extraordinary indulgence.
- Caramel Sauce: A splash of caramel sauce will elevate the sweetness and add a luscious texture, inviting everyone for seconds.
- Coffee or Tea: Pair with a hot cup of coffee or tea, as the warmth of the beverage beautifully complements the sweet and nutty flavors.
- Nutty Granola: Serve alongside a small bowl of nutty granola for an added crunch that contrasts perfectly with the soft bars.
- Milk: A tall glass of cold milk is the classic choice, balancing the richness and bringing out the flavors for a comforting treat.
Creating a meal around these Peanut Butter and Jelly Dessert Bars is not only delicious but also a charming way to share joy with loved ones!
Peanut Butter and Jelly Bars Variations
Feel free to explore endless possibilities for customizing your Peanut Butter and Jelly Bars, allowing your taste buds to dance in delight!
-
Nut-Swap: Replace peanut butter with almond or cashew butter for a unique nutty flavor. The change can add a different layer of richness that’s equally comforting.
-
Jelly Twist: Swap grape jelly for strawberry, raspberry, or even mango jam for a fruity surprise. Each variation opens up a new dimension of flavor, ensuring there’s a fruity twist in every bite!
-
Chocolate Delight: Add chocolate chips to the batter for a rich, sweet surprise. The combination of peanut butter and chocolate is pure indulgence and adds a depth that resonates with chocolate lovers.
-
Crunch Factor: Toss in some chopped nuts like walnuts or pecans for added texture and a delightful crunch. The contrasting textures make each bite an adventure, bringing an extra layer of satisfaction to the bars.
-
Spiced Up: Add a teaspoon of cinnamon or a hint of nutmeg to the batter for a warm, aromatic flavor that complements the peanut butter beautifully. The spices can turn these familiar bars into a cozy, autumn-inspired dessert.
-
Healthier Option: Use natural sweeteners like honey or maple syrup in place of granulated sugar. This substitution amplifies the health benefits while giving a unique flavor twist that your family will appreciate.
-
Gluten-Free: Substitute self-rising flour with a gluten-free baking blend for a celiac-friendly option. These bars can easily cater to diverse dietary needs without sacrificing deliciousness.
-
Peanut-Free: For a peanut-free version, use sun butter or tahini in place of peanut butter, providing a nut-free alternative that’s just as tasty. It’s a comforting option for those with nut allergies while keeping the nostalgic flavors intact.
With every variation, your Peanut Butter and Jelly Bars can become a surprise each time you bake them. For another nostalgic treat, check out my Velveeta Mac and Cheese recipe that captures the essence of home-cooked goodness!
How to Store and Freeze Peanut Butter and Jelly Bars
Room Temperature: Keep the bars in an airtight container at room temperature for up to 3 days to maintain their soft and crumbly texture.
Fridge: If you prefer a chilled treat, store the bars in the fridge for up to a week. Just make sure they are covered to prevent them from drying out.
Freezer: For longer storage, wrap the bars individually in plastic wrap and place them in a freezer-safe container. They can be frozen for up to 1 month.
Reheating: To enjoy them warm, simply microwave a bar for 10-15 seconds. This helps to revive the creamy peanut butter flavor and soft texture of the Peanut Butter and Jelly Bars!
Peanut Butter and Jelly Dessert Bars Recipe FAQs
What is the best way to select ripe ingredients for this recipe?
Absolutely! For the best results, choose creamy peanut butter without added sugars to ensure a rich flavor. When looking for jelly, opt for those with natural fruit ingredients and minimal preservatives. Fresh, high-quality brands will elevate your dessert bars. If you prefer to use fresh fruit, opt for fruits that are ripe but firm, like strawberries or blueberries, to create a chunky jam.
How should I store the Peanut Butter and Jelly Bars?
You can store them in an airtight container at room temperature for up to 3 days. If you prefer a chilled treat, pop them in the refrigerator, where they will stay fresh for about a week. Just remember, keeping them covered is key to preventing them from drying out.
Can I freeze Peanut Butter and Jelly Bars, and if so, how?
Yes, of course! To freeze your beautifully baked bars, wrap each piece individually in plastic wrap, making sure they’re tightly secured to prevent freezer burn. Then, place them in a freezer-safe container or a sealed freezer bag. They can be frozen for up to 1 month. When you’re ready to enjoy one, simply microwave it for 10-15 seconds for a warm treat that tastes just baked!
What should I do if my bars are too dry?
If you find your Peanut Butter and Jelly Bars turning out dry, it might be due to over-baking. Always check them a few minutes before the recommended baking time! If they do come out dry, you can serve them warm with a scoop of ice cream or a drizzle of peanut butter to add moisture back into the treat.
Are there any dietary considerations for this recipe?
Definitely! For nut allergies, you can substitute the peanut butter with sunflower seed butter, which provides a similar texture without the allergens. If someone is dairy-free, vegan margarine can replace the unsalted butter, and using a plant-based egg substitute is perfect for an egg-free version. Always check the jars of jelly for any allergens to accommodate dietary needs!
Can I use a different type of flour if I don’t have self-rising flour?
Absolutely! If you only have all-purpose flour, you can make your own self-rising flour by combining 1 cup of all-purpose flour with 1 teaspoon of baking powder and ½ teaspoon of salt. Mix them together well before adding to your cake batter to achieve the right rise in your Peanut Butter and Jelly Bars!
Peanut Butter and Jelly Bars – A Nostalgic Homemade Delight
Ingredients
Equipment
Method
- Preheat your oven to 350°F (175°C) and grease a 9x13-inch baking dish.
- Cream together the unsalted butter, brown sugar, and granulated sugar until light and fluffy, about 1-2 minutes.
- Add in the eggs and vanilla extract, and beat until well combined, about 1 minute.
- Gradually mix in the self-rising flour at a low speed until just combined.
- Spread about ⅔ of the batter evenly into the prepared baking dish.
- Whisk the grape jelly until smooth, then spread it over the batter.
- Drop spoonfuls of the remaining batter over the jelly layer.
- Bake in the preheated oven for about 40 minutes until golden brown.
- Cool completely in the pan before slicing into squares.
")