")
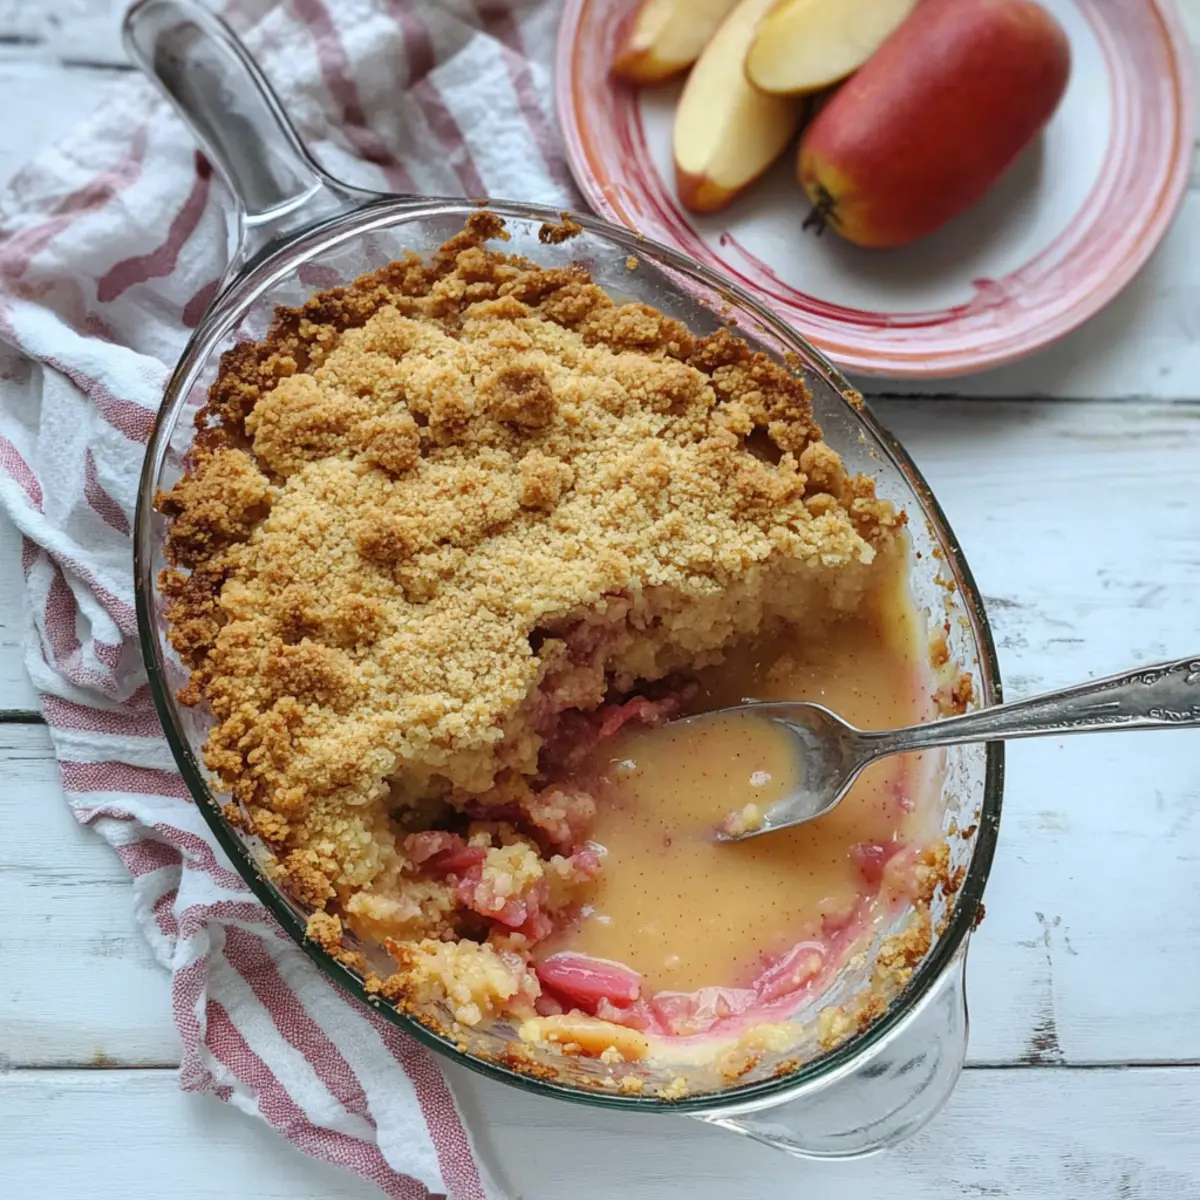
As the sun begins to warm the earth and seasonal fruits start to ripen, I find myself craving a slice of nostalgia that brings comfort and cheer. This Gluten-Free Rhubarb and Pear Crumble combines the tangy embrace of fresh rhubarb with the sweet softness of ripe pears, creating an easy dessert that’s sure to impress both family and friends. Not only is this crumble a delightful way to showcase seasonal flavors, but it’s also a fantastic gluten-free option that doesn’t skimp on taste or texture. Whether you’re looking for a quick treat to satisfy your sweet tooth or craving some cozy comfort food, this recipe is a winner! Curious about how to whip up this scrumptious dessert that takes minimal effort? Let’s dive in!
Why is Rhubarb and Pear Crumble a Must-Try?
Boldly delicious: The combination of tart rhubarb and sweet pears creates a mouthwatering flavor explosion that’s perfect for any occasion.
Easy to make: With simple ingredients and straightforward steps, you can whip up this dessert in no time!
Gluten-free goodness: This recipe caters to gluten-sensitive friends without compromising on taste or texture—everyone will adore it!
Versatile options: Feel free to adapt the fruit mix with apples or plums, or try unique sweeteners like maple syrup for a twist.
Crowd pleaser: Serve warm with custard or ice cream, and watch it disappear rapidly at your next gathering!
For more delightful takes on fruit desserts, check out my delicious Mocha Cookie Crumble or the comforting Velveeta Mac and Cheese.
Rhubarb and Pear Crumble Ingredients
• Here’s what you’ll need to create this delightful gluten-free treat!
For the Fruit Filling
- Rhubarb – Provides a tart flavor and juicy texture; fresh or frozen works beautifully.
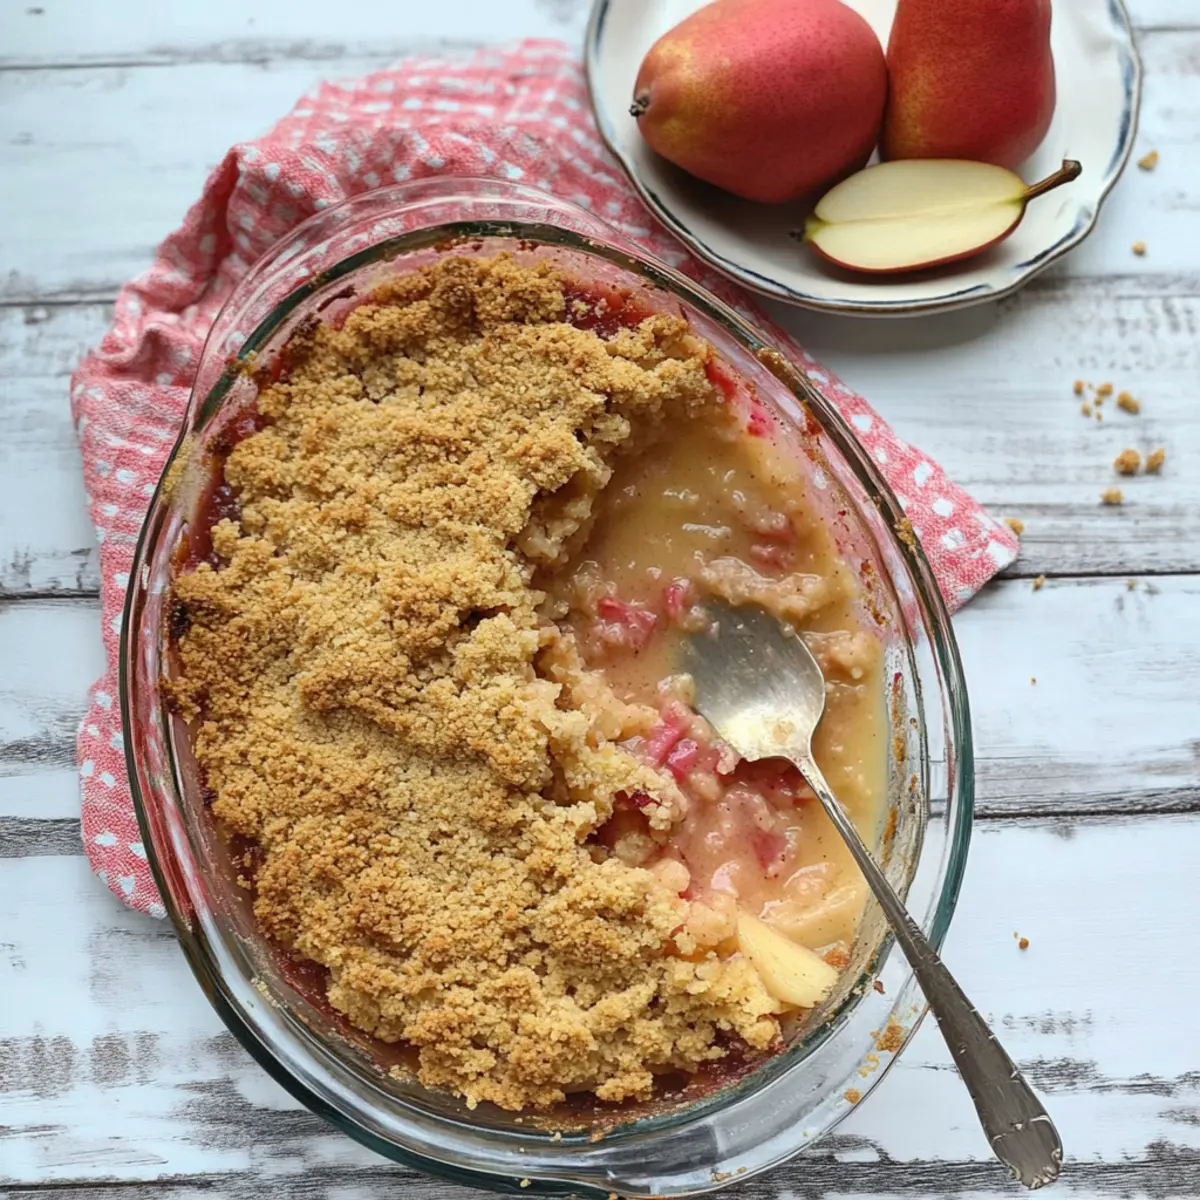
- Conference Pear – Offers natural sweetness and a soft texture; ensure the pears are ripe but firm.
- Light Brown Sugar – Adds sweetness and a caramel-like richness to balance the tartness of the fruit.
- Unsalted Butter (20g) – Enhances the richness of the filling; substitute with vegan butter for a dairy-free option.
- Cornflour – Acts as a thickening agent, giving the filling a lovely consistency.
For the Crumble Topping
- Gluten-Free Self-Raising Flour (200g) – Forms the base and structure of the topping without gluten; or use gluten-free plain flour with 2 tsp baking powder as a substitute.
- Cold Unsalted Butter (100g) – Essential for achieving the crumbly texture; ensure it’s cold to get the perfect mix.
- Light Brown Sugar (100g) – Sweetens the crumble, complementing the flavors of the fruit.
Enjoy crafting this warm, comforting Rhubarb and Pear Crumble that’s destined to be your new favorite dessert!
Step‑by‑Step Instructions for Gluten-Free Rhubarb and Pear Crumble
Step 1: Preheat the Oven
Start by preheating your oven to 180°C (Fan 160°C or Gas Mark 5). This ensures your oven is ready to transform your delightful Gluten-Free Rhubarb and Pear Crumble into a golden, bubbling treat. While the oven warms up, gather your ingredients and prepare to embrace the sweet aromas that will soon fill your kitchen.
Step 2: Prepare the Fruit
Chop the rhubarb into 1-inch chunks, and peel and core the Conference pears before cutting them into similar-sized pieces. In a saucepan, combine the rhubarb, pears, 20g of unsalted butter, 50g of light brown sugar, and a tablespoon of cornflour. Cook over medium heat for about 5 minutes, stirring occasionally until the fruit softens and releases its juices, with a nice, fragrant aroma.
Step 3: Make the Crumble Topping
In a mixing bowl, combine 200g of gluten-free self-raising flour and 100g of light brown sugar for the topping. Add 100g of cold unsalted butter, cut into cubes. Using your fingertips, rub the butter into the flour mixture until it resembles coarse breadcrumbs. This step is crucial for achieving the right crumble texture that will perfectly complement your Rhubarb and Pear mixture.
Step 4: Assemble the Crumble
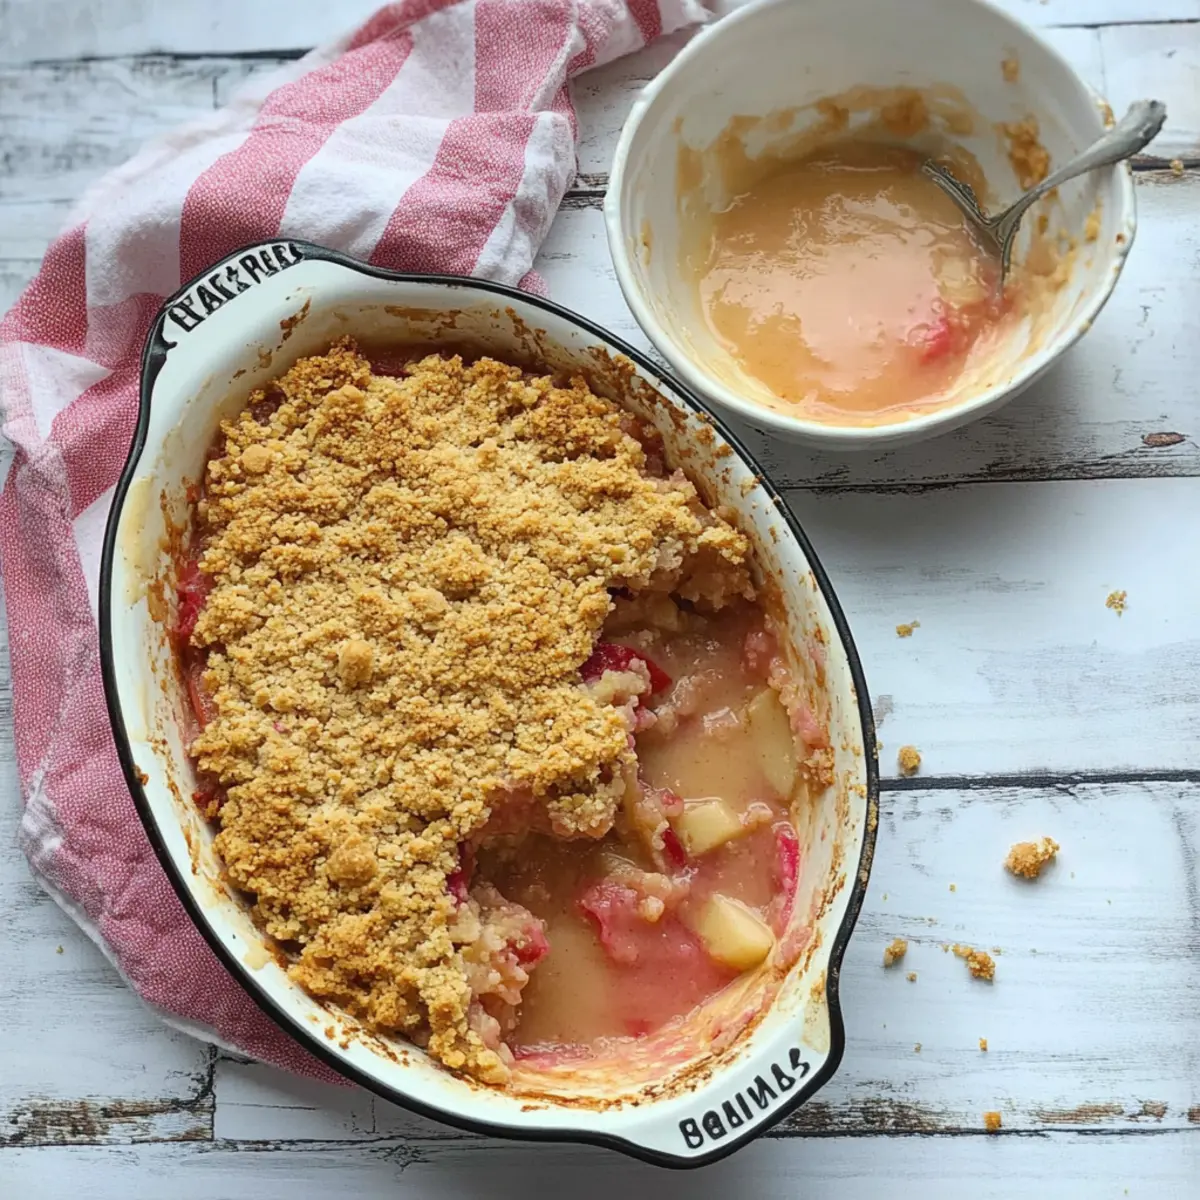
Once your fruit filling is ready, transfer the mixture into a crumble dish, spreading it evenly. Gently sprinkle the crumbly topping over the fruit, ensuring a nice coverage. This layer will create a delightful contrast when baked, allowing the juices to peek through and bubble.
Step 5: Bake to Perfection
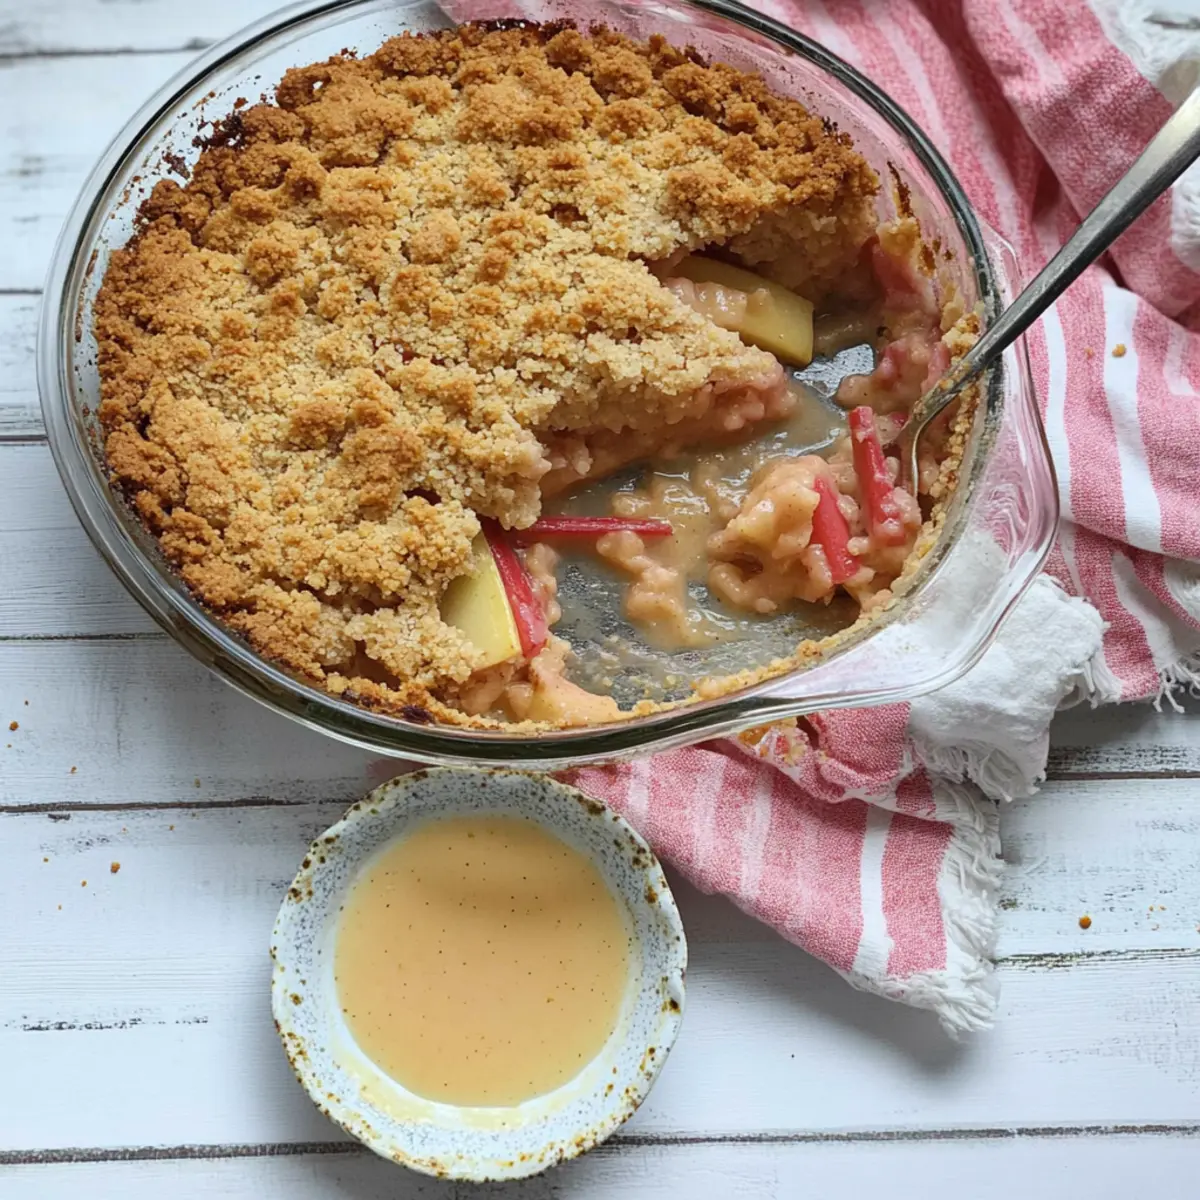
Place the assembled Gluten-Free Rhubarb and Pear Crumble in your preheated oven and bake for 35-40 minutes. Keep an eye on it, watching for the topping to turn a lovely golden brown and the filling to become bubbly. The delightful aroma will signal that your dessert is close to being ready.
Step 6: Serve and Savor
Once out of the oven, let your raspberry and pear crumble cool slightly before serving. Pair it warm with a generous scoop of custard, ice cream, or double cream for an extra indulgent treat. Enjoy this cozy dessert with family and friends, and bask in the delicious flavors of seasonal fruits.
What to Serve with Gluten-Free Rhubarb and Pear Crumble
Looking to create a delightful spread that perfectly complements your sweet creation?
-
Custard: A warm pour of smooth custard adds creamy richness, balancing the fruit’s tartness and enhancing the comforting vibes of the crumble.
-
Vanilla Ice Cream: The cold, creamy texture of vanilla ice cream juxtaposes beautifully against the warm crumble, creating a delectable contrast that melts in your mouth.
-
Whipped Cream: Light and fluffy whipped cream makes for a lovely, airy topping that adds a touch of elegance and sweetness, enhancing every bite.
-
Fresh Berries: A side of mixed fresh berries brings a burst of flavor and color, rounding out the dish with a fresh, fruity touch that harmonizes with the rhubarb.
-
Mint Tea: A calming cup of mint tea acts as a refreshing palate cleanser, contrasting the crumble’s sweetness and leaving a lovely aftertaste.
-
Sparkling Lemonade: The zesty and fizzy notes of sparkling lemonade elevate the dessert experience, providing a lively contrast to the warm, hearty crumble.
-
Almond Biscotti: A crunchy almond biscotti adds a delightful texture that pairs wonderfully when dipped into the warm crumble or enjoyed as a sweet snack alongside it.
-
Dark Chocolate: For a touch of indulgence, serve dark chocolate on the side; its rich flavors will enhance the crumble’s sweetness and bring a gourmet twist to dessert.
Rhubarb and Pear Crumble Variations
Feel free to get creative with this crumble recipe and make it your own masterpiece!
-
Fruit Swap: Use apples or plums instead of rhubarb and pears for different flavor profiles. Each fruit brings its unique sweetness and acidity, making every crumble a new experience!
-
Sweetener Change: Try substituting light brown sugar with maple syrup or coconut sugar for a richer flavor. This small swap can lend a delightful nuance to the entire dessert.
-
Nutty Twist: Incorporate chopped nuts like walnuts or almonds into the crumble topping for added crunch and richness. It creates a beautiful textural contrast that elevates your dessert!
-
Spiced Up: Add cinnamon or nutmeg to the crumble mixture for warm, spicy undertones that complement the fruit beautifully. Just a teaspoon can transform your crumble into a cozy autumn delight.
-
Dairy-Free Dream: Replace the cold unsalted butter with coconut oil or vegan butter for a completely dairy-free dessert that’s just as comforting and tasty. You won’t miss the butter one bit!
-
Extra Crunch: Fold in some oats or granola into the topping for a heartier, crunchier crumble. This will create a delightful variation, perfect for those who love texture in their desserts.
-
Fruity Enhancement: Mix in a handful of berries, such as blueberries or raspberries, with the rhubarb and pears for a pop of color and added sweetness. The berries meld beautifully with the other fruits!
-
Heat it Up: If you enjoy a bit of heat, add a pinch of cayenne pepper or sliced jalapeños into the filling. It’s an unexpected twist that can surprise and delight your taste buds!
As you experiment, I invite you to discover more delectable flavor combinations by exploring my Harvest Bowl Sweetgreen for seasonal inspiration or try mastering the smoky goodness of Smoked Chicken Breast. Enjoy creating your beloved crumble!
How to Store and Freeze Rhubarb and Pear Crumble
Fridge: Store leftover Rhubarb and Pear Crumble in an airtight container for up to 3 days. It’s best enjoyed warm, so consider reheating it in the oven before serving.
Freezer: For longer storage, freeze the crumble before baking for up to 3 months. When ready to enjoy, bake directly from the freezer, adding a few extra minutes to the baking time.
Covering: If baking in advance, cover the crumble with foil to prevent freezer burn, ensuring it stays delicious when thawed.
Reheating: To maintain its crispy topping, reheat in the oven rather than the microwave at 180°C (350°F) for about 15 minutes.
Make Ahead Options
These delightful Gluten-Free Rhubarb and Pear Crumble components are perfect for meal prep, allowing you to enjoy a homemade dessert without the time crunch! You can prepare the fruit filling up to 24 hours ahead; simply cook the rhubarb and pear mixture as directed, let it cool, and refrigerate it in an airtight container. The crumble topping can also be prepped and stored in the fridge for up to 3 days. When it’s time to serve, assemble the crumble by layering the fruit and topping, then bake as instructed. This method ensures that your crumble remains just as delicious and fresh, making your busy weeknights a little sweeter!
Expert Tips for Rhubarb and Pear Crumble
• Pre-Cook the Fruit: Softening the rhubarb and pears before baking ensures a well-flavored, tender filling that enhances the overall taste.
• Cold Butter is Key: Use cold unsalted butter for the crumble topping to achieve that perfectly crumbly texture; it’s essential for success in this gluten-free recipe.
• Adjust Cooking Times: If you double the recipe or change the baking dish size, adjust the baking time to prevent overbaking or underbaking your delicious Rhubarb and Pear Crumble.
• Choosing the Right Pears: Always use firm, ripe Conference pears for the best texture and sweetness; avoid overly soft varieties which can turn mushy.
• Store Wisely: Leftovers can be stored in the fridge for up to 3 days or frozen for later enjoyment—just reheat in the oven for the best results.
Rhubarb and Pear Crumble Recipe FAQs
How do I choose ripe rhubarb and pears?
Absolutely! When selecting rhubarb, look for firm, crisp stalks that are bright in color. Avoid any that are limp or have dark spots all over. For pears, they should be ripe but still firm; a good test is pressing gently near the stem—if it gives just slightly, it’s perfect for this crumble!
How should I store leftover crumble?
Very! Store your Rhubarb and Pear Crumble in an airtight container in the fridge for up to 3 days. It’s best enjoyed warm, so simply reheat it in the oven to keep the topping nice and crispy.
Can I freeze the rhubarb and pear crumble?
Yes, you can! For freezing, I recommend freezing the crumble before baking for up to 3 months. Wrap it tightly in plastic wrap and then seal it in a freezer bag. When you’re ready to bake, take it out and bake directly from frozen, adding about 10-15 minutes to the baking time.
What should I do if the crumble topping is too dry?
No worries! If your crumble topping seems too dry and crumbly, you can try adding a tablespoon of cold water or melted butter to the mixture and rub it in gently. This will unite the ingredients without making it soggy, helping it hold together better.
Are there any allergen considerations for this recipe?
Definitely! This Rhubarb and Pear Crumble is naturally gluten-free, but always ensure any pre-purchased ingredients, like flour or butter substitutes, have no cross-contamination warnings. For dairy allergies, substitute the butter with a solid vegan margarine, and you’re good to go!
Delicious Rhubarb and Pear Crumble – Your New Favorite Dessert
Ingredients
Equipment
Method
- Preheat your oven to 180°C (Fan 160°C or Gas Mark 5).
- Chop the rhubarb into 1-inch chunks, and peel and core the Conference pears before cutting them into similar-sized pieces. In a saucepan, combine the rhubarb, pears, 20g of unsalted butter, 50g of light brown sugar, and a tablespoon of cornflour. Cook over medium heat for about 5 minutes, stirring occasionally until the fruit softens and releases its juices.
- In a mixing bowl, combine 200g of gluten-free self-raising flour and 100g of light brown sugar for the topping. Add 100g of cold unsalted butter, cut into cubes. Rub the butter into the flour mixture until it resembles coarse breadcrumbs.
- Transfer the fruit filling into a crumble dish, spreading it evenly. Sprinkle the crumble topping over the fruit.
- Bake for 35-40 minutes, watching for the topping to turn golden brown and the filling to bubble.
- Let cool slightly before serving warm with custard, ice cream, or double cream.
")