")
As I strolled through the bustling summer fair, the sweet scent of toasted marshmallows wafted through the air, instantly transporting me back to childhood campouts. That nostalgia inspired me to craft the easiest, most delightful no-bake treat: S’mores Icebox Cake. This dessert captures the essence of summer in every creamy, chocolatey bite with layers of fluffy marshmallow and crunchy graham crackers. The beauty of this recipe lies in its simplicity—just six ingredients and a mere 20 minutes of prep time, making it a fantastic make-ahead option for gatherings and a guaranteed crowd-pleaser. Whether you’re hosting a backyard BBQ or seeking a cool indulgence on a hot day, this cake is sure to satisfy any sweet tooth. Are you ready to dive into a slice of summer bliss?
Why is S’mores Icebox Cake a Must-Try?
Ease of Preparation: With only six ingredients and 20 minutes of prep, anyone can whip up this delightful dessert without a hitch.
No Baking Required: Perfect for hot summer days, you’ll love that this treat requires zero cooking!
Crowd-Pleasing Appeal: Whether for a potluck or a family gathering, the nostalgic flavors and textures will have everyone coming back for seconds.
Versatile Variations: Feel free to switch up the graham crackers or pudding flavors to keep things exciting, just like you would with an Enchanting Barbie Cake.
Creamy and Decadent: Experience layers of fluffy marshmallow, rich chocolate pudding, and crunchy graham crackers in every bite.
Chill this dreamy cake ahead of time, and you’ll always have a refreshing dessert ready to impress at any summer gathering!
S’mores Icebox Cake Ingredients
• Only six ingredients create this creamy masterpiece.
For the Cake Layers
- Graham Crackers – Use Honey Maid or gluten-free options for a delicious foundation.
- Instant Chocolate Pudding Mix – Choose the full-fat version for the best creamy texture.
- Cold Whole Milk – This hydrates the pudding mix; other milks may not set properly.
For the Cream Filling
- Marshmallow Fluff/Creme – Adds sweetness; using more Cool Whip yields a smoother cake.
- Cool Whip – Lightens up the filling; defrost at room temperature for optimal mixing.
- Mini Marshmallows – These offer delightful texture; substitute with larger marshmallows if needed.
Optional Toppings
- Hershey’s Chocolate Bar – Adds a rich chocolatey finish; dark chocolate is a great alternative.
- Chocolate Sauce – Drizzle for an elegant touch and extra flavor to this S’mores Icebox Cake.
Step‑by‑Step Instructions for S’mores Icebox Cake
Step 1: Prepare the Pudding
In a large mixing bowl, combine the instant chocolate pudding mix with cold whole milk using an electric mixer. Beat the mixture on medium speed for about 2 minutes until it thickens to a creamy consistency. Once done, cover the bowl with plastic wrap and refrigerate for at least 10 minutes to let it set properly.
Step 2: Make the Marshmallow Layer
While the pudding sets, grab a medium bowl and mix together the Cool Whip and marshmallow fluff until smooth. Carefully fold in half of the mini marshmallows to add delightful texture. Ensure the mixture is well combined—this will create the fluffy layer for your S’mores Icebox Cake.
Step 3: Layer the Graham Crackers
Take a 9×13 baking dish and start by laying down an even layer of graham crackers, completely covering the bottom of the dish. Make sure to overlap the crackers slightly to form a solid foundation. This will be the first layer to absorb all the delicious flavors of the cake as it chills.
Step 4: Add the Layers
Using a spatula, take one-third of the marshmallow mixture and spread it evenly over the graham crackers. Next, spoon half of the chilled chocolate pudding over this layer, ensuring an even distribution. Continue layering by repeating the process with more graham crackers, followed by the marshmallow mixture, and then the remaining pudding.
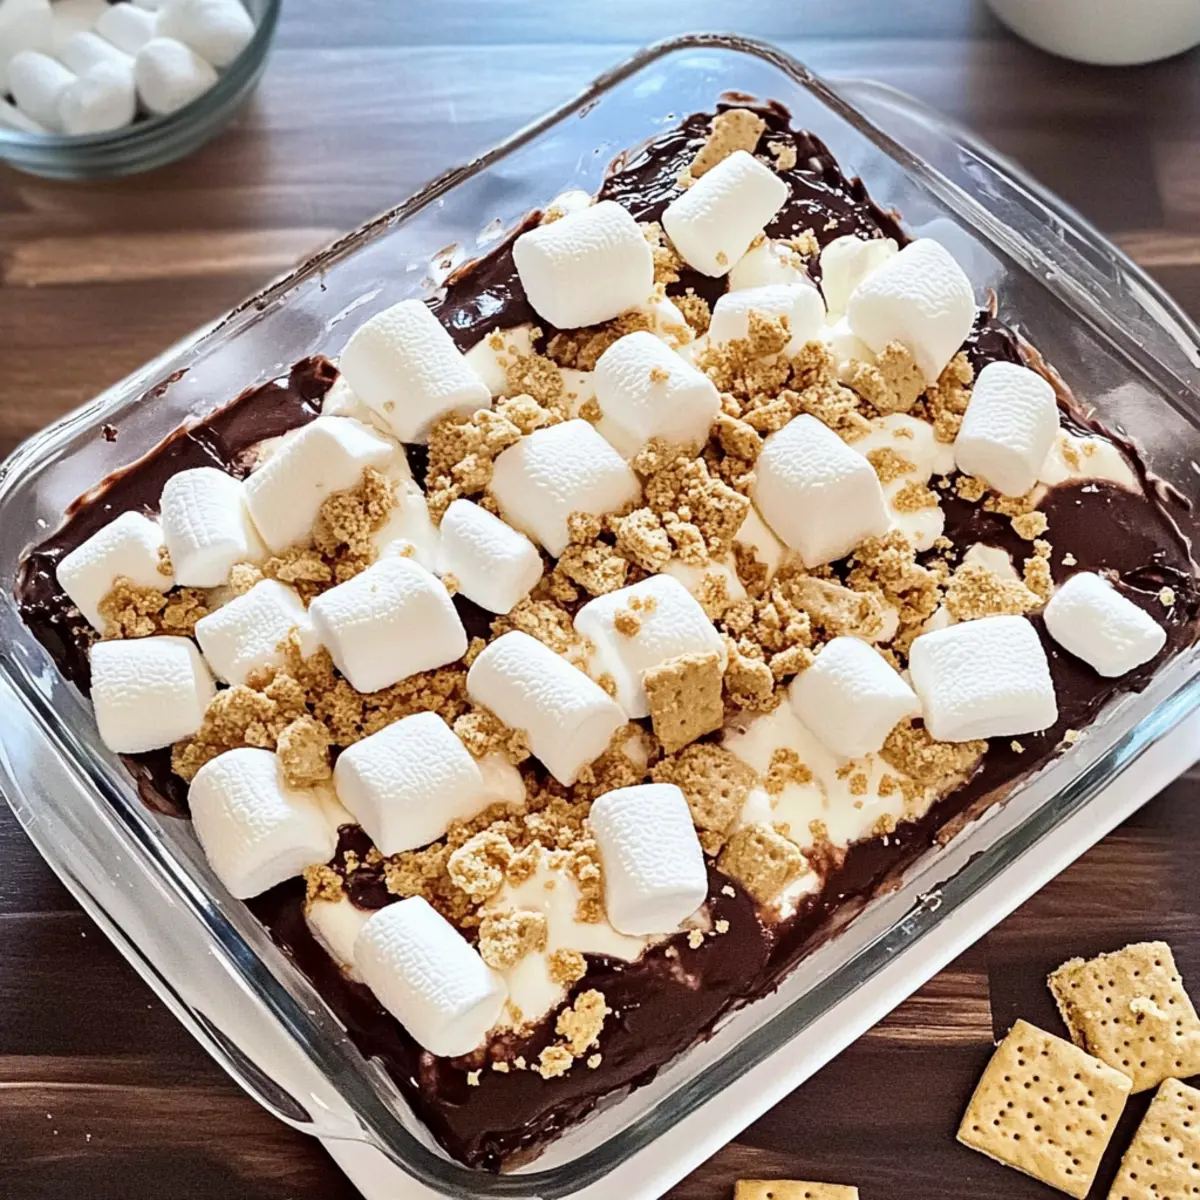
Step 5: Finish with Graham Crackers
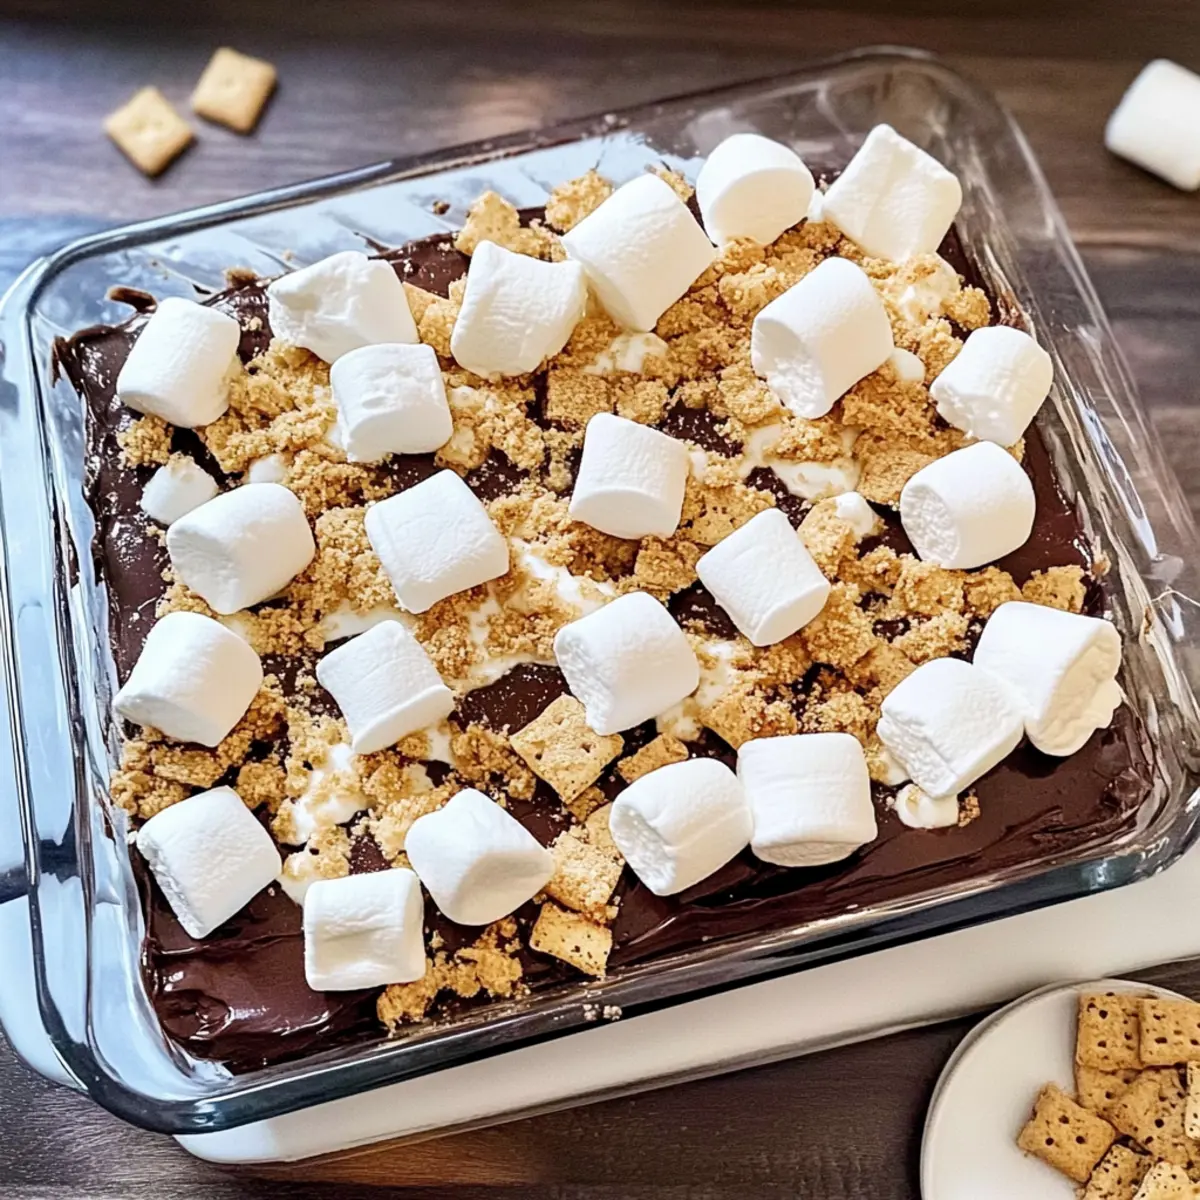
Top the cake with another layer of graham crackers, gently pressing them into the mixture to ensure they adhere. Then, spread the remaining marshmallow mixture across this final layer, creating a smooth and inviting top. This will be the visible layer once you serve your S’mores Icebox Cake.
Step 6: Chill Until Set
Cover the baking dish with plastic wrap and place it in the refrigerator. Allow the cake to chill for a minimum of 4 hours, preferably overnight. This chilling time will help the layers meld together perfectly, resulting in a deliciously creamy S’mores Icebox Cake that’s easy to cut into squares.
Step 7: Garnish Before Serving
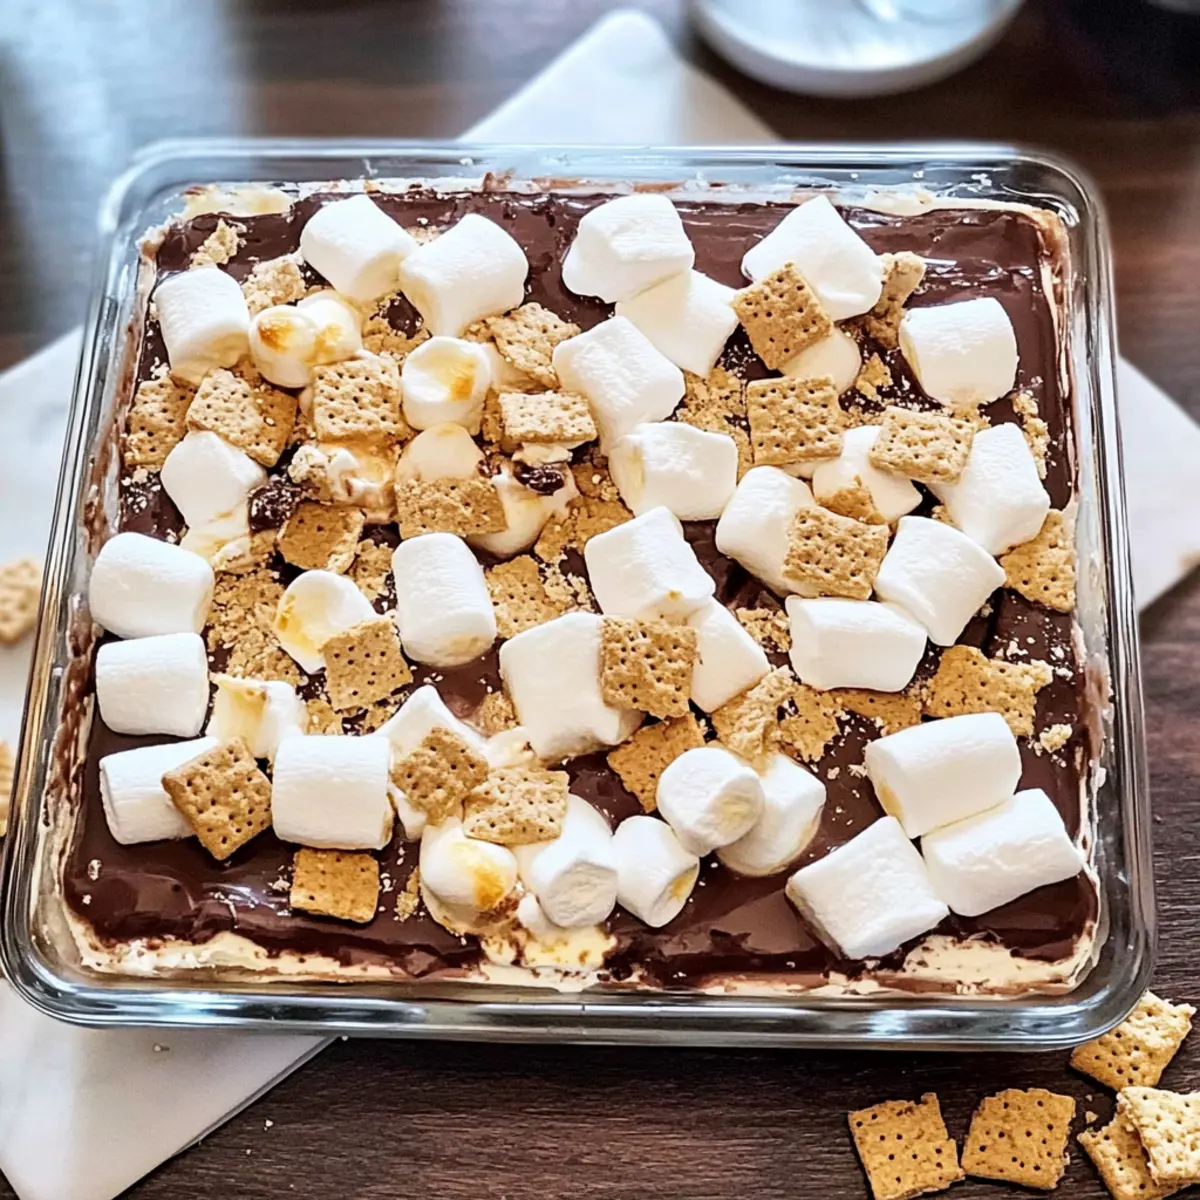
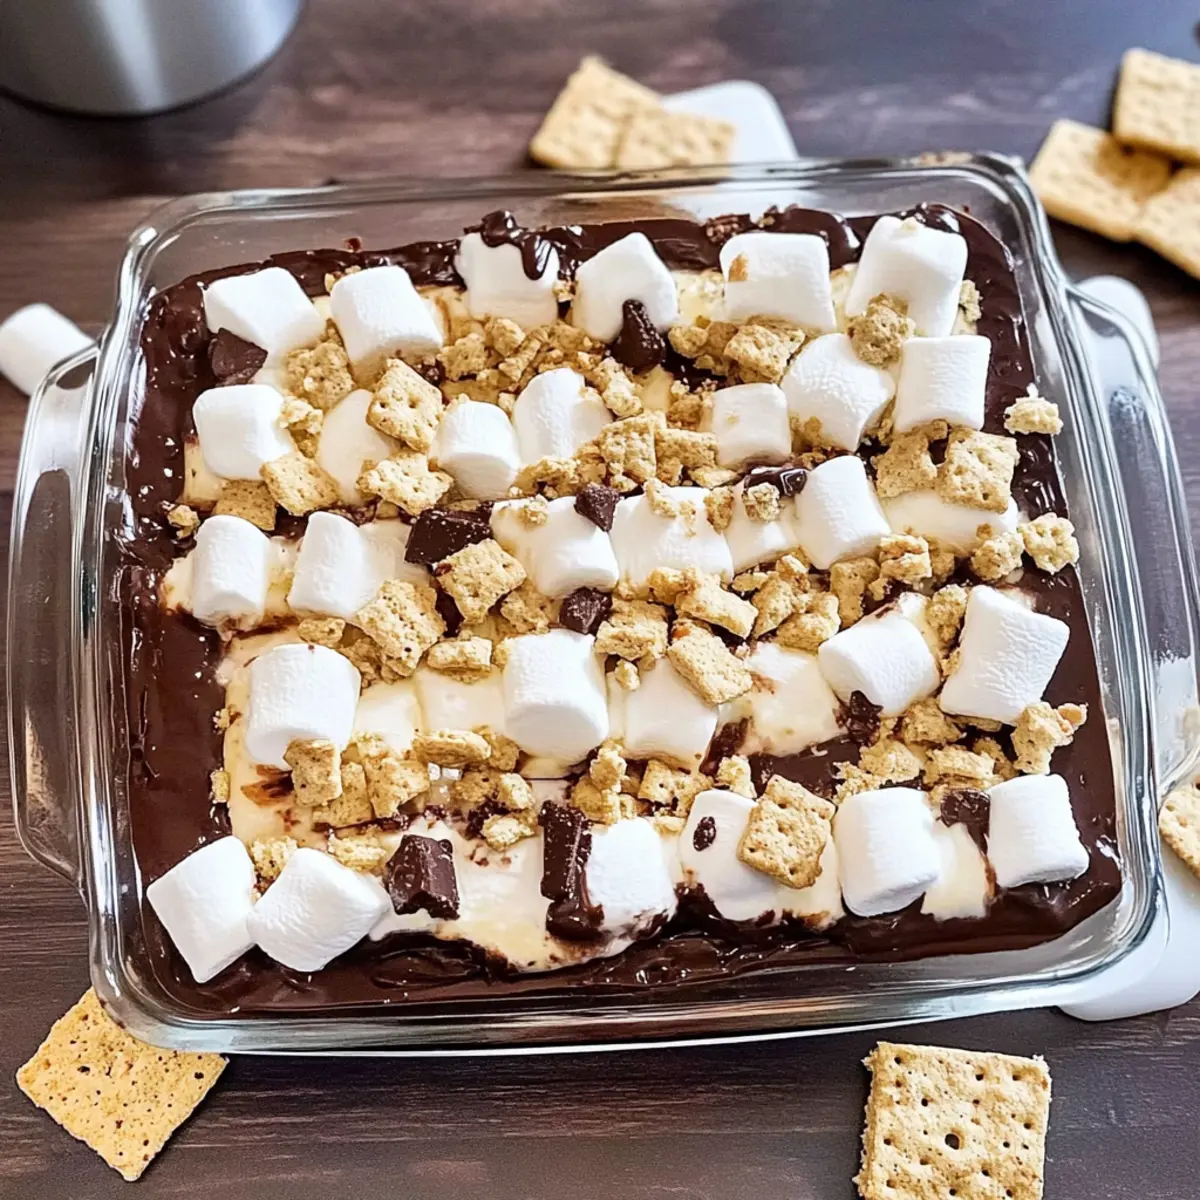
When you’re ready to serve, consider toasting mini marshmallows with a kitchen torch for a fun touch. Add pieces of Hershey’s chocolate bar on top and drizzle with chocolate sauce for extra visual appeal. Each serving will showcase the delicious layers of the S’mores Icebox Cake beautifully, tempting everyone to take a bite.
Expert Tips for S’mores Icebox Cake
-
Chilling is Key: Make sure to chill the cake for at least 4 hours, allowing the flavors to meld and the texture to set.
-
Smooth Surface Trick: For a flawless top layer, consider doubling the amount of Cool Whip and marshmallow fluff and omitting the mini marshmallows.
-
Watch the Milk: Use cold whole milk for activating the pudding mix; alternatives may not achieve the desired thickness for your S’mores Icebox Cake.
-
Storage Reminder: Keep the cake covered in the refrigerator for up to 5 days; do not freeze to prevent texture changes.
-
Layer with Care: When layering, spread each layer evenly for a balanced taste and harmonious presentation.
Make Ahead Options
This S’mores Icebox Cake is a fantastic treat to prepare ahead of time, saving you precious moments on busy days! You can assemble the entire cake up to 24 hours in advance; just be sure to refrigerate it tightly covered to maintain its freshness and prevent sogginess. The graham crackers will absorb the flavors beautifully, resulting in a deliciously cohesive dessert. When you’re ready to serve, simply garnish with toasted mini marshmallows, Hershey’s chocolate pieces, and a drizzle of chocolate sauce for that perfect finishing touch. This way, you can impress your family or guests with an effortlessly chic dessert that tastes just as delightful as if made that day!
What to Serve with S’mores Icebox Cake
Creating a delightful meal that complements your sweet indulgence can elevate any gathering.
- Fresh Berry Salad: A bright mix of berries adds a refreshing contrast to the richness of the cake. The tartness enhances the sweetness beautifully.
- Chocolate Mint Mojito: This fizzy cocktail brings a cool, herbal note to your meal, perfectly balancing the cake’s creamy chocolate layers. It’s a crowd favorite!
- Grilled Pineapple Skewers: Sweet, caramelized pineapple provides a juicy burst that pairs wonderfully with the S’mores Icebox Cake, adding a tropical twist that feels like summer.
- Classic Vanilla Ice Cream: A scoop of creamy vanilla creates a luscious texture combo. The coolness melts into the cake, creating a delightful dessert experience.
- Whipped Cream Topping: Elevate each slice by serving with a dollop of freshly whipped cream, enhancing the fluffy layers and adding a touch of elegance.
- Chocolate Drizzle Coffee: Pair your cake with a velvety coffee topped with chocolate drizzle for a deliciously warm contrast to your chilled dessert.
- Coconut Macaroons: These chewy, sweet bites are fantastic for sharing and offer a coconut twist that harmonizes well with the S’mores theme.
- Crispy Fried Plantains: Their natural sweetness and crispy texture provide a savory contrast that can balance the dessert without overpowering it.
Each of these pairings will create a memorable feast, ensuring your S’mores Icebox Cake takes center stage!
Storage Tips for S’mores Icebox Cake
Fridge: Keep the S’mores Icebox Cake covered in the refrigerator for up to 5 days for the best taste and texture.
Freezer: It’s not recommended to freeze this cake, as the creamy layers may not hold their texture post-thaw.
Serving: When serving, cut the cake into squares straight from the fridge for easy handling and delightful presentation.
Reheating: No need to reheat! Enjoy this cake chilled to experience its refreshing and nostalgic flavors.
S’mores Icebox Cake Variations & Substitutions
Feel free to get creative with your S’mores Icebox Cake to suit your taste buds and dietary needs!
- Gluten-Free: Substitute regular graham crackers with gluten-free versions, ensuring everyone can enjoy this delightful treat.
- Flavor Twist: Experiment with different flavors of instant pudding, like vanilla or butterscotch, to find a new favorite combination.
- Nutty Surprise: Add in chopped nuts, such as pecans or almonds, for a satisfying crunch that complements the creamy layers.
- Chocolate Lovers: Switch out Hershey’s chocolate bar for dark or milk chocolate varieties for a richer flavor experience.
- S’mores Inspired: Layer in toasted coconut for a tropical twist! It adds a wonderful flavor dimension that works beautifully.
- Fruity Addition: Incorporate fresh berries, like raspberries or strawberries, between layers for a fruity freshness that brightens the dessert.
- Rich & Creamy: Use whipped cream instead of Cool Whip for an ultra-creamy texture that feels indulgent and homemade.
- Spicy Kick: For those who crave heat, try adding a pinch of cayenne pepper or chili powder into the chocolate pudding for a surprising kick!
When you’re ready for more delectable options, check out this easy strawberry cake filling to elevate your desserts or dive into my secrets for crafting the perfect heart cake for those special gatherings!
S’mores Icebox Cake Recipe FAQs
What type of graham crackers should I use for the S’mores Icebox Cake?
Use Honey Maid graham crackers for the best flavor and structure. If you or your guests have gluten sensitivities, gluten-free graham crackers are a perfect alternative and will still provide that essential crunch.
How long can I store S’mores Icebox Cake in the fridge?
You can keep the cake covered in the refrigerator for up to 5 days. To ensure it stays fresh, be sure to use an airtight container or tightly cover it with plastic wrap to avoid drying out.
Can I freeze S’mores Icebox Cake?
I don’t recommend freezing this cake, as the creamy layers may not maintain their delightful texture once thawed. The chilling process is what keeps it perfectly creamy and fluffy.
What should I do if my pudding didn’t set properly?
If your pudding mix didn’t thicken as expected, ensure you used the correct whole milk, as lower-fat alternatives may not set properly. If it’s still too runny, you can try whisking in a little bit of cornstarch and refrigerating it again. Resetting it in the fridge for at least 30 minutes should help.
Are there any dietary restrictions to be aware of with S’mores Icebox Cake?
Absolutely! This S’mores Icebox Cake contains dairy and gluten, so for anyone with lactose intolerance or gluten sensitivity, consider using dairy-free milk and gluten-free graham crackers. It’s always best to check ingredient labels, especially for marshmallow fluff and Cool Whip, to avoid allergens.
Can I use a different flavor of pudding for this cake?
Very! You can definitely mix it up by trying different flavors of instant pudding, like vanilla or butterscotch. Just be sure to stick with the same quantity for consistency in texture and layering.
S'mores Icebox Cake: The Ultimate No-Bake Summer Treat
Ingredients
Equipment
Method
- Prepare the pudding by combining instant chocolate pudding mix with cold whole milk in a large mixing bowl. Beat on medium speed for 2 minutes until thickened. Cover and refrigerate for 10 minutes.
- Make the marshmallow layer by mixing Cool Whip and marshmallow fluff until smooth. Fold in half of the mini marshmallows.
- Layer graham crackers in a 9x13 baking dish, covering the bottom completely.
- Spread one-third of the marshmallow mixture over the graham crackers, then spoon half of the chocolate pudding over it. Repeat with remaining graham crackers, marshmallow mixture, and pudding.
- Top the cake with a final layer of graham crackers, press gently, and spread remaining marshmallow mixture on top.
- Cover with plastic wrap and refrigerate for at least 4 hours or overnight.
- Garnish with toasted mini marshmallows, pieces of Hershey's chocolate, and chocolate sauce before serving.
")