")
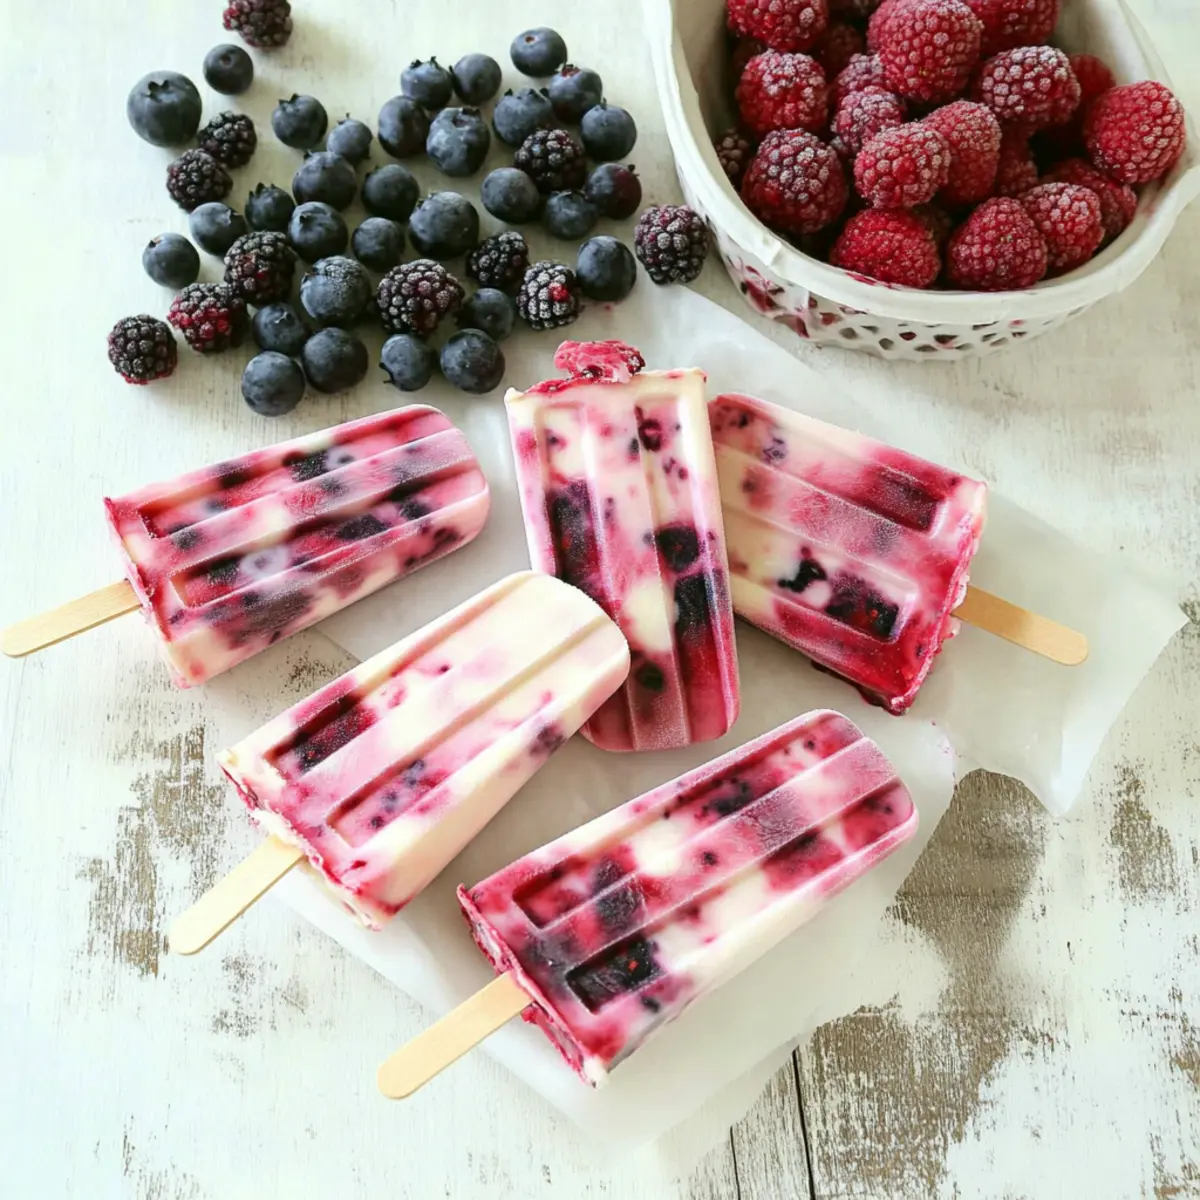
With the sun blazing overhead, nothing feels more satisfying than a refreshing bite of summer in a popsicle form. Today, I’m excited to share my recipe for Berry Yogurt Popsicles—an easy, healthy treat that’s perfect for those warm afternoons when you crave something cool. Using a delightful combination of fresh blueberries, raspberries, and strawberries, these popsicles bring together the creaminess of Greek yogurt and the natural sweetness of honey for a guilt-free indulgence. Not only are they a great way to celebrate seasonal fruit, but they also pack a nutritious punch with each creamy bite, making them a fantastic choice for both kids and adults. Want to learn how to whip up these vibrant popsicles? Let’s dive in!
Why are These Popsicles a Must-Try?
Refreshing Delight: These Berry Yogurt Popsicles are a perfect way to cool down during hot days while enjoying a nutritious treat.
Simple Ingredients: With just a handful of fresh berries and creamy yogurt, this recipe is as easy to make as it is delicious.
Health-Conscious Choice: At only 50 calories per popsicle, it’s a guilt-free dessert that everyone will love, making it a great alternative to store-bought frozen treats.
Versatile Flavors: Feel free to mix and match your favorite berries or even add a tropical twist with coconut milk for a unique spin. Check out my tips on adding fresh flavors with a Strawberry Cream Cheese frosting or alternate layers like in the Lemon Blueberry Lasagna for even more fun!
Perfect for Gatherings: These popsicles are not just a snack; they’re a crowd-pleaser at picnics and kids’ parties, ensuring smiles all around!
Berry Yogurt Popsicles Ingredients
For the Berry Mixture
• ½ cup fresh or frozen blueberries – Adds natural sweetness and a burst of flavor; you can substitute with blackberries for a different taste.
• ½ cup fresh or frozen raspberries – Provides tartness and vibrant color; any mixed berries can be used as a substitution.
• ½ cup fresh or frozen strawberries – Contributes sweetness and texture; frozen strawberries are a great alternative if fresh ones are unavailable.
For the Yogurt Base
• 2 cups full-fat Greek style yogurt (plain or vanilla) – Forms the creamy base, offering richness; regular yogurt can be used if Greek yogurt is not available, but texture may vary.
• ¼ cup honey – Sweetens the mixture naturally; maple syrup can be used for a vegan option.
• 2 tablespoons lemon juice – Adds brightness and balances flavors; lime juice can also work well for a refreshing citrus twist.
Enjoy making these delightful Berry Yogurt Popsicles, a truly guilt-free summer treat that everyone will love!
Step‑by‑Step Instructions for Berry Yogurt Popsicles
Step 1: Cook the Berries
In a medium saucepan over medium heat, combine your berries—blueberries, raspberries, and strawberries. Cook for about 15–20 minutes, stirring occasionally, until the berries soften and break down. Remove the mixture from heat, let it cool for a few minutes, then blend into a smooth puree. Allow it to cool to room temperature as you prepare the yogurt base.
Step 2: Mix the Yogurt Base
In a large mixing bowl, combine the full-fat Greek yogurt, honey, and lemon juice. Use a whisk to blend everything together until the mixture is smooth and creamy, ensuring there are no lumps. This yogurt base for your Berry Yogurt Popsicles needs to be well-mixed to achieve that perfect creamy texture that balances the tartness of the berries.
Step 3: Swirl the Berry Puree
Once both mixtures are cooled to room temperature, gently swirl the berry puree into the yogurt mixture. Use a spatula or a spoon to create a marbled effect, being careful not to fully combine them. This will give your Berry Yogurt Popsicles the beautiful visual appeal of vibrant fruit swirls against the creamy yogurt.
Step 4: Fill the Molds
Carefully pour the yogurt and berry mixture into your ice pop molds, filling them about three-quarters full to allow for expansion during freezing. If using wooden sticks, position them in the center of each mold. Make sure to tap the molds lightly on the counter to release any air bubbles, which ensures a more solid popsicle structure.
Step 5: Freeze Until Solid
Cover the molds with their lids or plastic wrap to create an airtight seal. Place them in the freezer and let them freeze for at least 4 hours, or overnight for best results. The mixture will become solid and ready to pop out, with the creamy texture of the yogurt perfectly countering the burst of fruit flavor in each bite.
Step 6: Remove and Store Popsicles
To release your delightful Berry Yogurt Popsicles from the molds, run them under warm water for a few seconds. This will help loosen them without breaking. Once removed, store any extras in freezer-safe bags, where they can keep for up to 1–2 months. These popsicles are now ready to enjoy as a cool treat whenever you crave something refreshing!
Make Ahead Options
These Berry Yogurt Popsicles are a fantastic choice for busy home cooks looking to save time while still enjoying a delicious, healthy treat! You can prepare the berry mixture up to 24 hours in advance—just cook and blend the berries as instructed, then refrigerate the puree in an airtight container. The yogurt base can also be mixed ahead and stored in the fridge for up to 3 days; simply keep it in a separate container to maintain its creamy texture. When you’re ready to assemble, swirl the cooled berry puree into the yogurt, pour into molds, and freeze. By prepping ahead, you’ll have refreshing popsicles ready to enjoy whenever a craving strikes, ensuring a guilt-free treat with minimal hassle!
Berry Yogurt Popsicles: Creative Twists
Customize your Berry Yogurt Popsicles with these delightful variations that will elevate your treat to a new level of deliciousness.
- Dairy-Free: Use coconut yogurt instead of Greek yogurt for a refreshing non-dairy option that still delivers creaminess. This swap adds a lovely tropical flavor twist!
- Fruity Explosion: Incorporate peach or mango puree alongside your berry mix for extra sweetness and a sunny summer vibe. Each bite will burst with delightful fruity goodness!
- Herb Infusion: Add fresh mint or basil for a herbaceous note. Simply blend herbs with the berry mixture for a refreshing twist that surprises your taste buds.
- Sweetener Swap: Try maple syrup or agave nectar in place of honey for a vegan-friendly option, or even blend in stevia for a sugar-free treat—perfect for those looking for a healthier indulgence!
- Creamy Layered Popsicles: Alternate layers of yogurt and berry puree in the molds to create visually stunning popsicles. The layers offer delightful texture and flavor contrasts.
- Nutty Crunch: For added texture, mix in crushed nuts or granola after blending the yogurt and berries. This creates a fun crunch that complements the creamy pops!
- Spicy Heat: Add a pinch of chili powder to the berry puree for an unexpected kick. This will give your popsicles a zesty flavor profile that pairs beautifully with the sweetness.
- Zesty Citrus: Swap lemon juice for orange juice for a sweeter citrusy flavor. This simple change will make your Berry Yogurt Popsicles a refreshing treat perfect for warm days!
These variations are all about getting creative and having fun in the kitchen. Explore different flavors until you find your perfect combination! If you’re looking for other delightful dessert inspirations, check out my easy Strawberry Cake Filling or try adding a decadent layer of Strawberry Cream Cheese to amplify the berry goodness.
Expert Tips for Berry Yogurt Popsicles
Cool Berries First: Make sure the berry mixture is fully cooled before adding to the yogurt. This prevents curdling and keeps the texture smooth.
Mold Care: Hand-wash your popsicle molds instead of using the dishwasher to avoid discoloration that can affect the appearance of your Berry Yogurt Popsicles.
No Sticking: Run molds under warm water for a few seconds before removing popsicles. This helps them release easily without breaking.
Adjust Sweetness: Taste your yogurt mixture before pouring it into the molds. You can always add more honey if you prefer a sweeter treat.
Mix It Up: Get creative with your berries! Feel free to swap out or combine different berries for unique flavors each time you make these popsicles.
How to Store and Freeze Berry Yogurt Popsicles
Fridge: Keep any unconsumed popsicles in the fridge for short-term enjoyment, but they are best stored in the freezer for optimal flavor and firmness.
Freezer: Store the Berry Yogurt Popsicles in airtight freezer-safe bags for up to 1–2 months. This prevents freezer burn and keeps them fresh for those hot summer days!
Reheating: There’s no need to reheat these popsicles; simply pop one out of the freezer whenever a craving strikes!
Serving Freshness: To ensure the best taste, enjoy these treats within the first month of freezing for maximum flavor and creamy texture.
What to Serve with Creamy Berry Swirl Yogurt Popsicles
As summer sizzles, these vibrant popsicles make a refreshing centerpiece for your warm-weather gatherings.
-
Fresh Fruit Salad: A colorful mix of seasonal fruits brings a burst of juicy freshness, enhancing the fruity flavors in the popsicles. Serve it alongside for a cheerful, healthy side.
-
Light Salad with Citrus Dressing: Crisp greens and a zesty citrus dressing provide a sharp contrast to the creaminess of the popsicles, refreshing your palate between bites.
-
Homemade Granola Bars: Chewy and nutty, these bars offer a wholesome crunch that pairs beautifully with the smooth texture of the popsicles. Their natural sweetness complements the fruity taste.
-
Minty Iced Tea: A cooling drink brewed with fresh mint and a hint of citrus will quench your thirst and perfectly balance the sweetness of the popsicles. This makes for a delightful, refreshing treat on a sunny afternoon.
-
Coconut Chia Pudding: Creamy and nutrient-rich, this pudding adds an exotic touch while maintaining a light profile. Its texture is a great contrast to the popsicles, and a touch of honey brings it all together.
-
Lemon Sorbet: If you’re in the mood for something extra, a scoop of lemon sorbet serves as a bright, tangy complement. The citrus notes enhance the chill and fun of your berry yogurt popsicles.
-
Dark Chocolate Dipped Biscuits: A decadent twist to your dessert spread, these biscuits add a hint of richness that balances the healthy treats. Plus, who can resist chocolate?
-
Sparkling Water with Berries: A refreshing drink option that can be infused with fresh berries mirrors the flavors of your popsicles. It’s bubbly, fun, and makes for a lovely, light pairing.
-
Mini Cheesecakes: Indulge in a bite-sized dessert that wraps richness in a creamy texture. The slight tanginess of the cheesecake highlights the berry notes in your popsicles, creating a symphony of flavors.
Berry Yogurt Popsicles Recipe FAQs
How do I choose the best berries for this recipe?
Absolutely! When selecting berries, you want to look for ones that are ripe, juicy, and free from blemishes. Fresh blueberries should be firm and plump, while strawberries and raspberries should have a vibrant color and pleasant aroma. If you use frozen fruit, check that the berries are unsweetened and free from freezer burn.
How should I store my popsicles for the best freshness?
To keep your Berry Yogurt Popsicles fresh, store them in airtight freezer-safe bags. Make sure to remove as much air as possible to prevent freezer burn. They will last for up to 1-2 months, but for the best flavor, I recommend enjoying them within the first month. This ensures that they stay delicious and creamy!
Can I freeze these popsicles for later? How?
Yes, indeed! After the popsicles are completely frozen (about 4 hours or overnight), remove them from the molds by running warm water over the outside for a few seconds. Place the pops in freezer-safe bags, ensuring they are well-sealed to maintain freshness. You can keep them in the freezer for up to 1-2 months and simply pop one out whenever you’re ready for an indulgent treat!
What if my popsicles are hard to remove from the molds?
Very common! If you’re having trouble getting your Berry Yogurt Popsicles out of the molds, try running warm water over the molds for 10-15 seconds. This gentle heat will help loosen the popsicles without damaging them. If they still resist, give them a little twist.
Are these popsicles suitable for kids with allergies?
Indeed! These popsicles can be a great option for many, but always check for specific allergies. If your little ones are dairy-free or vegan, you can easily substitute Greek yogurt with a plant-based yogurt alternative and use maple syrup instead of honey. Just verify that all ingredients align with your child’s dietary needs.
Can I use other fruits instead of berries?
The more the merrier! While this recipe shines with berries, you can certainly experiment with other fruits. Pureed bananas, mangoes, or peaches work beautifully too! Just be mindful of the moisture content to maintain the right texture in your popsicles. Enjoy creating your own fresh flavor combinations!
Berry Yogurt Popsicles: A Creamy, Guilt-Free Summer Treat
Ingredients
Equipment
Method
- In a medium saucepan over medium heat, combine your berries. Cook for about 15–20 minutes, stirring occasionally, until the berries soften and break down.
- Remove the mixture from heat, let it cool for a few minutes, then blend into a smooth puree. Allow it to cool to room temperature.
- In a large mixing bowl, combine the full-fat Greek yogurt, honey, and lemon juice. Whisk until smooth and creamy.
- Once both mixtures are cooled, gently swirl the berry puree into the yogurt mixture to create a marbled effect.
- Carefully pour the mixture into ice pop molds, filling them three-quarters full. Insert sticks and tap the molds lightly to release air bubbles.
- Cover the molds and freeze for at least 4 hours, or overnight.
- Run molds under warm water for a few seconds to release the popsicles. Store extras in freezer-safe bags for up to 1–2 months.
")