")
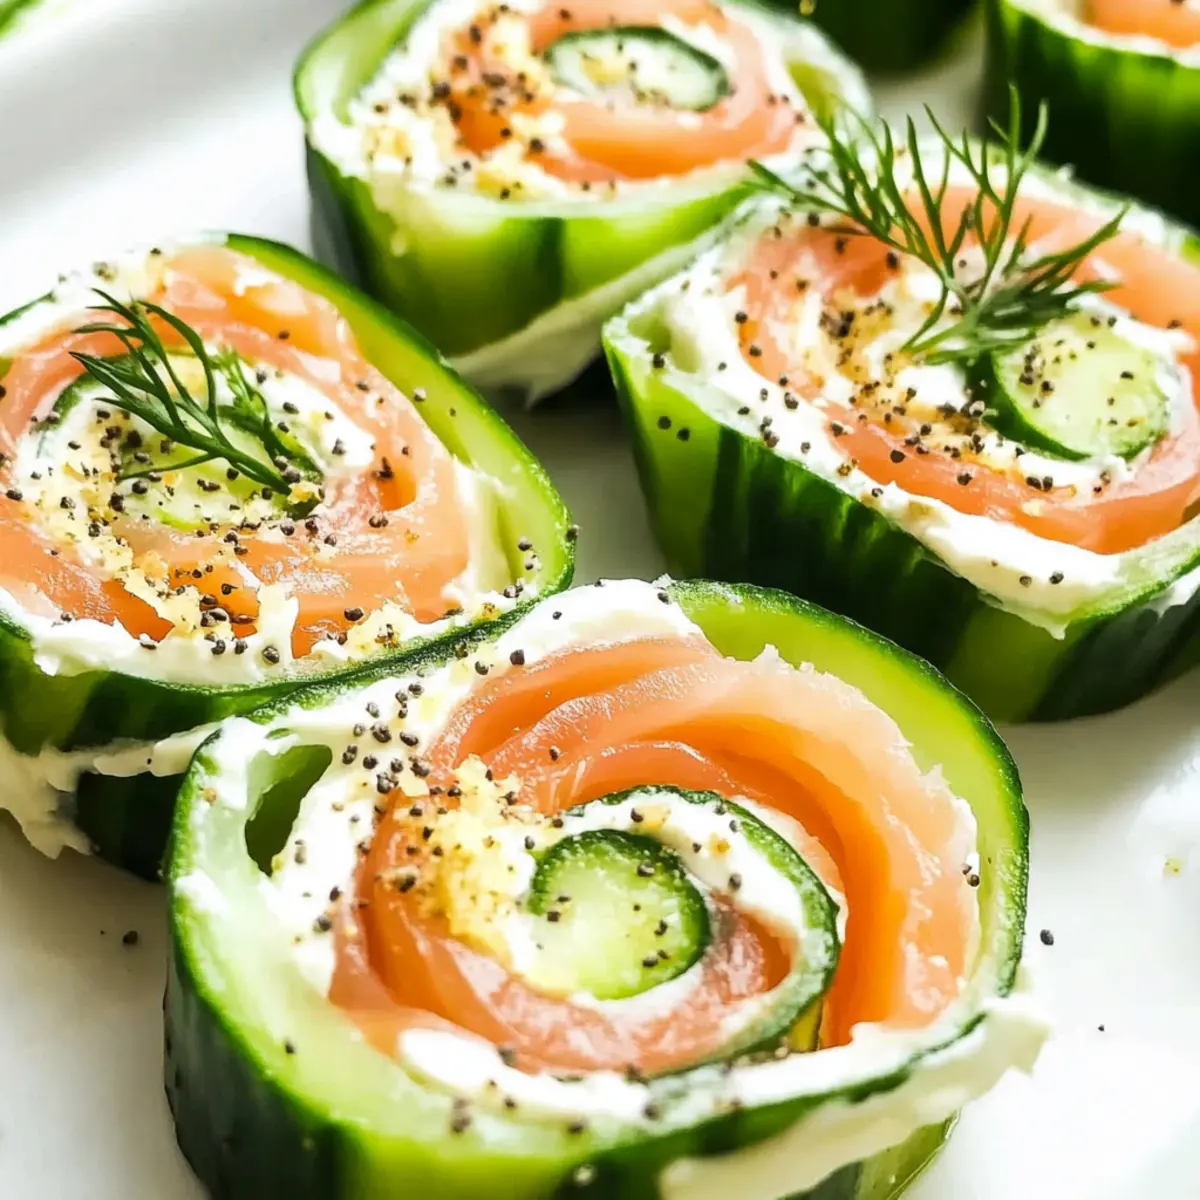
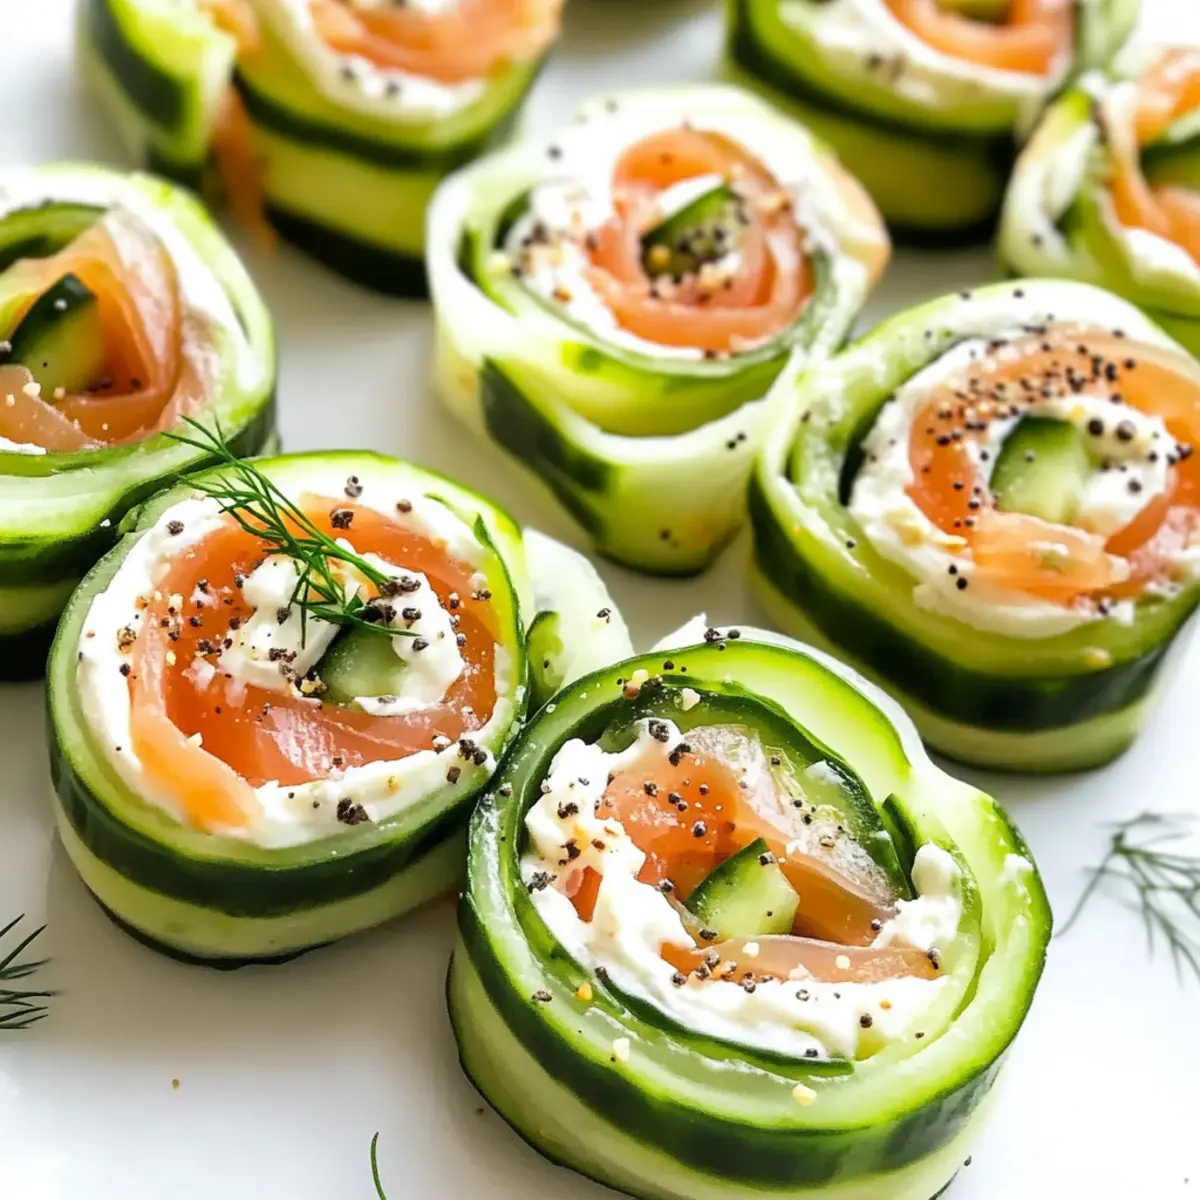
Stepping into my kitchen, I often find myself yearning for something light yet satisfying—especially during the warm summer months. That’s when I whip up these Easy Cucumber Roll Ups, a delightful gluten-free appetizer that never ceases to impress. With just a handful of ingredients like crispy cucumber, creamy cheese, and smoky salmon, they come together in minutes, making them ideal for both spontaneous gatherings and cozy evenings at home. Plus, they’re low-carb and can easily be modified for a dairy-free diet! If you’re ready to elevate your snack game, stick around to discover how these refreshing bites can transform any occasion. What’s your favorite way to enjoy crisp, fresh flavors?

Why are these Cucumber Roll Ups a must-try?
Simplicity at its best: With only a few ingredients, making these roll ups is quick and hassle-free, perfect for busy days or spontaneous gatherings.
Flavor-packed goodness: The creamy cheese paired with smoky salmon and seasoned cucumber creates a mouthwatering combination that will impress your guests.
Versatile adaptations: Feel free to swap the smoked salmon for fresh bell peppers or use dairy-free cream cheese to accommodate dietary preferences.
Perfect for any occasion: Whether it’s a summer party or a cozy dinner, these cucumber roll ups are a stylish starter or snack that complements any menu.
Check out our recipe for Sourdough Dinner Rolls for the perfect side!
Cucumber Roll Ups Ingredients
For the Filling
• Cream Cheese – Softened cream cheese creates a luscious filling; substitute with dairy-free cream cheese for a lactose-free option.
• Smoked Salmon – Adds a delightful savory flavor; try smoked trout or fresh bell peppers for a vegetarian variation.
For the Roll Base
• Cucumber – Provides the refreshing foundation; choose English cucumbers for their crisp texture, but any variety works beautifully.
For Seasoning
• Everything Bagel Seasoning – Enhances the cream cheese’s flavor; swap it with garlic or onion powder for a personal touch.
• Fresh Dill – A hint of fresh herbiness; optional, but it elevates the presentation and taste!
Now you’re set to create these delightful Cucumber Roll Ups that promise a flavor explosion! Enjoy this gluten-free appetizer, and watch it become a favorite at your gatherings!
Step‑by‑Step Instructions for Cucumber Roll Ups
Step 1: Slice Cucumber
Begin by trimming the ends of the cucumber, then use a mandoline or a sharp vegetable peeler to slice it lengthwise into thin strips. Aim for around 1/8-inch thickness to ensure the slices are flexible enough to roll without breaking. Lay the cucumber strips flat on a clean cutting board for the next steps.
Step 2: Dry the Cucumber
Once you have your cucumber strips ready, pat them gently with paper towels to absorb any excess moisture. This step is crucial because it helps prevent sogginess and allows the roll ups to hold together better. A few gentle presses will do; ensure the slices remain intact for easy assembly.
Step 3: Spread Cream Cheese
Take your softened cream cheese and carefully spread an even layer over each cucumber slice using a small spatula or the back of a spoon. The cream cheese should cover the entire surface of the cucumber to add creaminess to each bite. Let your creativity flow as you ensure each slice is beautifully coated.
Step 4: Season
Sprinkle generous amounts of everything bagel seasoning evenly over the cream cheese layer on each cucumber slice. This seasoning will elevate the flavors and create an exciting taste profile in your Cucumber Roll Ups. Feel free to adjust the quantity based on your personal taste preferences for a flavorful kick.
Step 5: Layer Salmon
Next, gently place a layer of smoked salmon atop the seasoned cream cheese. Ensure the salmon is evenly distributed across the slices to create a harmonious flavor blend in the roll ups. For those opting for a vegetarian version, simply use fresh bell pepper slices or any preferred filling at this stage.
Step 6: Roll
Starting from one end, carefully roll up each cucumber slice snugly to encase the filling. Use your hands to hold the roll together without squishing it. Aim for a firm but delicate roll to maintain a nice shape. Once rolled, place the seam side down to help keep it together while you prepare for the next steps.
Step 7: Chill
Wrap each of the rolled cucumbers in plastic wrap and place them in the refrigerator for at least 30 minutes. Chilling allows the flavors to meld together and firms up the structure of your Cucumber Roll Ups, making them more enjoyable to bite into when served at gatherings or as a delightful afternoon snack.
Step 8: Slice and Serve
Once chilled, unwrap the rolls and use a sharp knife to slice them into bite-sized pieces, about 1-2 inches wide. Arrange the Cucumber Roll Ups neatly on a platter, garnishing with fresh dill if desired. These vibrant, refreshing bites are now ready to impress your guests and satisfy your cravings for a light yet flavorful treat.

Cucumber Roll Ups Variations & Substitutions
Feel free to let your culinary creativity shine and customize your cucumber roll ups to suit your taste!
- Vegetarian Option: Replace smoked salmon with colorful bell pepper strips or roasted red peppers for a vibrant twist.
- Dairy-Free: Use a dairy-free cream cheese alternative to make it suitable for a lactose-free diet while keeping the creaminess.
- Spicy Kick: Add a layer of spicy cream cheese or a sprinkle of crushed red pepper flakes for a delightful heat.
- Herbed Flavor: Incorporate fresh herbs like chives or basil into the cream cheese for an extra burst of fresh flavor in every bite.
- Crunchy Add-ins: For an exciting texture, add thinly sliced radishes or carrots into the filling for an extra crunch.
- Nutty Twist: Spread a layer of hummus instead of cream cheese, garnished with toasted sesame seeds, for a rich, nutty flavor.
- Sweet Touch: Drizzle a bit of honey over the cream cheese or add finely chopped fruits like apples for a unique, sweet twist.
- Fresh Herb Garnish: Enhance presentation and flavor by garnishing the finished roll ups with fresh dill or cilantro.
Whichever variation you choose, these delicious roll ups will surely become a hit at your gatherings. For a delightful side dish, consider pairing them with our easy recipe for Sourdough Dinner Rolls or serve alongside our flavorful Chicken Rollatini Culinary! Enjoy every bite!
Expert Tips for Cucumber Roll Ups
-
Perfectly Thin Slices: Aim for cucumber slices around 1/8-inch thick to ensure they roll easily without cracking or breaking.
-
Moisture Control: Always pat the cucumber slices dry after slicing. Excess moisture can make roll ups soggy and difficult to manage.
-
Chill for Flavor: Refrigerate the rolled up cucumbers for at least 30 minutes. This step enhances the flavors and makes the roll ups firmer for easier slicing.
-
Secure with Toothpicks: If you’re having trouble keeping the rolls together, use toothpicks to secure them. This is especially helpful if you opt for a thicker filling.
-
Mix Up the Filling: Experiment with different spreads like herbed cream cheese or even hummus for a delicious twist on these Cucumber Roll Ups.
Make Ahead Options
These Easy Cucumber Roll Ups are perfect for meal prep, making them a fantastic choice for busy cooks! You can assemble the cucumber roll ups by following the initial steps and then wrap them tightly in plastic wrap before refrigerating for up to 24 hours. Just ensure the cucumber slices are patted dry to prevent sogginess. When it’s time to serve, simply slice the chilled rolls into bite-sized pieces and arrange them on a platter to impress your guests. This simple prep in advance guarantees that you can enjoy a delightful, fresh appetizer with minimal effort right when you need it.
Storage Tips for Cucumber Roll Ups
Refrigerator: Store your Cucumber Roll Ups in an airtight container for up to 1 day to maintain freshness and texture.
Wrapping: Wrap the rolls tightly in plastic wrap if storing for a short period to prevent them from drying out or absorbing other odors.
Freezer: For long-term storage, freeze unassembled cucumber rolls (cucumber, cream cheese, and fillings) for up to 3 months. Assemble and chill before serving.
Reheating: While these are best served cold, if you prefer them slightly warm, do so gently in the microwave for a few seconds; however, keep in mind that this might alter their crispness.
What to Serve with Easy Cucumber Roll Ups
Imagine delighting your taste buds with complementary flavors and textures that enrich the experience of your light, refreshing snacks.
- Creamy Avocado Dip: The smooth and rich taste of avocado adds an indulgent contrast to the crisp cucumber rolls.
- Tomato and Mozzarella Salad: Fresh tomatoes and creamy mozzarella create a vibrant side that balances the coolness of the cucumber.
- Quinoa Salad: A colorful quinoa medley dotted with fresh herbs and vegetables complements the lightness of the roll ups beautifully.
- Chilled White Wine: A crisp Sauvignon Blanc pairs wonderfully, enhancing the overall freshness of your meal while cutting through creamy textures.
- Herbed Hummus: Serve with a side of herbed hummus for a hearty addition that packs protein and creamy richness with every bite.
- Fruit Skewers: Sweet strawberries and zesty pineapple add a pop of color and flavor that contrasts delightfully with the savory roll ups.
- Crispy Sweet Potato Chips: For a crunchy texture that echoes the cucumber’s crispness, sweet potato chips serve as a delightful snack alongside.
Cucumber Roll Ups Recipe FAQs
How do I choose the best cucumber for my roll ups?
Absolutely! For cucumber roll ups, I recommend opting for an English cucumber because of its thin skin and minimal seeds, making it extra crunchy and flavorful. Look for cucumbers that are firm and free from dark spots or blemishes. If yours have wrinkles or are soft to the touch, they may be overripe.
What’s the best way to store leftover Cucumber Roll Ups?
Very! To keep your Cucumber Roll Ups fresh, place them in an airtight container in the refrigerator for up to 1 day. Wrap them tightly in plastic wrap if you don’t have a container to help prevent drying out or absorbing any fridge odors.
Can I freeze Cucumber Roll Ups?
Absolutely! For freezing, I recommend assembling the cucumbers without the cream cheese and any fillings. Wrap the unassembled roll ups tightly in plastic wrap and store them in a freezer-safe container for up to 3 months. When you’re ready to enjoy, let them thaw in the refrigerator overnight, fill with cream cheese and desired toppings, and then chill for 30 minutes before serving.
What should I do if the cucumbers keep breaking when I roll them up?
Very! If your cucumber slices are breaking, try slicing them a bit thicker or ensure they are well-dried after cutting. This prevents excess moisture that can lead to cracking. Also, consider using a mandoline for perfectly thin and even slices, which are much easier to roll.
Are there any common allergens in Cucumber Roll Ups I should be aware of?
Definitely! While cucumber roll ups are generally safe, the cream cheese and smoked salmon can be allergens for some people. If you’re preparing these for guests, ask about dairy or fish allergies. You can easily replace cream cheese with a dairy-free option and substitute the salmon with roasted bell peppers to make it safe for everyone.
How long can I keep the ingredients for Cucumber Roll Ups before making them?
Very! The cucumbers should be used within 3 to 5 days after purchase for optimal freshness, while cream cheese can last about 2 weeks in the fridge if unopened. Make sure to check expiration dates to ensure your ingredients are fresh before assembly!
Refreshing Cucumber Roll Ups Perfect for Light Appetizers
Ingredients
Equipment
Method
- Slice cucumber lengthwise into thin strips using a mandoline or peeler.
- Pat cucumber strips dry with paper towels to absorb excess moisture.
- Spread an even layer of cream cheese over each cucumber slice.
- Sprinkle everything bagel seasoning over the cream cheese.
- Place a layer of smoked salmon on top of the seasoned cream cheese.
- Carefully roll up each cucumber slice to encase the filling.
- Wrap each roll in plastic wrap and refrigerate for at least 30 minutes.
- Once chilled, slice the rolls into bite-sized pieces and serve.
")