")
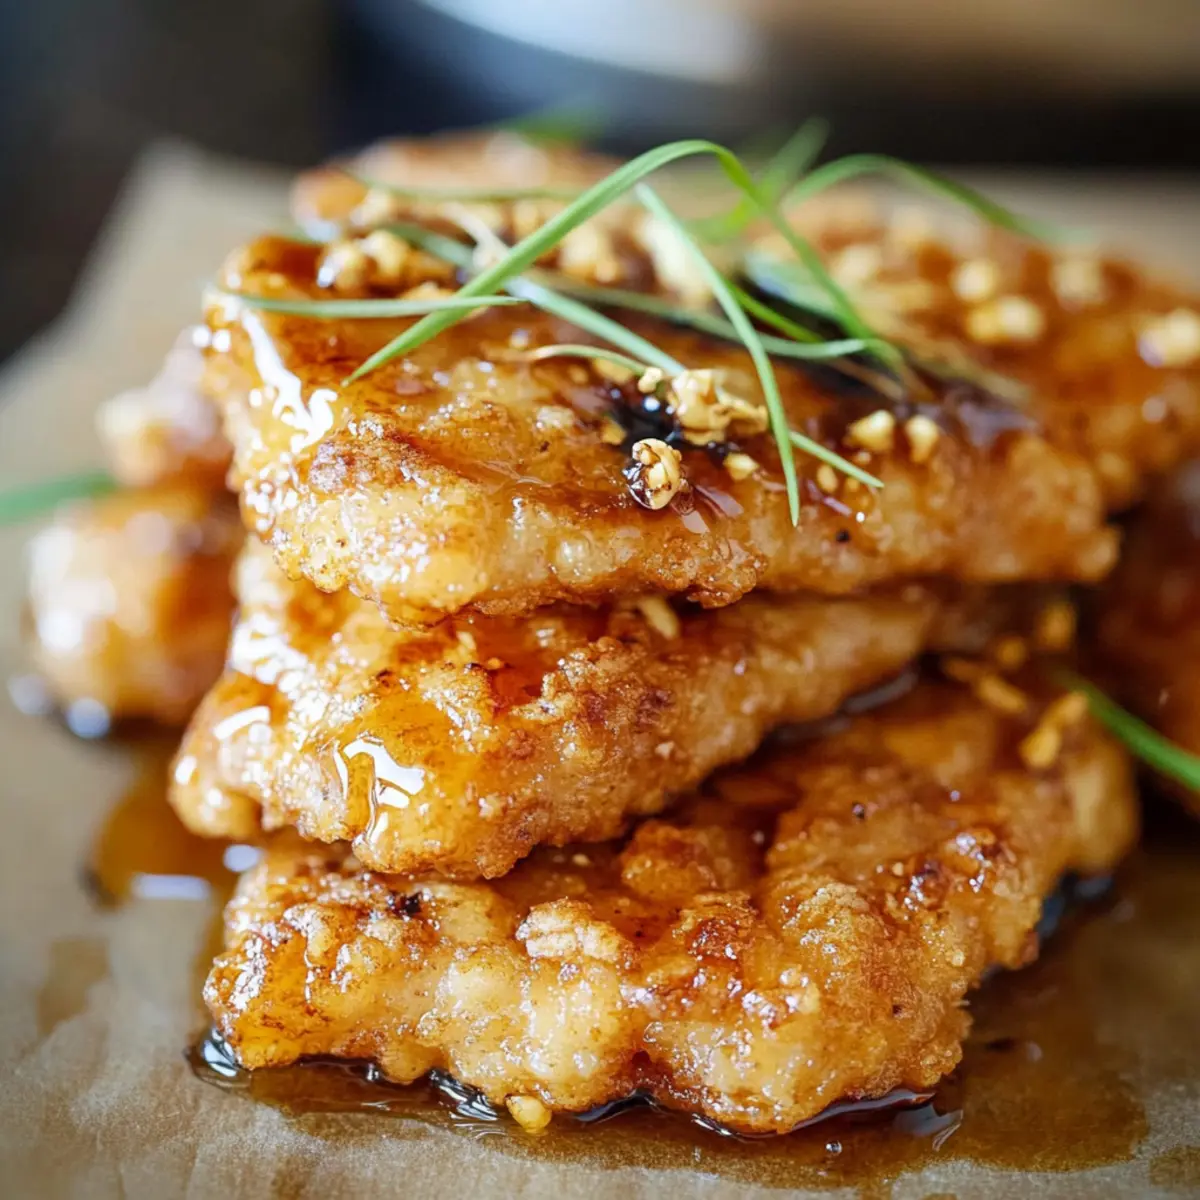
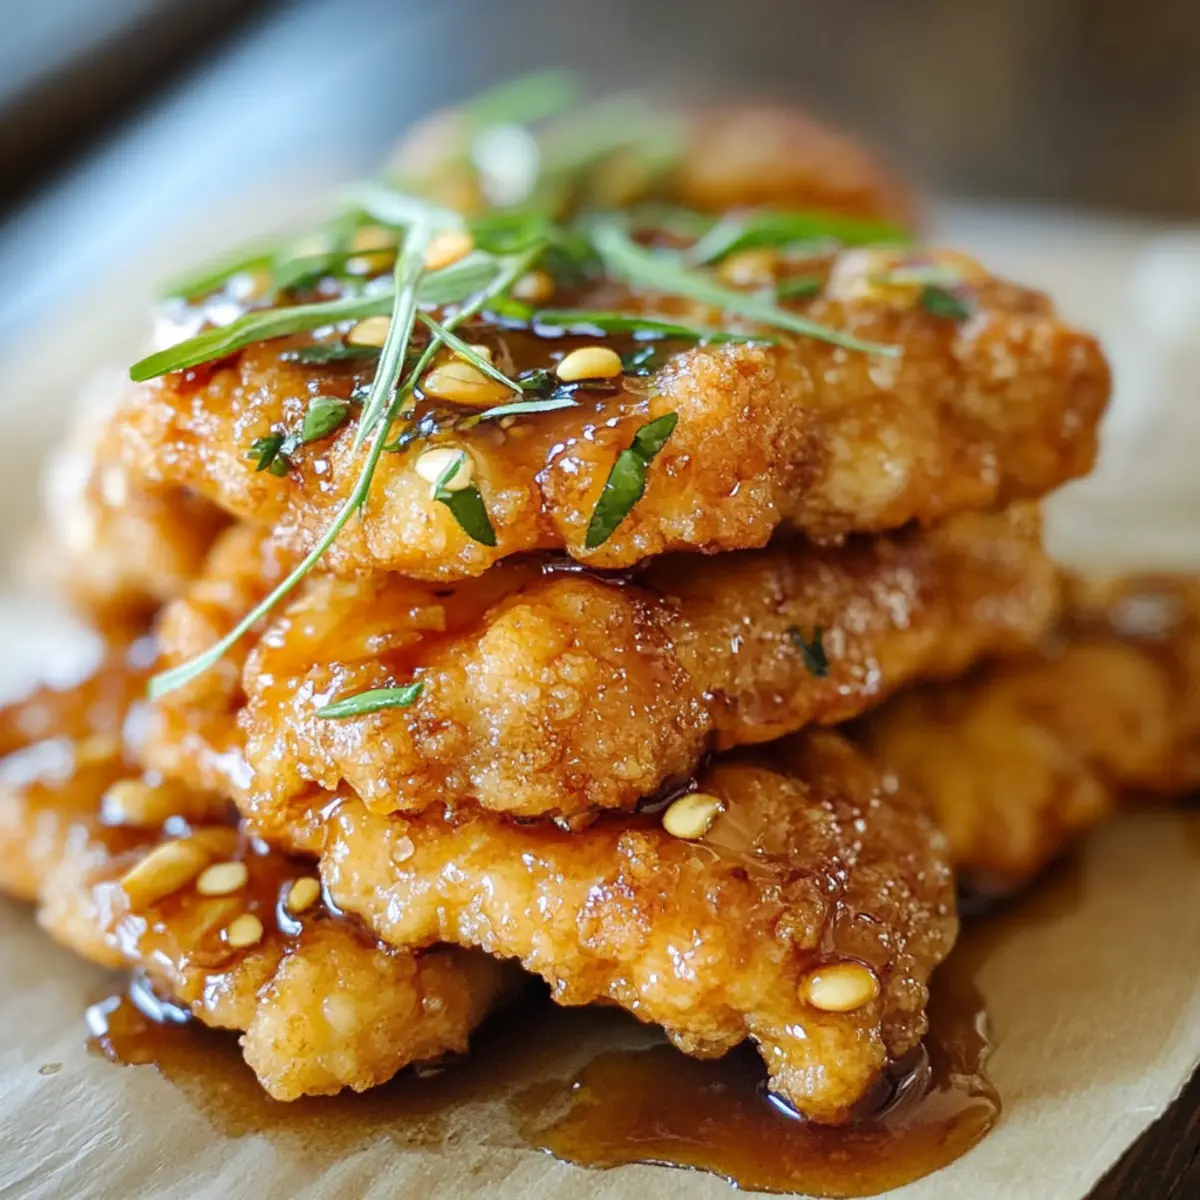
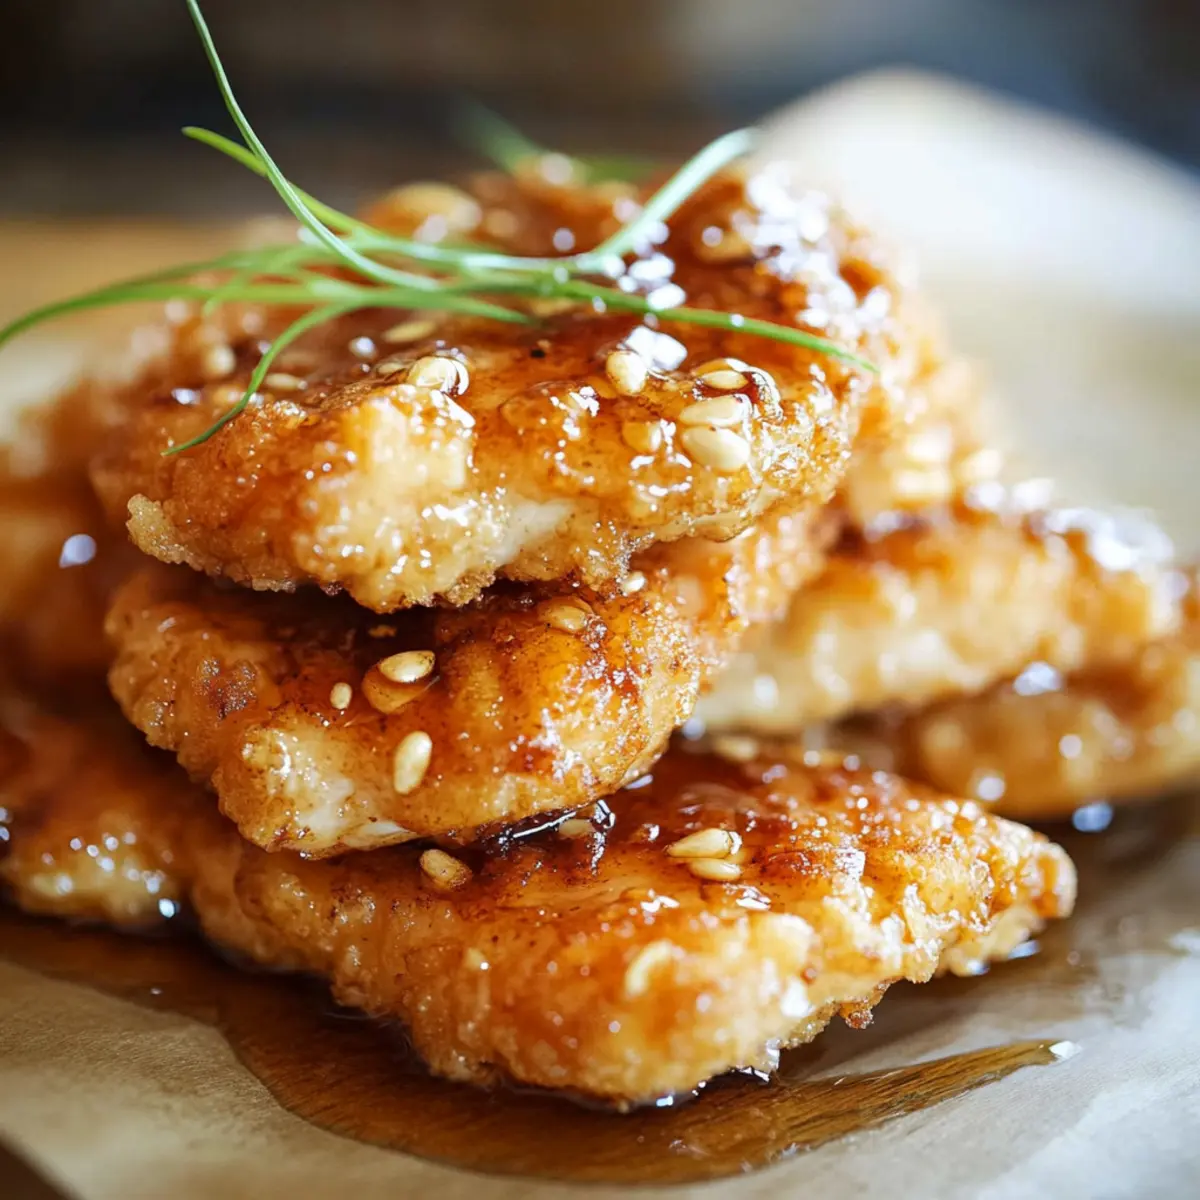
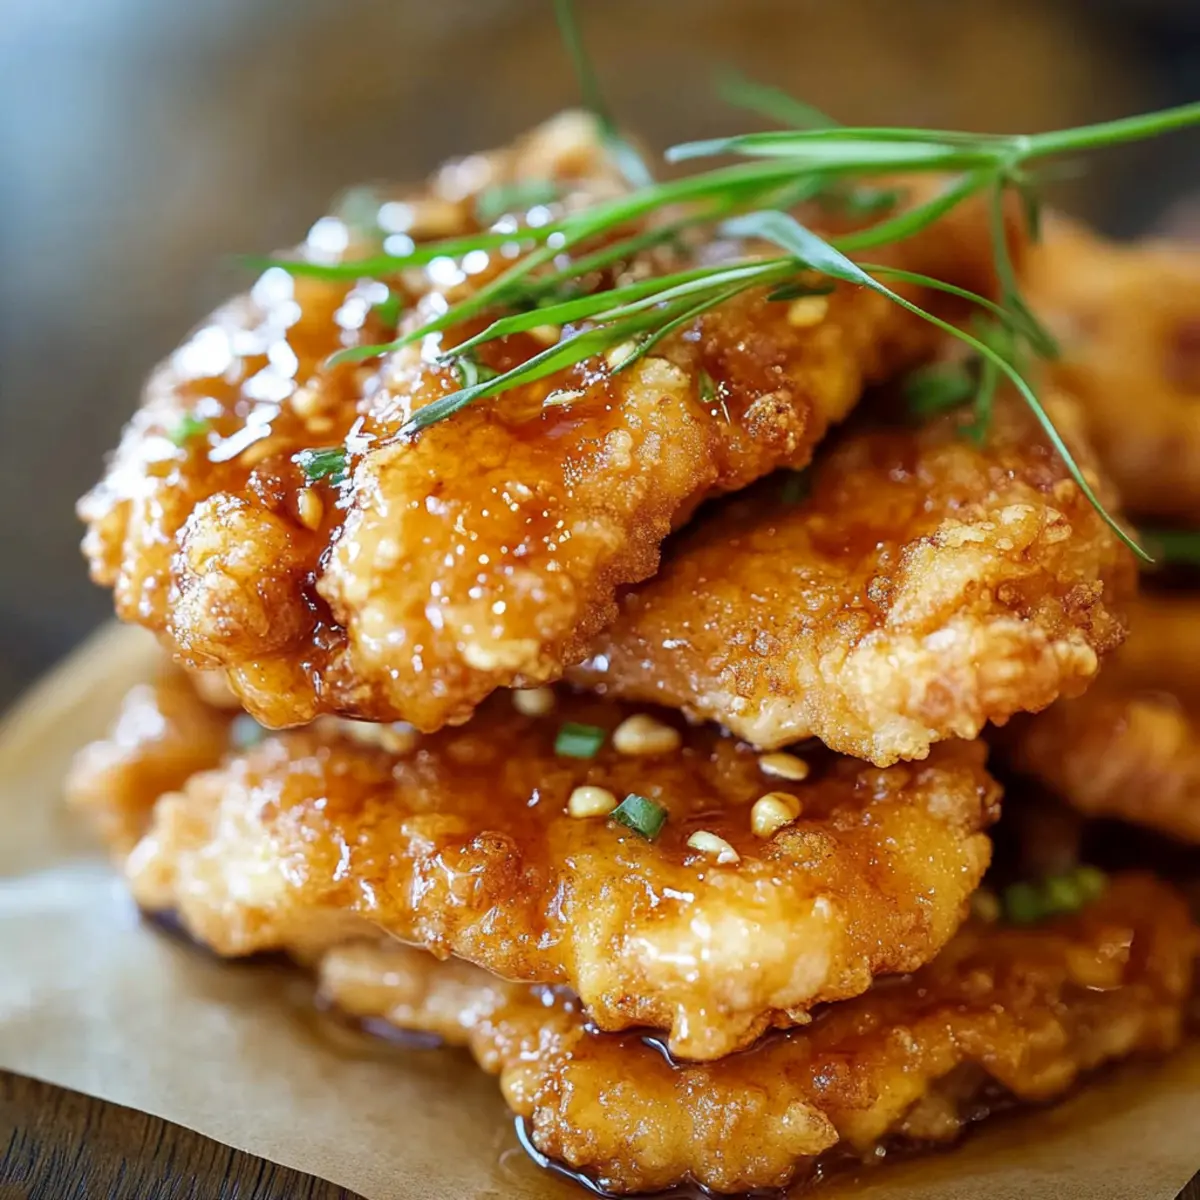
In the whirlwind of dinner preparations, a golden-brown triumph emerges: Crisp-Tender Honey Garlic Chicken. The moment you sink your teeth into that crunchy exterior, you’re greeted by tender, juicy chicken, lovingly enveloped in a sweet and savory honey garlic sauce that beckons you back for seconds. This recipe is not just about quick cooking; it transforms weeknight meals into memorable family feasts in mere minutes. Plus, it’s delightfully adaptable, making it an ideal option for picky eaters. Trust me, this dish is destined to become a staple in your kitchen rotation! Are you ready to dive into this delicious journey? Let’s get cooking!
Why Is Honey Garlic Chicken Irresistible?
Quick and Easy: This recipe takes the stress out of weeknight cooking, allowing you to whip up a flavorful dinner in just 30 minutes.
Sweet and Savory Bliss: The stunning harmony of honey and garlic creates a mouthwatering sauce that will have everyone at the table asking for more.
Crispy Perfection: With a well-seasoned crust, the chicken delivers that satisfying crunch we all crave, while the juicy interior remains tender and delicious.
Adaptable for All: Whether served over rice or with fresh veggies, this dish can easily accommodate picky eaters, making it a family-friendly favorite.
Meal Prep Friendly: The honey garlic sauce can be prepared ahead of time for ultimate convenience, as featured in our Buffalo Chicken Bombs or Alice Springs Chicken recipes.
Transform your dinner routine with this truly delectable dish!
Honey Garlic Chicken Ingredients
• Dive into the flavors of this delightful dish with essential ingredients!
For the Chicken
• Boneless, Skinless Chicken Breasts – The primary protein that remains juicy and tender after frying; chicken thighs make a tasty alternative.
• Vegetable Oil – Essential for frying; opt for oils with a high smoke point like canola for a perfect crispy texture.
• All-Purpose Flour – Coats the chicken for that irresistible crunch; easily replaced with a gluten-free flour for dietary needs.
• Large Eggs – Binds the breading, ensuring every bite is perfectly crispy.
• Kosher Salt and Black Pepper – Elevate the flavor; adjust to suit your taste preferences.
For the Seasoning
• Dried Thyme – Adds earthy herbal notes; fresh thyme can be substituted using three times the amount.
• Dried Oregano – Introduces a warm, aromatic flavor.
• Paprika – Provides a mild sweetness and a lovely reddish color.
• Cayenne Pepper – For those who enjoy a subtle kick; feel free to adjust based on your spice tolerance.
For the Sauce
• Honey – The sweet component of the sauce, balance according to your preference for sweetness.
• Garlic Cloves – Adds depth and aromatic flair to the sauce; roasting them can mellow the flavor.
• Soy Sauce – Imparts richness and umami; for a healthier option, low-sodium soy sauce works beautifully.
• Cornstarch – Thickens the sauce for a glossy finish; arrowroot starch can be a good substitute.
With these simple yet essential ingredients, you’re on the path to crafting the perfect Honey Garlic Chicken that will have your family coming back for seconds!
Step‑by‑Step Instructions for Honey Garlic Chicken
Step 1: Prepare Honey Garlic Sauce
In a saucepan over medium-high heat, combine 1/2 cup of honey, 4 minced garlic cloves, and 1/4 cup of soy sauce. Stir the mixture continuously until it begins to simmer, about 2 minutes. In a small bowl, mix 1 tablespoon of cornstarch with 1/4 cup of water, and gradually add it to the saucepan, stirring until the sauce thickens to a glossy consistency, about another minute.
Step 2: Heat Oil
In a large skillet, pour in 1 cup of vegetable oil and heat it over medium-high heat until the oil reaches 350°F. This allows the chicken to fry evenly, creating that desired crispy texture. Use a deep-fry thermometer if available for accuracy, and keep an eye on the oil to prevent overheating.
Step 3: Prepare Chicken
In a mixing bowl, whisk together 1 cup of all-purpose flour with 1 teaspoon of dried thyme, 1 teaspoon of dried oregano, 1 teaspoon of paprika, and a pinch of cayenne pepper. Season 2 boneless, skinless chicken breasts with kosher salt and black pepper, then dredge each piece in the flour mixture. Dip the coated chicken into 2 beaten large eggs, then re-coat in the flour mixture to ensure a crispy exterior.
Step 4: Fry Chicken
Carefully place the coated chicken pieces into the hot oil, frying in batches to avoid overcrowding. Cook the chicken for 3-4 minutes on each side until it’s golden brown and crispy. Use tongs to turn the chicken, and once done, transfer it to a paper towel-lined plate to drain excess oil, ensuring it stays crispy.
Step 5: Serve
To complete your Honey Garlic Chicken, place the fried pieces on a serving plate and generously drizzle the prepared honey garlic sauce over the top. This sweet and savory glaze will enhance the crispy chicken, making it look irresistible. Optionally, garnish with sesame seeds or chopped green onions for that extra touch before serving.
What to Serve with Honey Garlic Chicken?
Looking to create a delicious dining experience that complements the sweet and savory magic of your Honey Garlic Chicken?
-
Steamed Jasmine Rice: Soft and fragrant, it absorbs the honey garlic sauce beautifully, providing a perfect contrast to any crunchiness.
-
Stir-Fried Vegetables: A colorful medley of bell peppers, broccoli, and carrots adds freshness and a satisfying crunch, enhancing the meal’s overall appeal.
-
Crunchy Cabbage Slaw: This zesty slaw offers a great textural balance with a tangy dressing that cuts through the richness of the chicken.
-
Garlic Bread: Crispy garlic bread is a delightful side that invites you to wipe up every drop of that luscious honey garlic sauce left on your plate.
-
Creamy Mashed Potatoes: The buttery, smooth potatoes create a comforting base alongside your chicken, bringing a touch of heartiness to the meal.
-
Chilled Cucumber Salad: Refreshing and light, this salad brightens the palate with its crunch and clean flavors, perfectly contrasting the chicken’s richness.
-
Sparkling Lemonade: A bubbly, sweet-tart drink to wash down the honey garlic goodness adds a festive touch to your dinner.
-
Chocolate Lava Cake: Finishing with a warm, molten dessert creates a memorable sweet contrast after the savory chicken, making for a grand finale.
Each of these pairings not only complements the Honey Garlic Chicken but also elevates your dining experience into something extraordinary.
Storage Tips for Honey Garlic Chicken
-
Fridge: Store leftovers in an airtight container for up to 3 days. Ensure the chicken has cooled completely before refrigerating to maintain its crispiness.
-
Freezer: For longer storage, freeze the cooked Honey Garlic Chicken in a single layer on a baking sheet before transferring to an airtight freezer bag. It can last up to 3 months.
-
Reheating: To regain that crispy texture, reheat the chicken in a preheated oven at 375°F for about 10-15 minutes. Avoid microwaving, as it may result in soggy chicken.
-
Thawing: If frozen, thaw the chicken overnight in the fridge before reheating to ensure even warming. Enjoy this delightful dish any time with proper storage!
Honey Garlic Chicken Variations
Unleash your creativity in the kitchen with these delightful twists on the classic honey garlic chicken that will tantalize your taste buds!
-
Gluten-Free: Substitute all-purpose flour with gluten-free flour like almond or coconut flour for a crispy coating everyone can enjoy.
-
Spicy Honey Garlic: Stir in a tablespoon of sriracha or chili flakes into the honey garlic sauce for an electrifying heat that will send your taste buds dancing.
-
Herbed Upgrade: Fresh herbs like rosemary or basil can be used instead of dried thyme and oregano for a fresh and aromatic flavor profile.
-
Crispy Oven-Baked Chicken: For a healthier option, try oven-baking the chicken. Coat the chicken with the usual mixture, then bake at 425°F for about 20 minutes until golden and crisp.
-
Honey Garlic Shrimp: Substitute the chicken with shrimp for a quick seafood alternative that marries beautifully with the honey garlic sauce. Just sauté until they turn pink and opaque!
-
Vegetable Toss-In: Add colorful bell peppers and snap peas to the frying pan for a delicious veggie stir-fry that works perfectly alongside the chicken, creating a more wholesome meal.
-
Sweet and Sour Twist: Combine the honey garlic sauce with a splash of rice vinegar for a sweet and sour version that brightens up the flavors spectacularly!
-
Italian Flair: Infuse the flour with some Italian seasoning, like garlic powder and oregano, adding a different layer of flavor. Pair it with spaghetti for a delicious Italian-inspired dinner.
Let these variations inspire you, and if you’re craving more chicken ideas, don’t miss our delicious Marry Chicken Pasta and Mastering Smoked Chicken recipes to keep your dining table exciting!
Expert Tips for Honey Garlic Chicken
-
Hot Oil is Key: Ensure your oil is at 350°F before frying to achieve that ultimate crispy texture. Cool oil will result in soggy chicken.
-
Avoid Overcrowding: Fry the chicken in batches to maintain the oil’s temperature. Overcrowding can reduce crispiness and increase cooking time.
-
Double Coating for Crunch: After dredging the chicken in the flour mixture, dip it in the beaten eggs, then coat it again in flour. This double coating maximizes the crunch.
-
Make-Ahead Sauce: For convenience, prepare the honey garlic sauce in advance. Store it in the fridge and simply reheat when you’re ready to serve.
-
Taste as You Go: Adjust the sweetness of the sauce to your liking by adding more or less honey depending on your family’s palate.
Make Ahead Options
These Crispy Honey Garlic Chicken bites are perfect for busy home cooks looking to save time during the week! You can prepare the honey garlic sauce up to 3 days in advance; simply store it in an airtight container in the refrigerator. The chicken can also be breaded and kept in the fridge for up to 24 hours, ensuring it stays fresh and flavorful. To maintain its incredible texture, coat the chicken pieces just before frying. When you’re ready to enjoy this delightful dish, heat the oil and fry the chicken for about 3-4 minutes per side, drenching it in that sweet and savory sauce just before serving. You’ll have a satisfying, restaurant-quality meal with minimal effort!
Honey Garlic Chicken Recipe FAQs
What type of oil is best for frying the chicken?
I recommend using vegetable oil with a high smoke point, such as canola or peanut oil, to achieve that perfect crispy texture. It can handle the heat without burning, which is essential for frying.
How should I store leftover Honey Garlic Chicken?
Leftovers can be stored in an airtight container in the fridge for up to 3 days. Make sure the chicken has cooled completely before refrigerating to maintain its crispiness. When you reheat, place it in a preheated oven for best results.
Can I freeze Honey Garlic Chicken?
Absolutely! To freeze, first, let the cooked chicken cool down completely. Then place it in a single layer on a baking sheet and freeze until solid. Transfer the chicken to an airtight freezer bag; it can last up to 3 months. When you’re ready to enjoy it, thaw in the fridge overnight and reheat in the oven for about 10-15 minutes at 375°F.
What should I do if the chicken isn’t crispy after frying?
If your chicken isn’t crispy, it could be that the oil wasn’t hot enough—aim for about 350°F before adding chicken. Also, remember to fry in small batches; overcrowding the pan can lower the temperature and lead to soggy chicken.
Is this recipe suitable for those with gluten allergies?
Yes, you can easily make this dish gluten-free! Simply substitute the all-purpose flour with a gluten-free flour blend in the breading process. Be sure to check that your soy sauce is gluten-free as well.
Can I use chicken thighs instead of breasts?
Very! Chicken thighs are a fantastic alternative; they are more flavorful and juicier. Just adjust the cooking time slightly—thighs may take a few extra minutes to cook through compared to breasts.
Crispy Honey Garlic Chicken: A Sweet and Savory Delight
Ingredients
Equipment
Method
- In a saucepan over medium-high heat, combine honey, minced garlic, and soy sauce. Stir continuously until it simmers, about 2 minutes. Mix cornstarch with water, add it to the saucepan, and stir until the sauce thickens, about another minute.
- In a large skillet, pour in vegetable oil and heat over medium-high heat until it reaches 350°F.
- In a mixing bowl, whisk together flour, dried thyme, dried oregano, paprika, and cayenne pepper. Season chicken breasts with kosher salt and black pepper, dredge in the flour mixture, dip in beaten eggs, then re-coat in the flour mixture.
- Carefully place chicken into the hot oil, frying in batches for 3-4 minutes on each side until golden brown and crispy. Transfer to a paper towel-lined plate to drain.
- Place fried chicken on a serving plate and drizzle honey garlic sauce over the top. Optionally garnish with sesame seeds or chopped green onions.
")